Wide Sales
Slightly challenging
This will take about a half-hour per site, but it’s mostly just ticking the right boxes. You do need some prepared information first though.
Selling beyond the ‘zon.
Avoiding the 800lb gorilla.
This will take about a half-hour per site, but it’s mostly just ticking the right boxes. You do need some prepared information first though.
Selling beyond the ‘zon.
Avoiding the 800lb gorilla.
If you prefer to watch this walkthrough instead, I’ve prepared a video for you. Scroll down for the written instructions, along with screenshots to help you through the process.
You almost certainly have a Google account - if you don’t use their email, YouTube, maps, document editor or one of their confusingly named chat apps, then I’ll be very surprised.
If not, set one up. Use your real name again, pen names come later.
Then head to https://play.google.com/books/publish/
You will most likely have to enter a lot of information about yourself, your address, banking details for payouts, tax information, etc. I can’t show you that since I already did it…
I get a ‘Book Catalog’ which shows me everything I’ve published so far. I can add a new book, with a button top right, or I can go to the series tab.

You can only add books to a series once they’re live in the store, so you want to get the books up first.
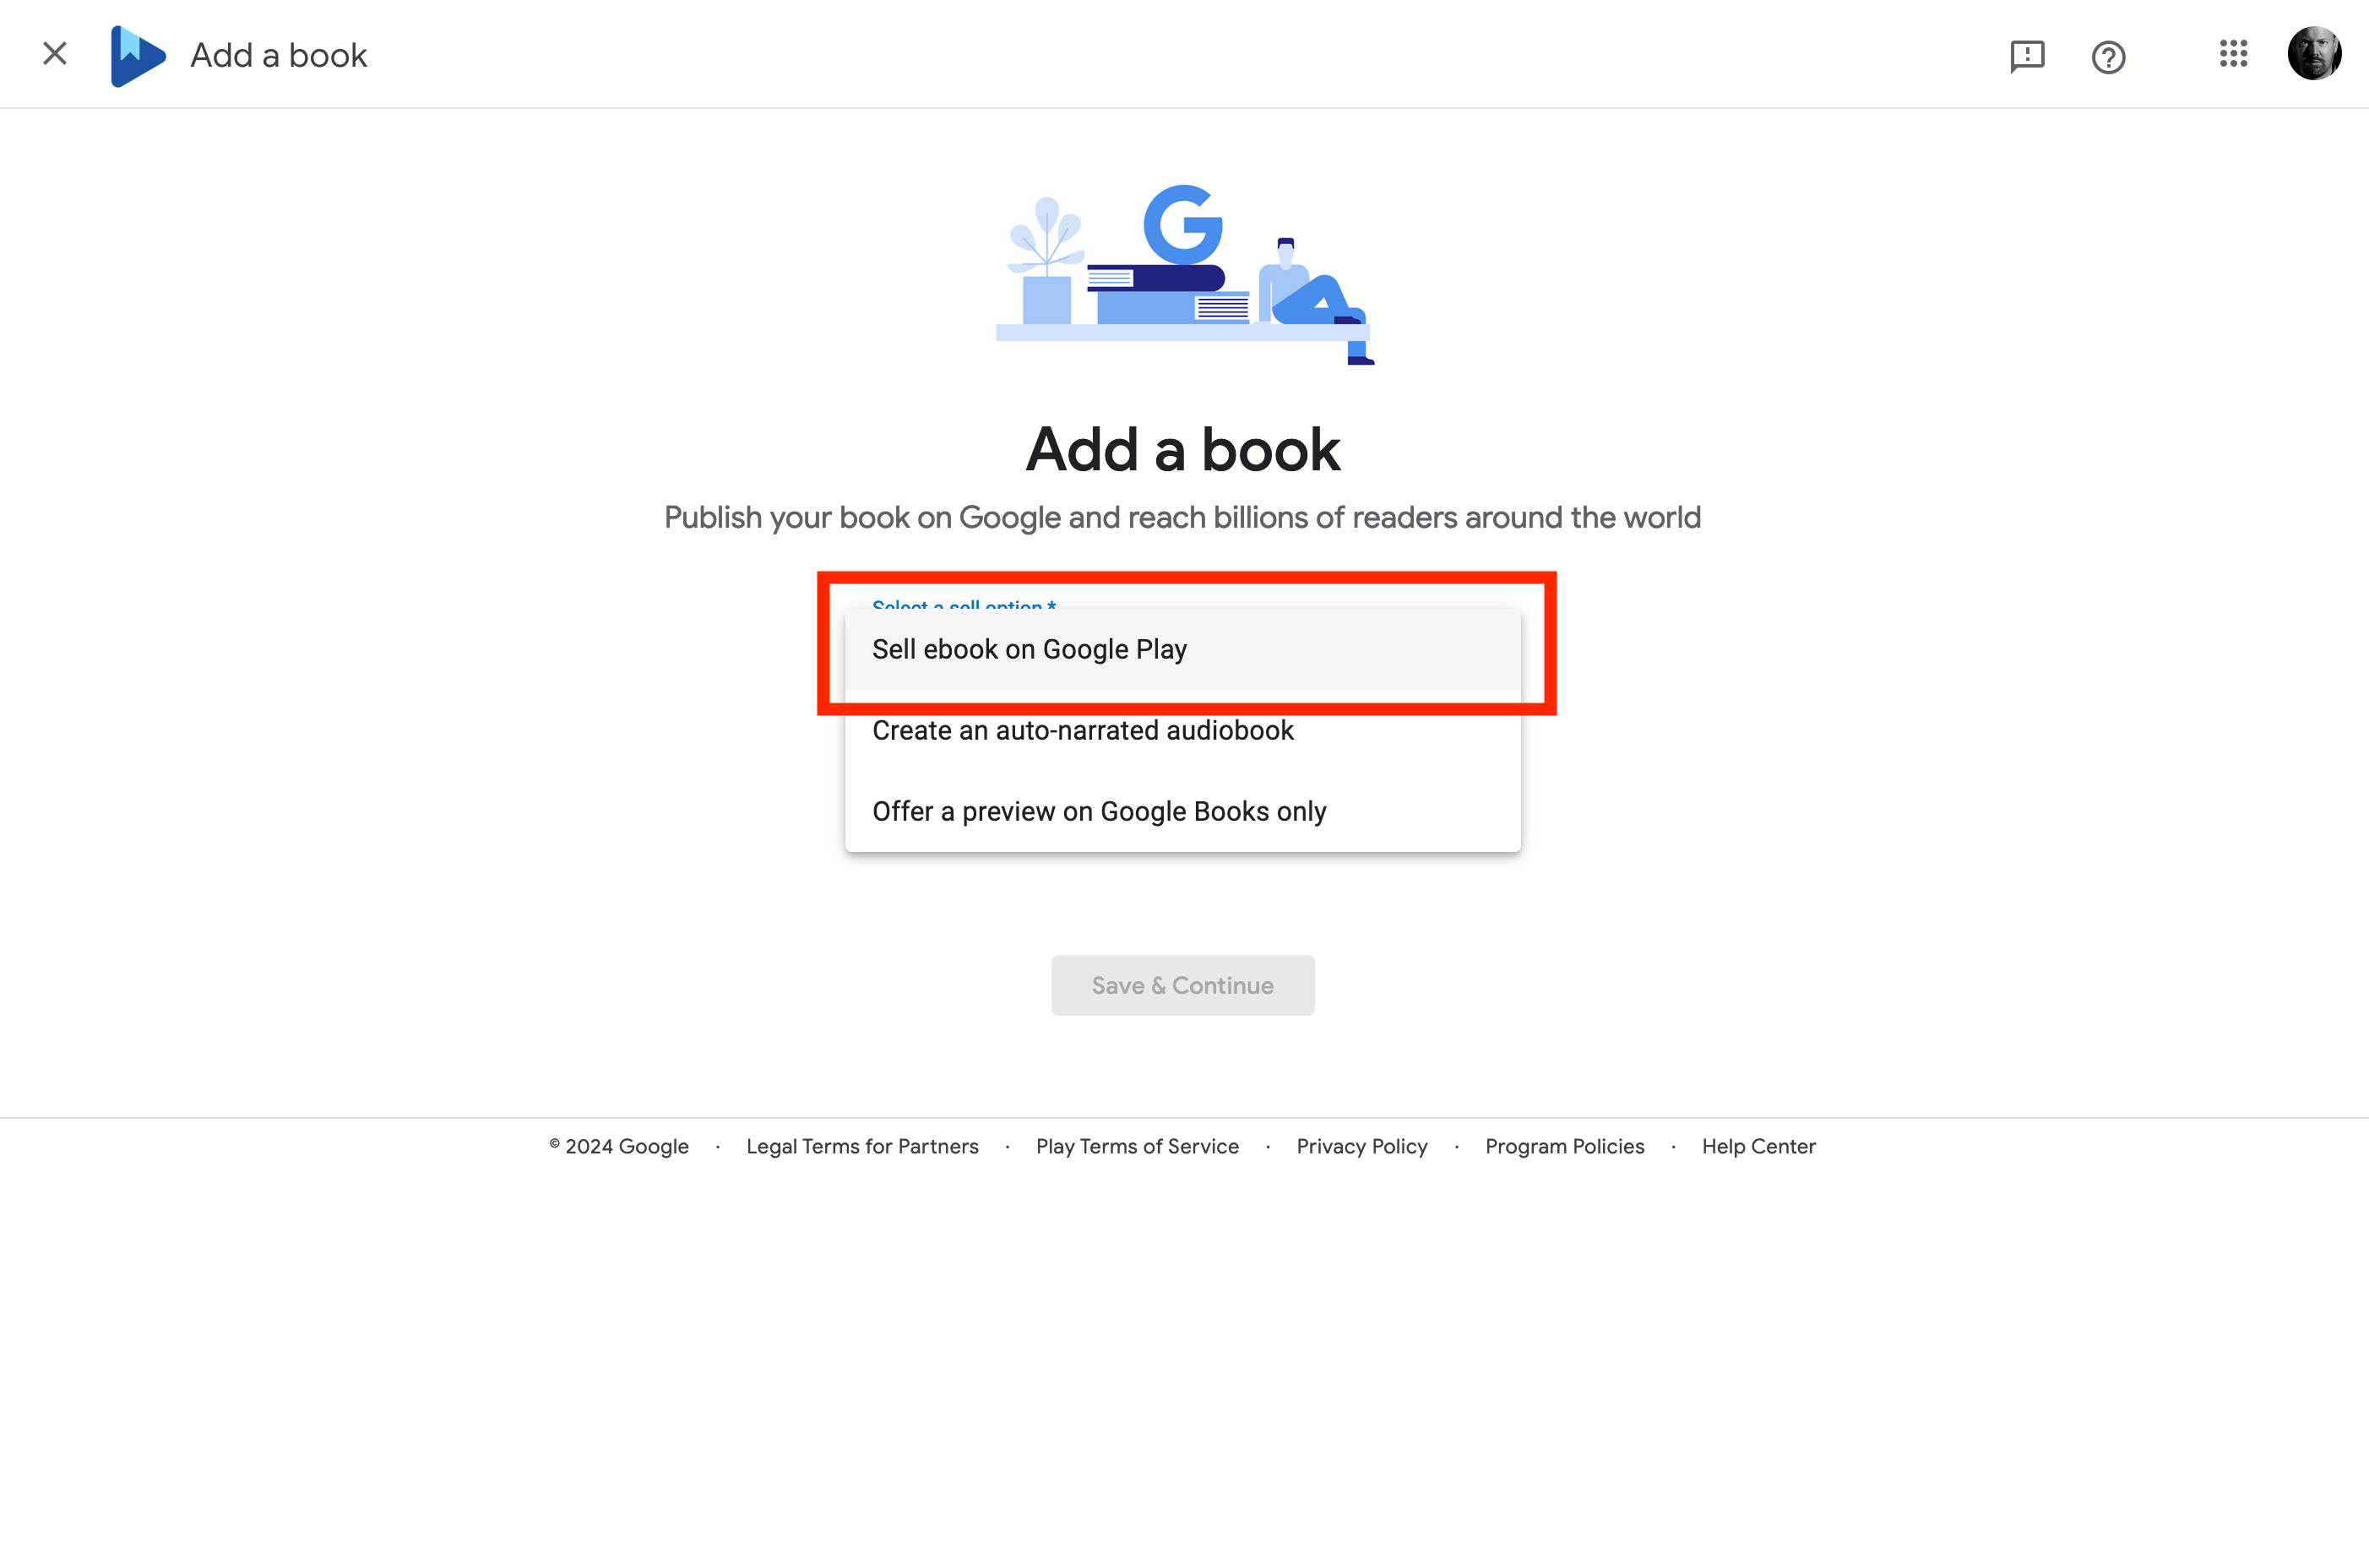
Hit ‘Add Book’ and then you almost certainly want to choose ‘Sell eBook on Google Play’:
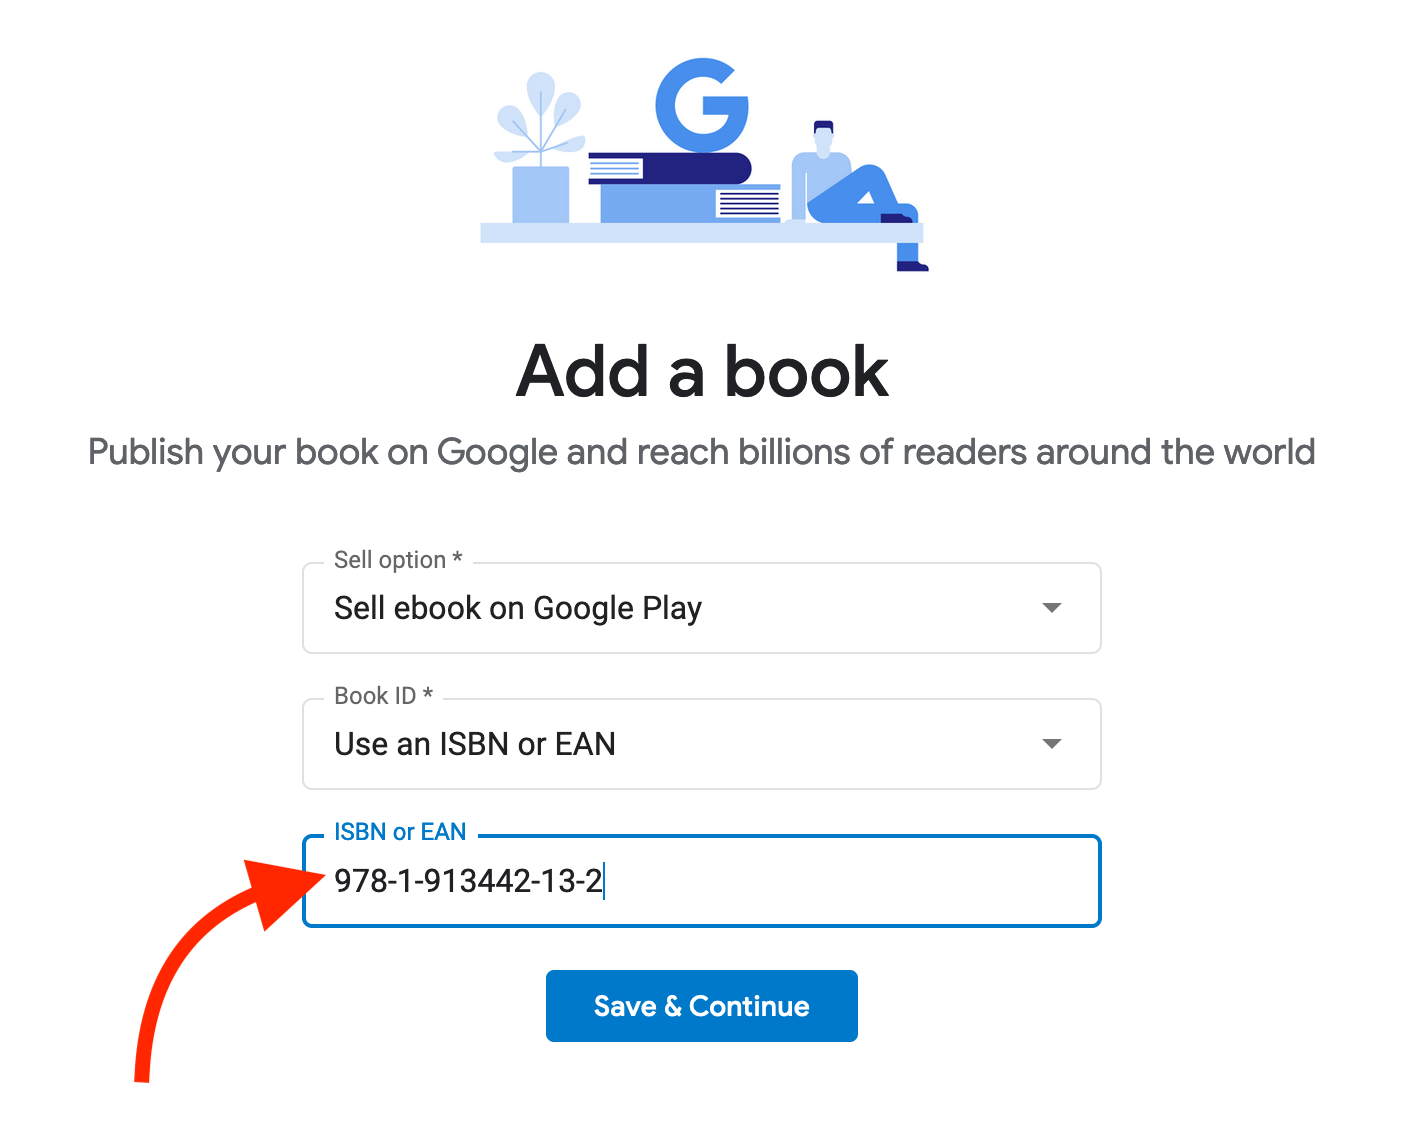
Here’s where you can choose to use your ISBN (or not) and allow Google to assign their own ID. I advise using your ISBN.
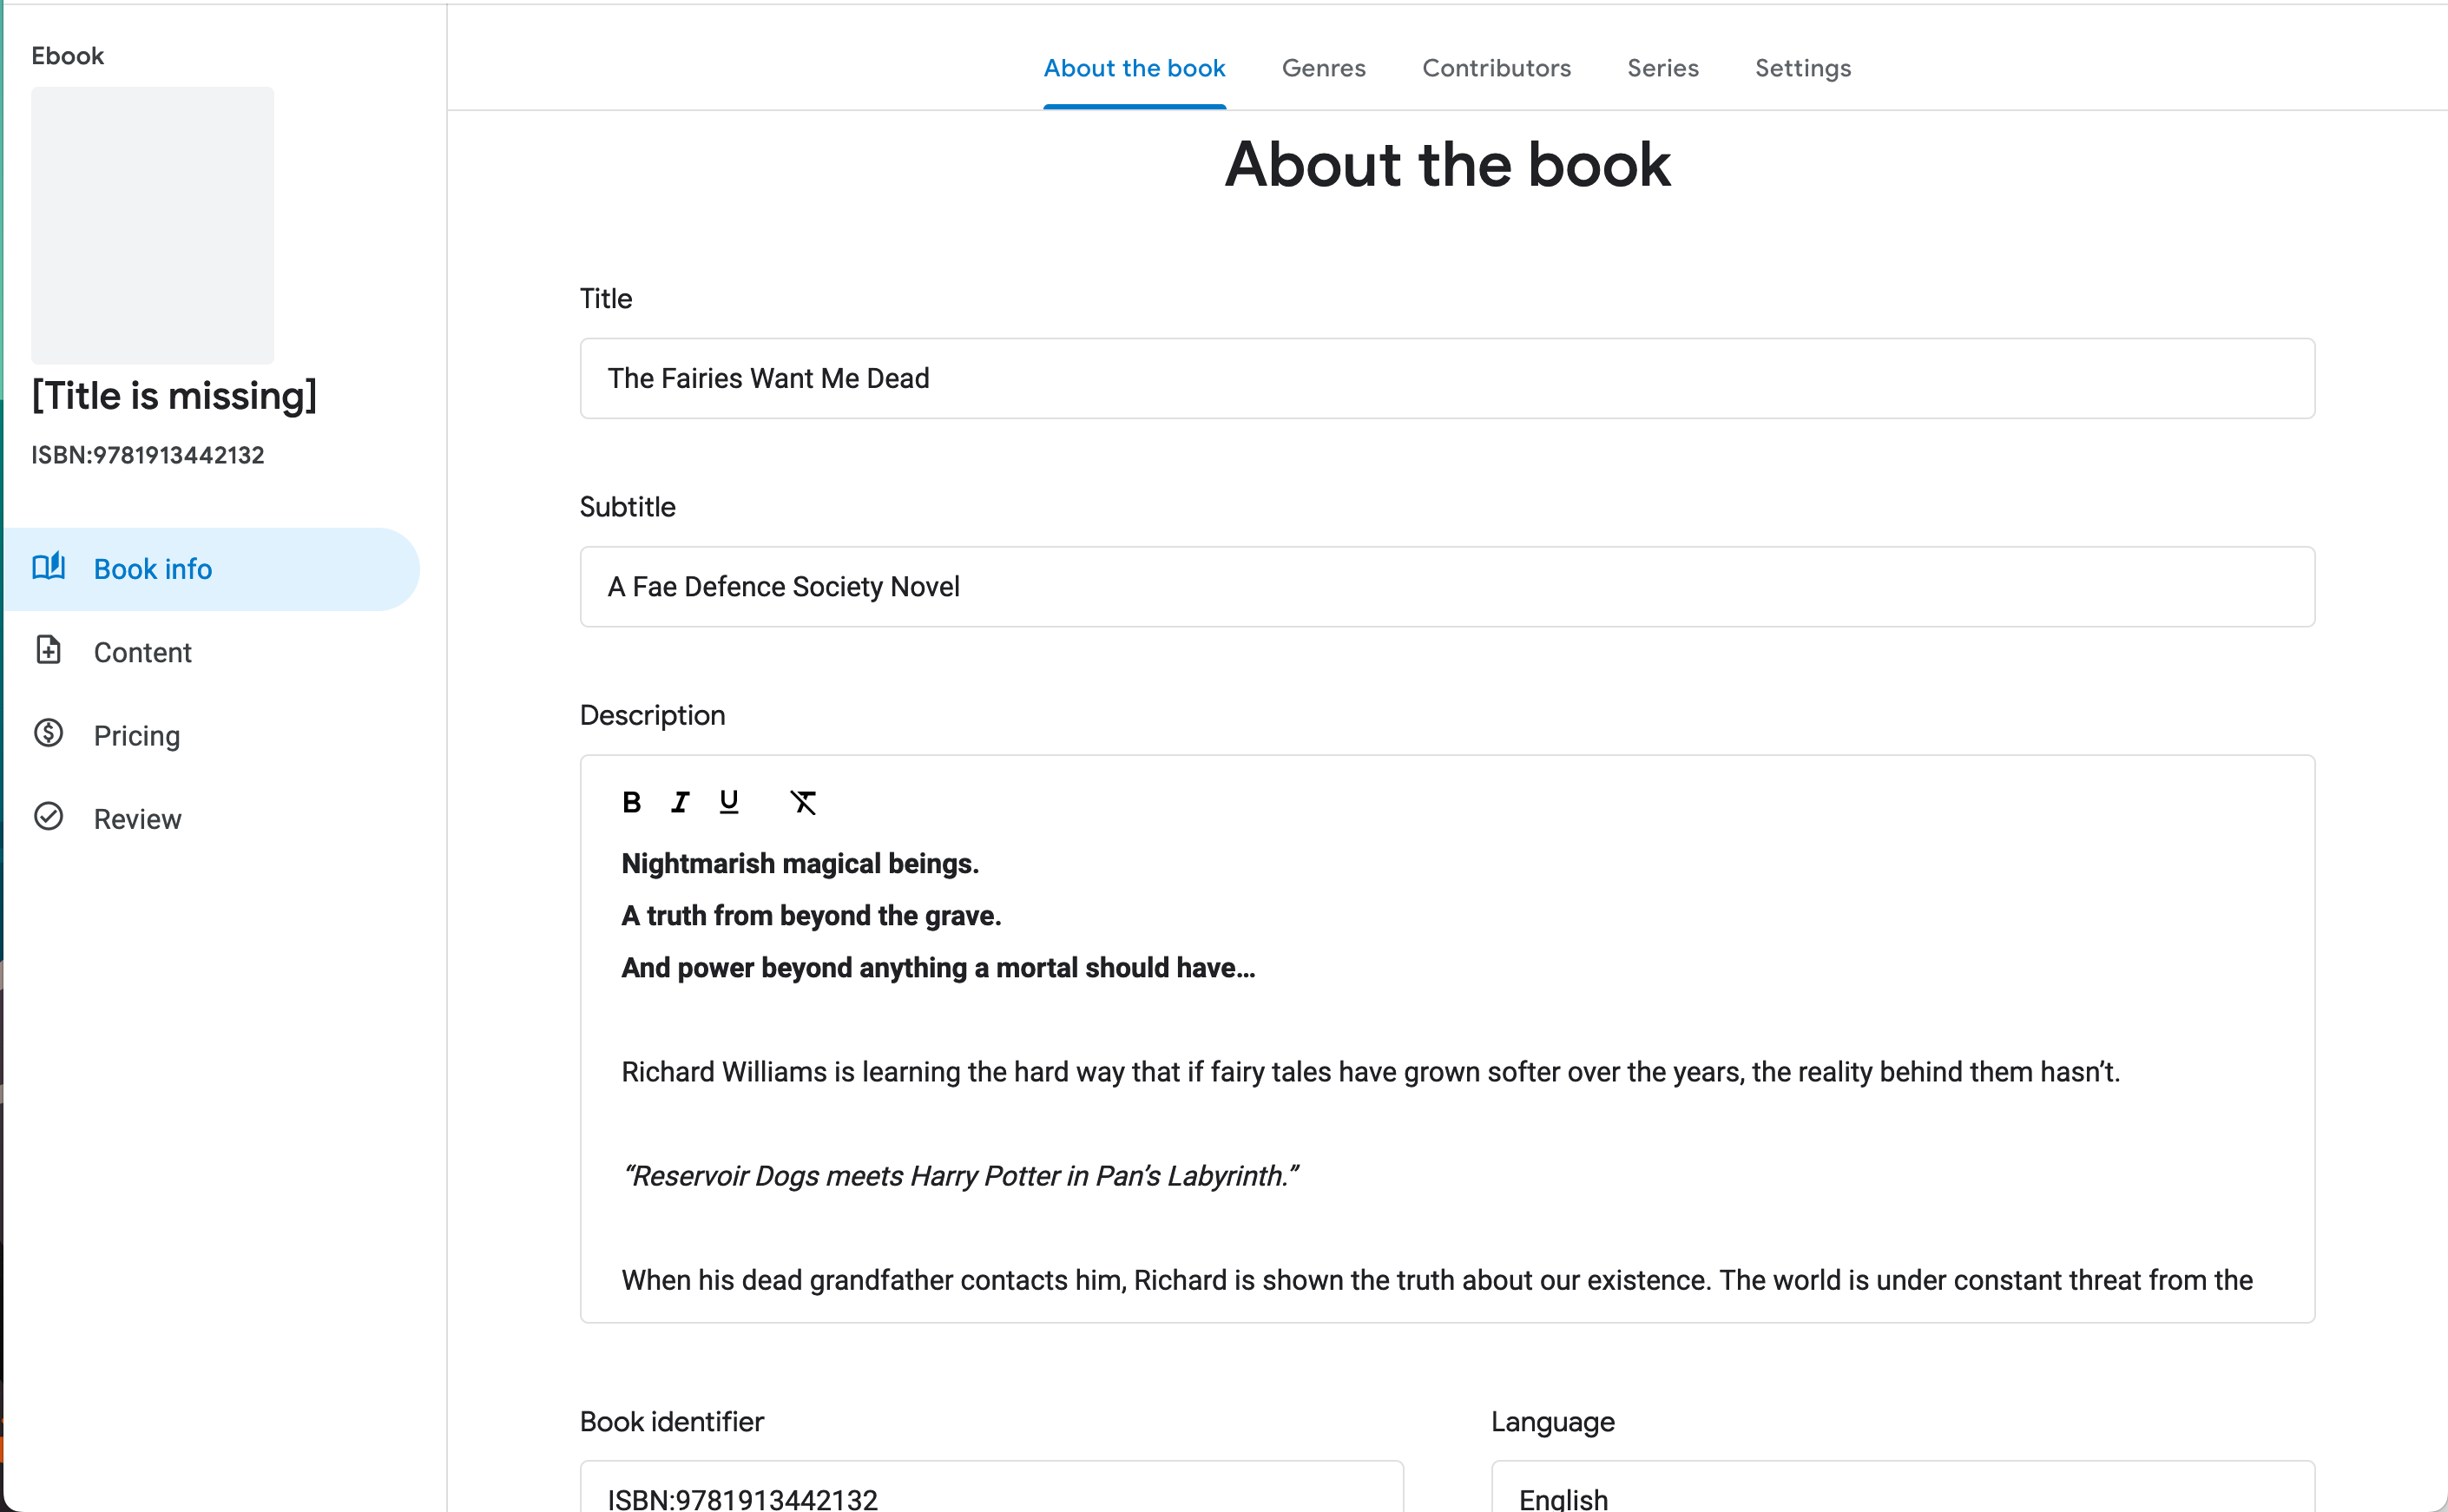
Now you’re going to add all that metadata. Title, blurb, language, etc:
Scroll down and keep going:
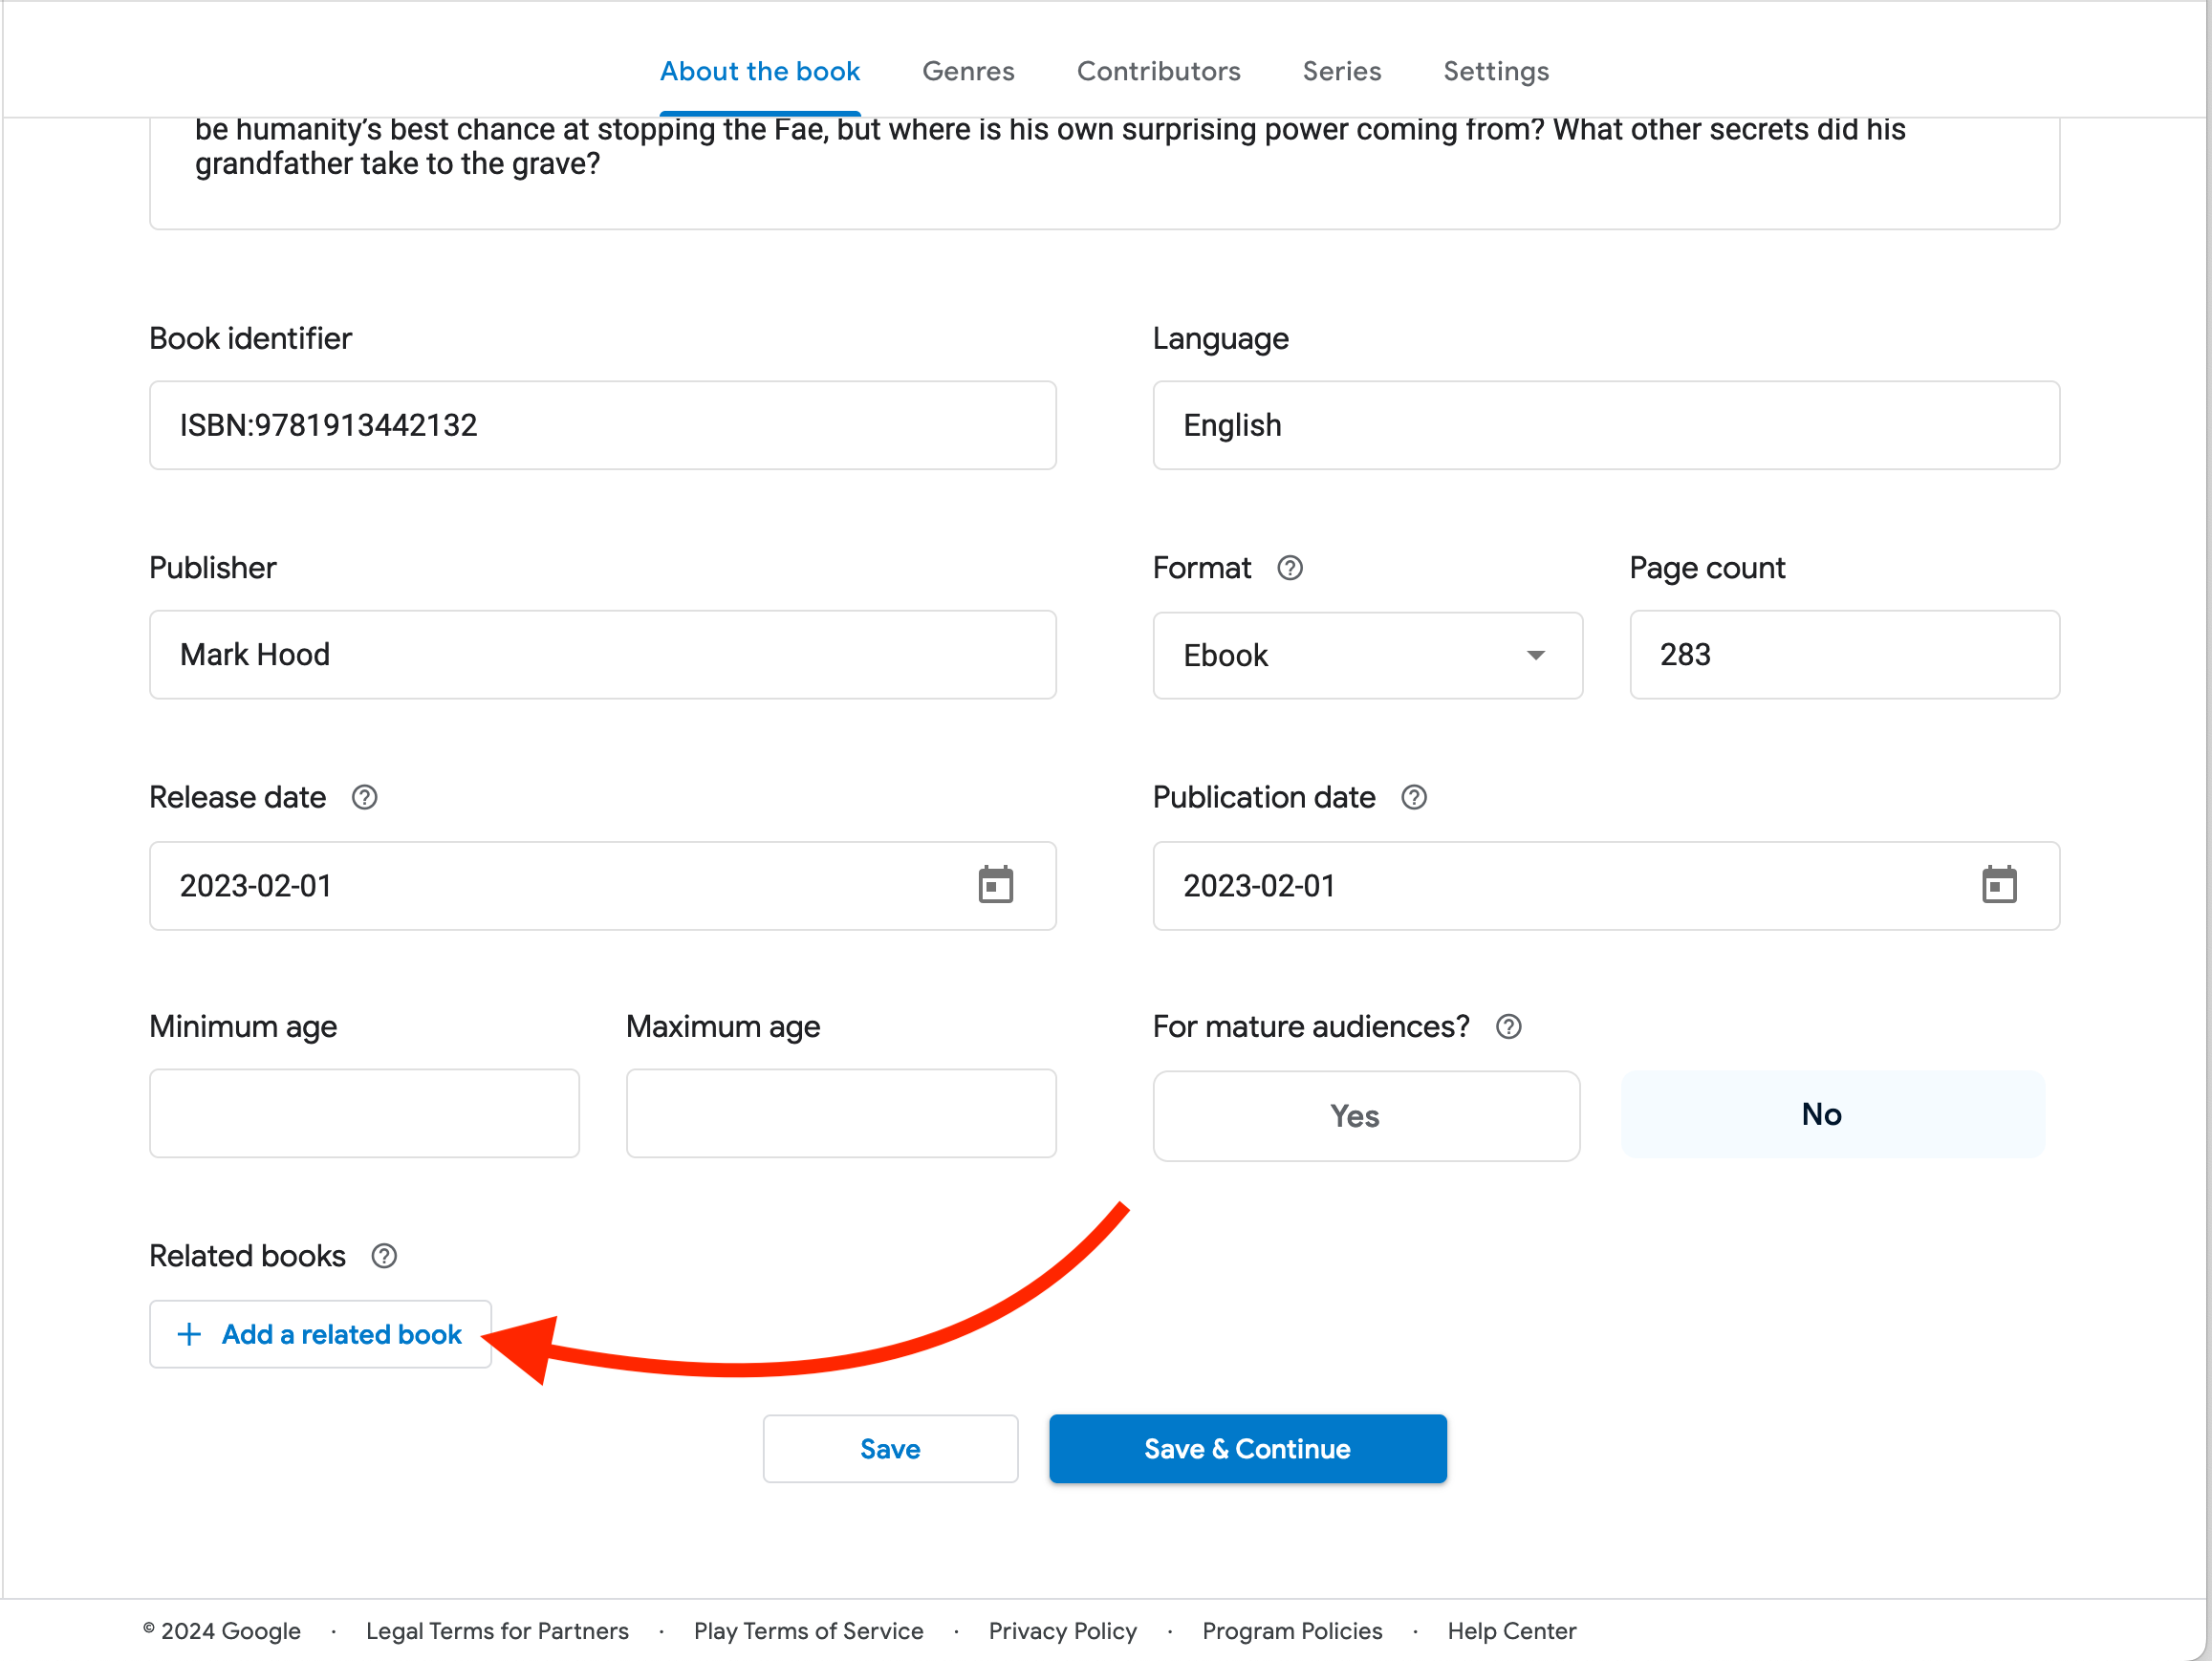
Important: If you want it released ASAP, leave the ‘Release Date’ blank. If you want it delayed until a certain date (e.g. for pre-orders), put that date in here. If you have already published it elsewhere, as I have, put that date in here. ‘Publication Date’ does not control whether or not your book is available, so you can put whatever you like in there. Normally it’s the release date.
Note that ‘related book’ doesn’t mean part of a series. It’s for when you’re publishing a translation or derivative work.
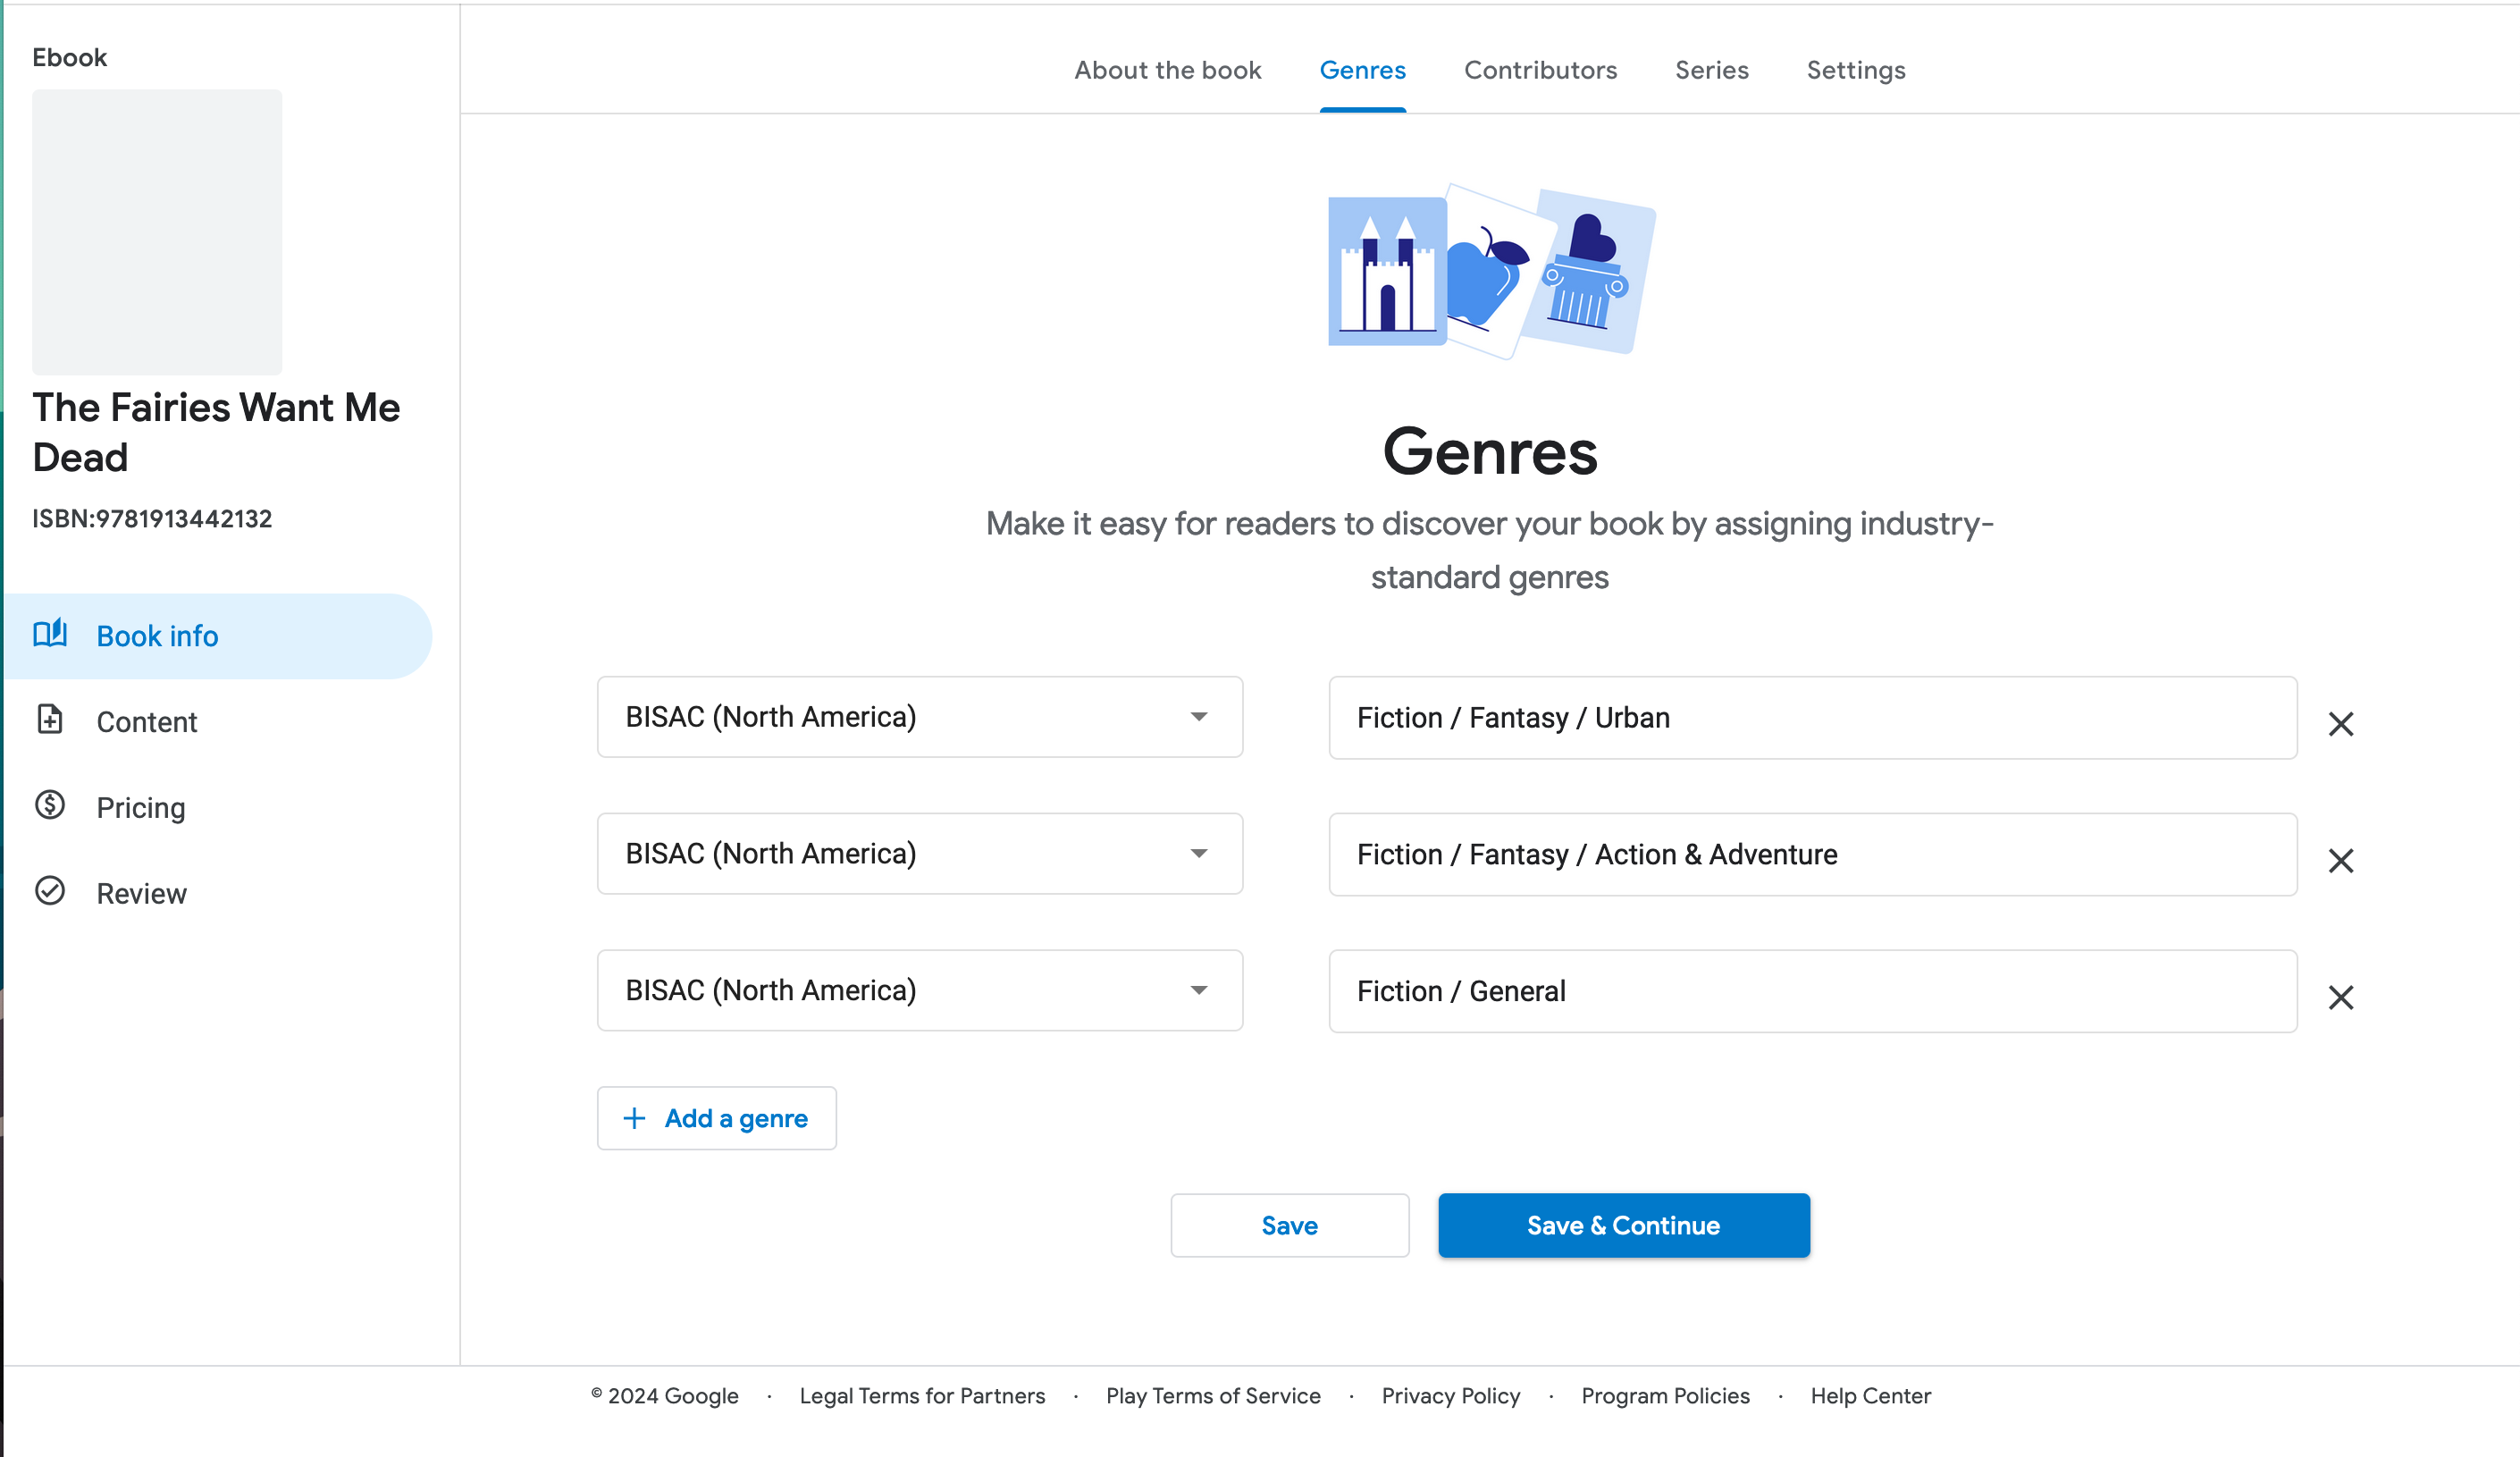
Save and continue, and we’ll do our BISAC codes. You can add as many as you like, but don’t add it to categories you’re not actually in.
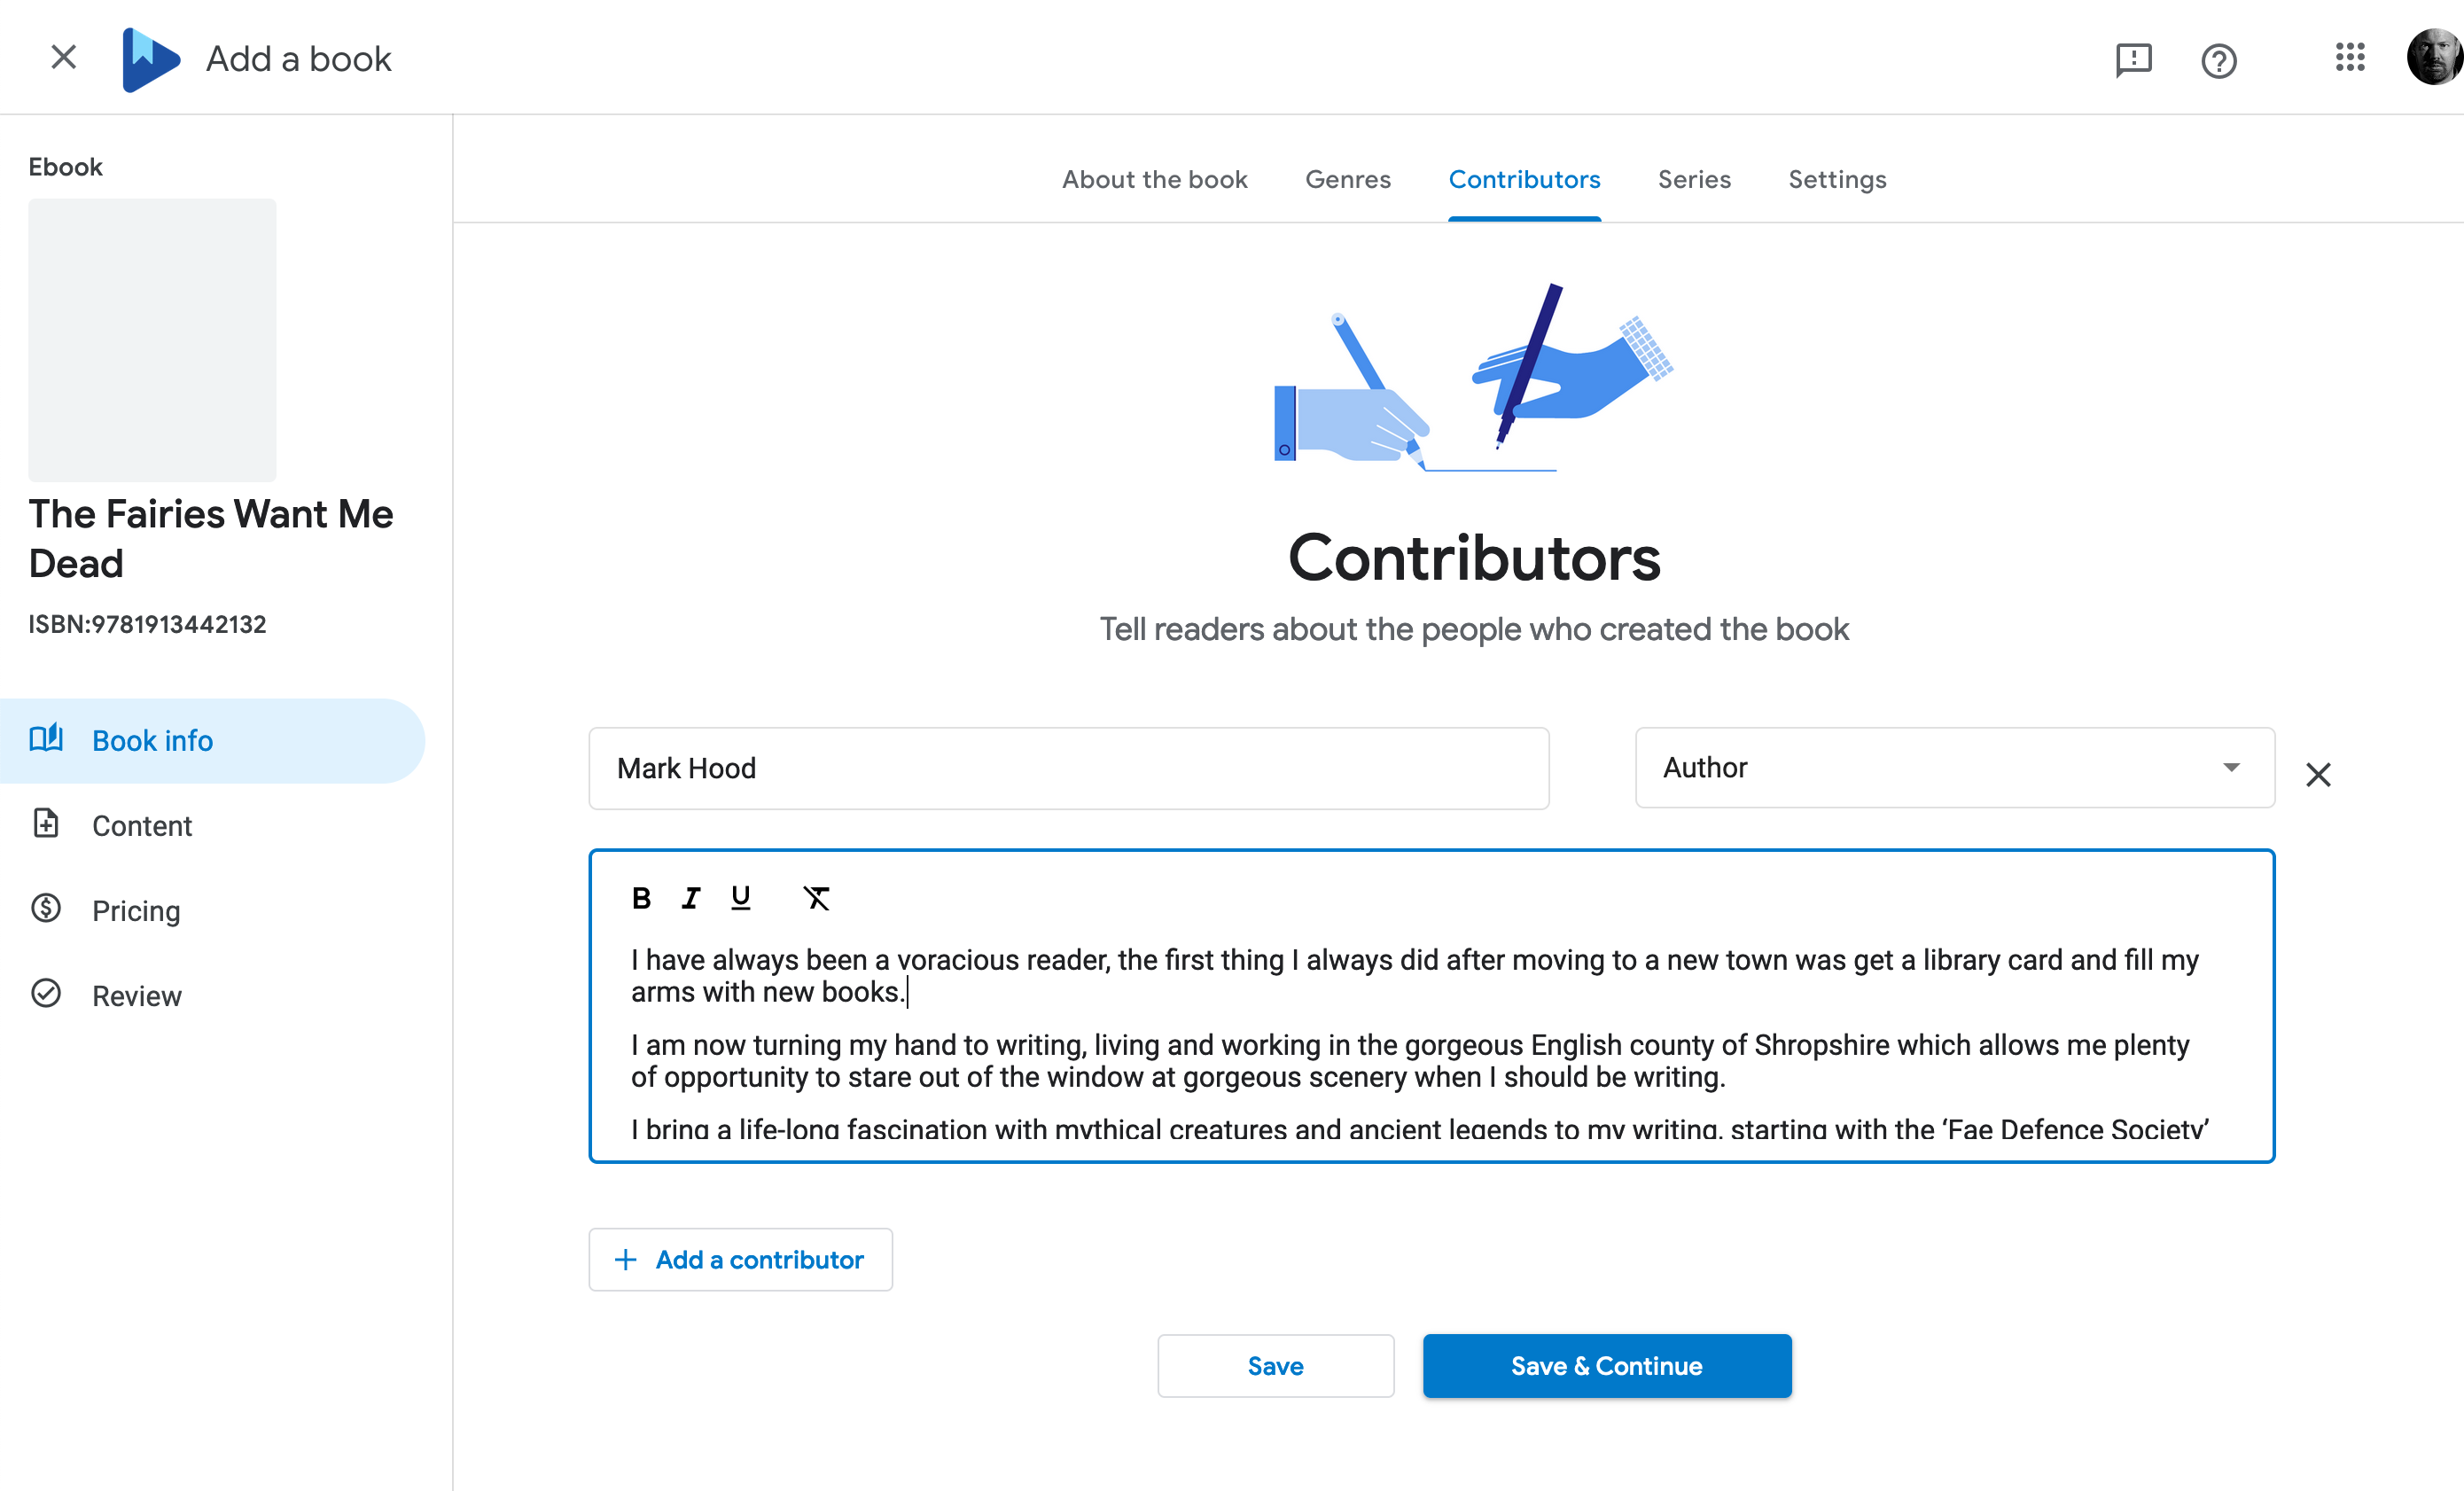
With that done, add the author(s) information:
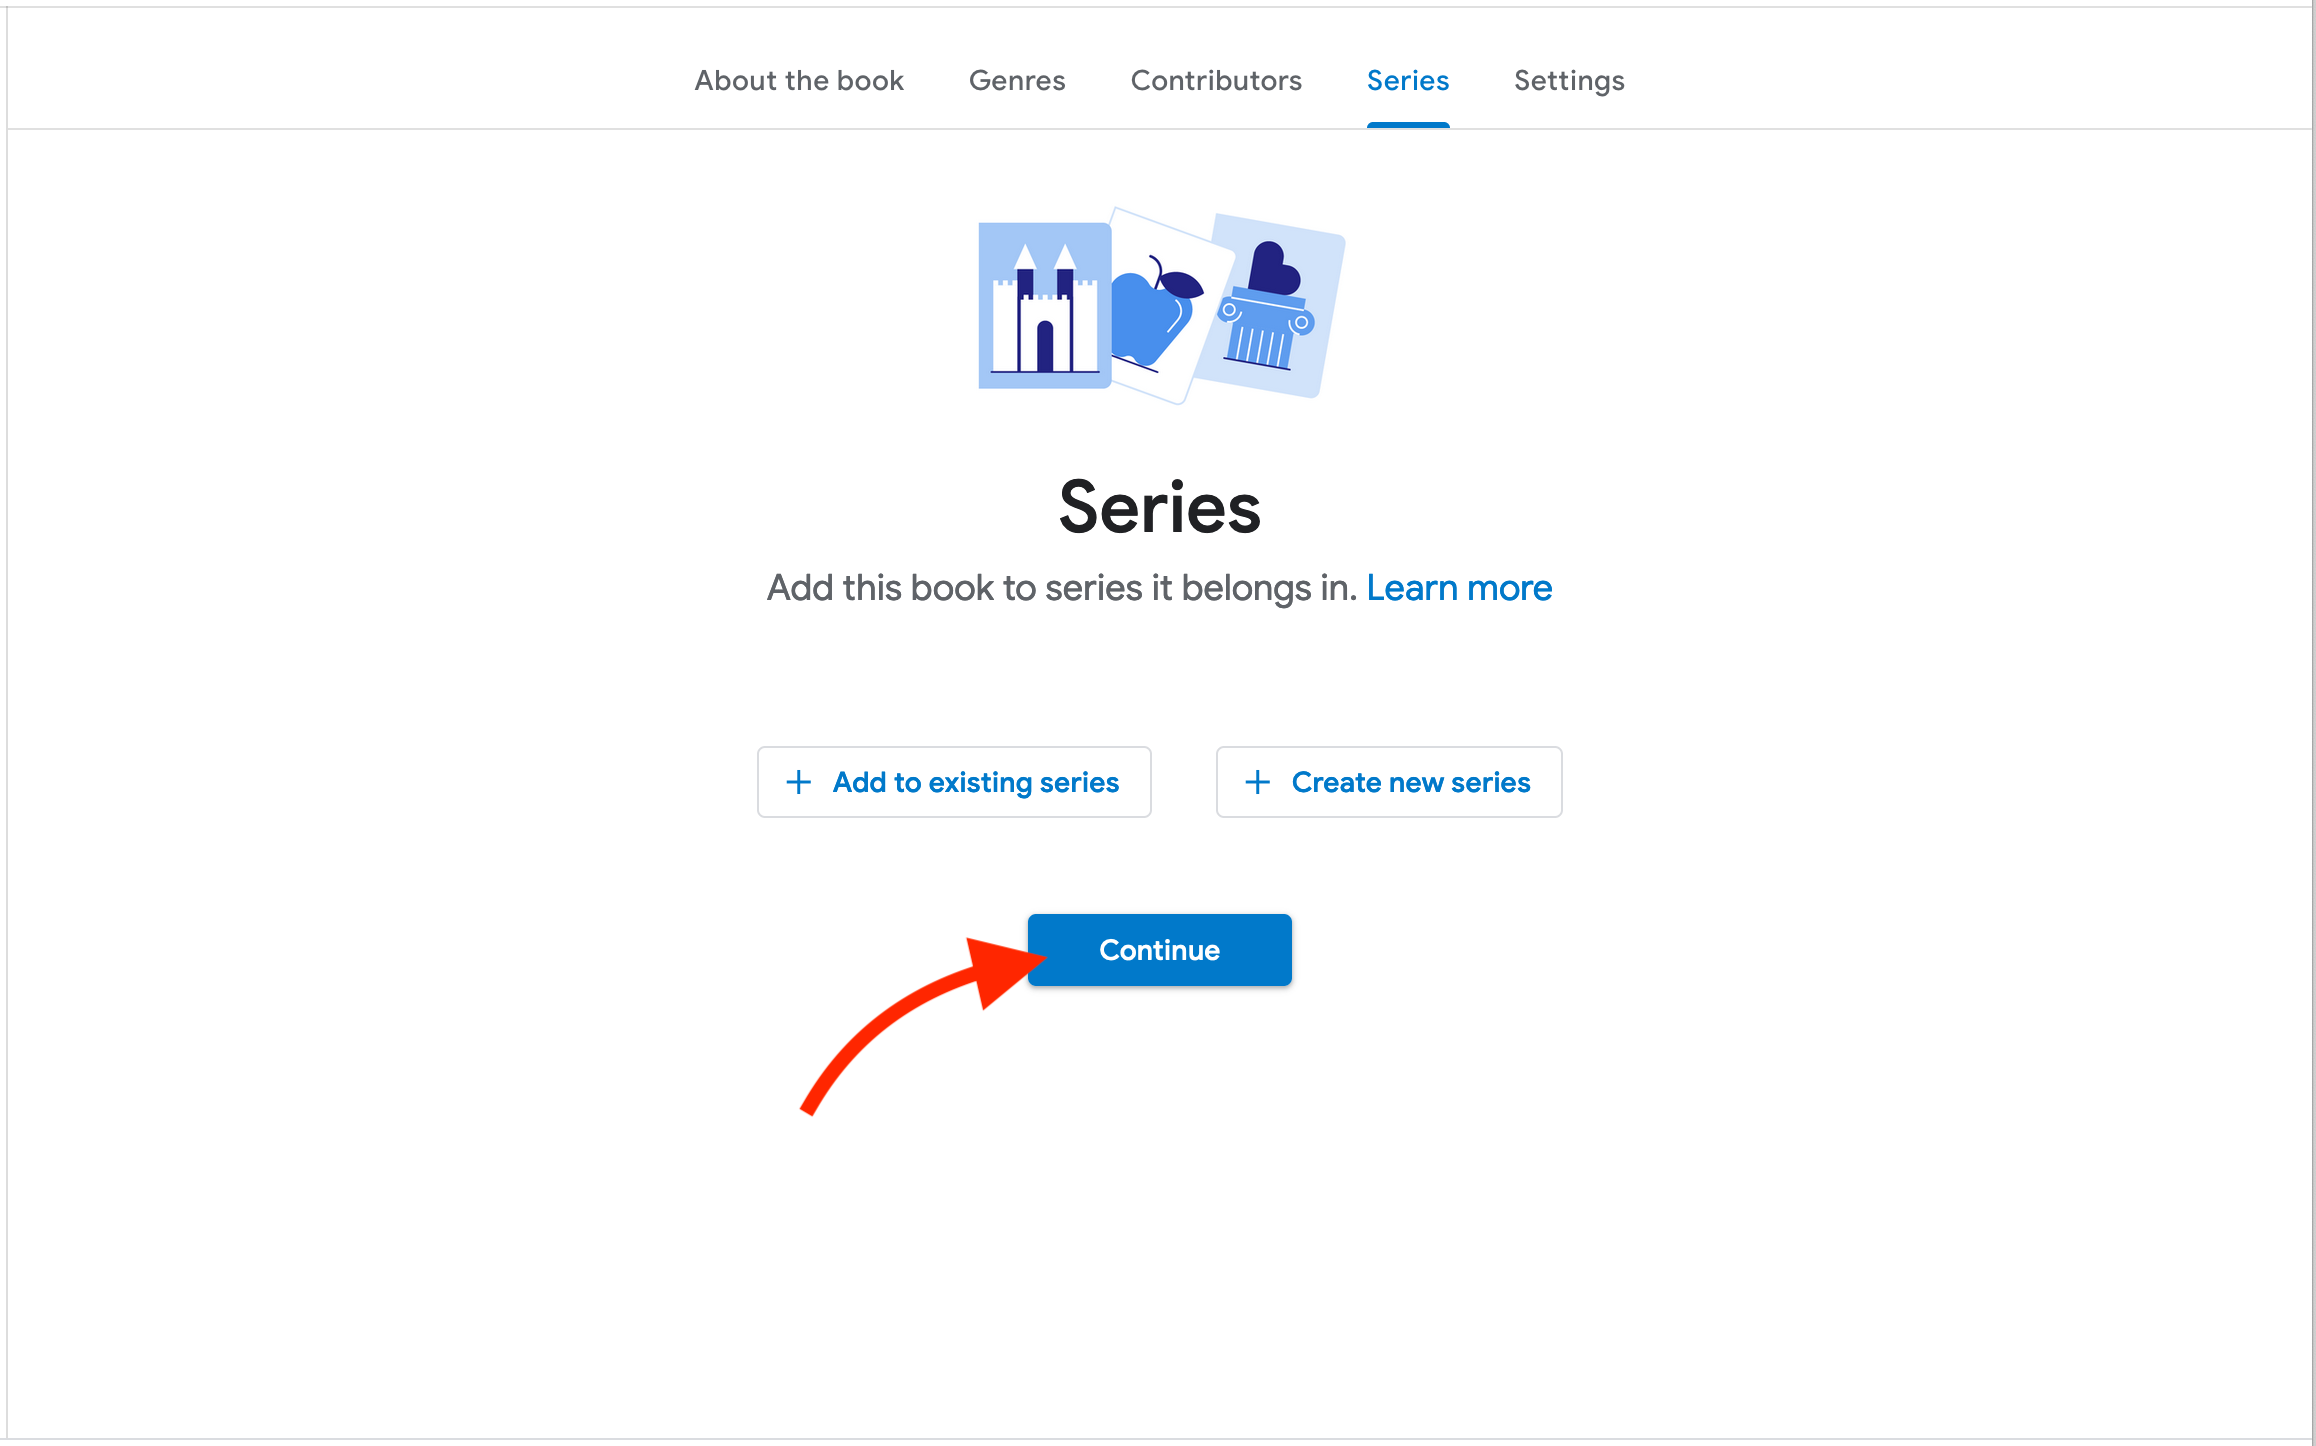
Now this is a part of a series, but I don’t want to get sidetracked. We’ll sort that out later. Continue on:
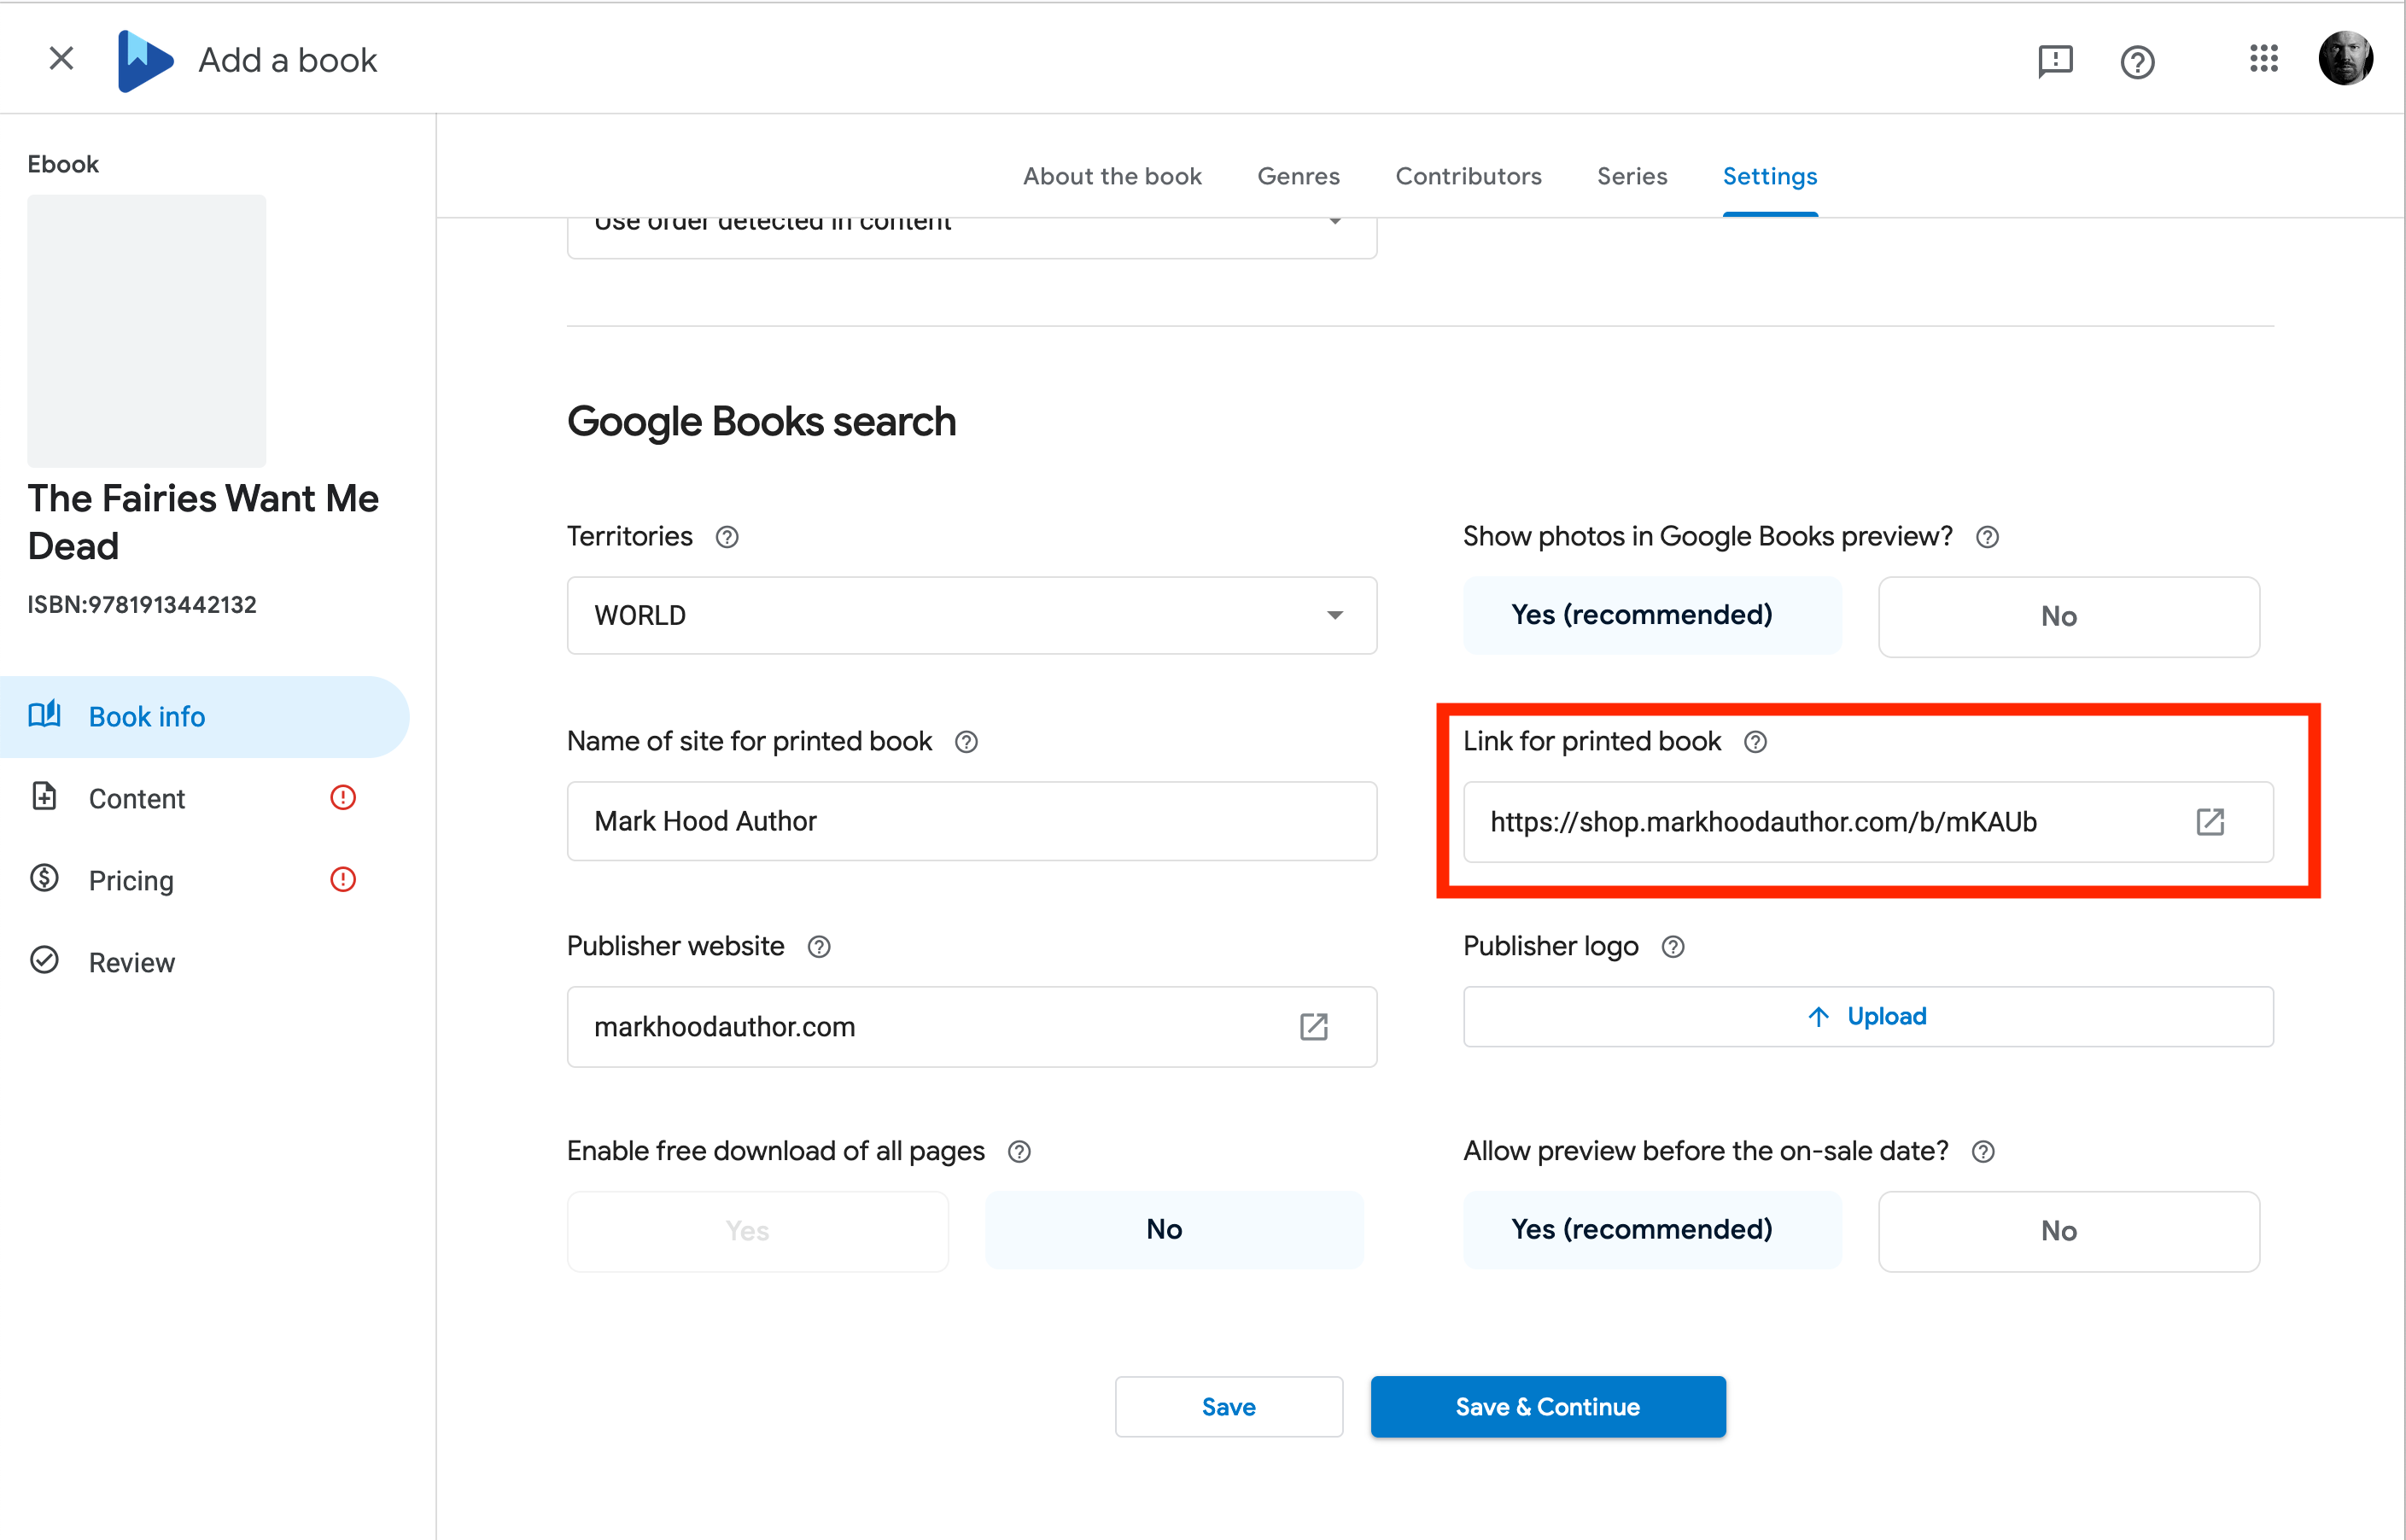
Settings. They recommend turning off DRM (as do I) but that’s up to you. It’s meant to prevent piracy, but in reality it doesn’t — and just makes life harder for your readers if they want to move the file to a new device in the future.
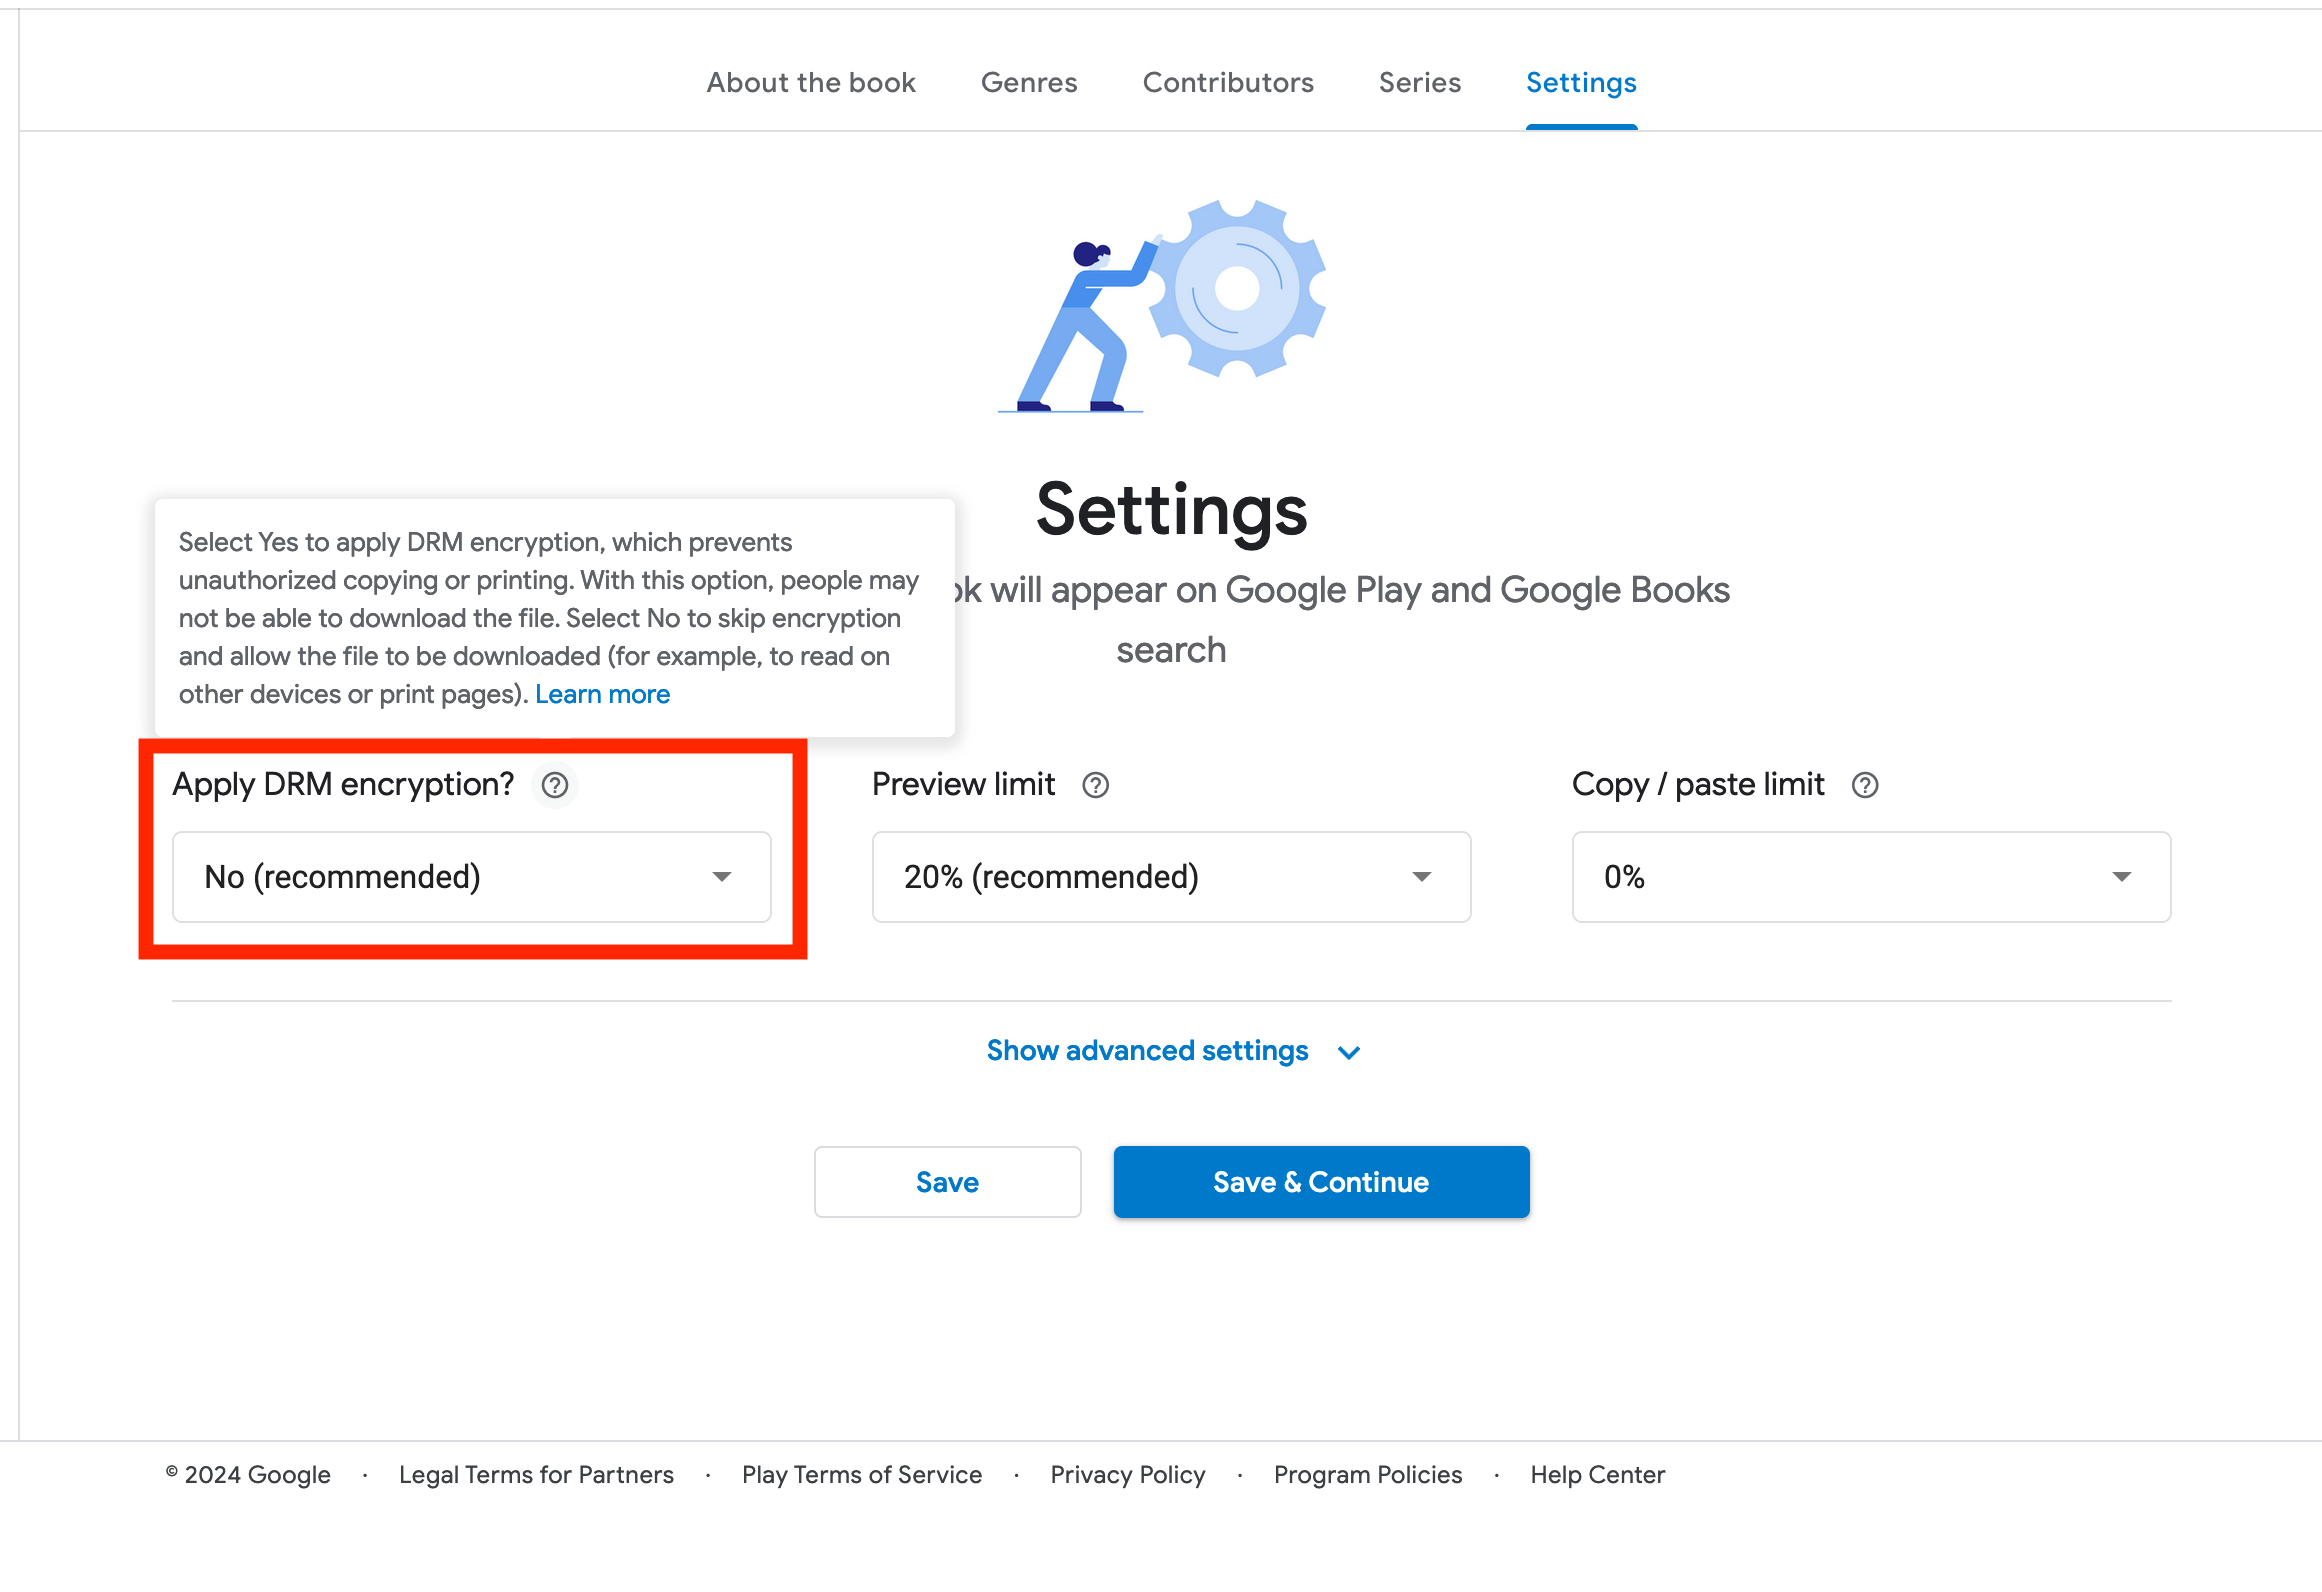
You can safely ignore ‘Advanced Settings’ for now, but you can take a look. If you have links to buy a paperback, you can add them here so Google Books will index it. I don’t believe they like Amazon links, though.
Save and Continue…
And finally we get to the actual book! Upload your ePub and your cover (yes, both in the same place, Google will figure out which is which):
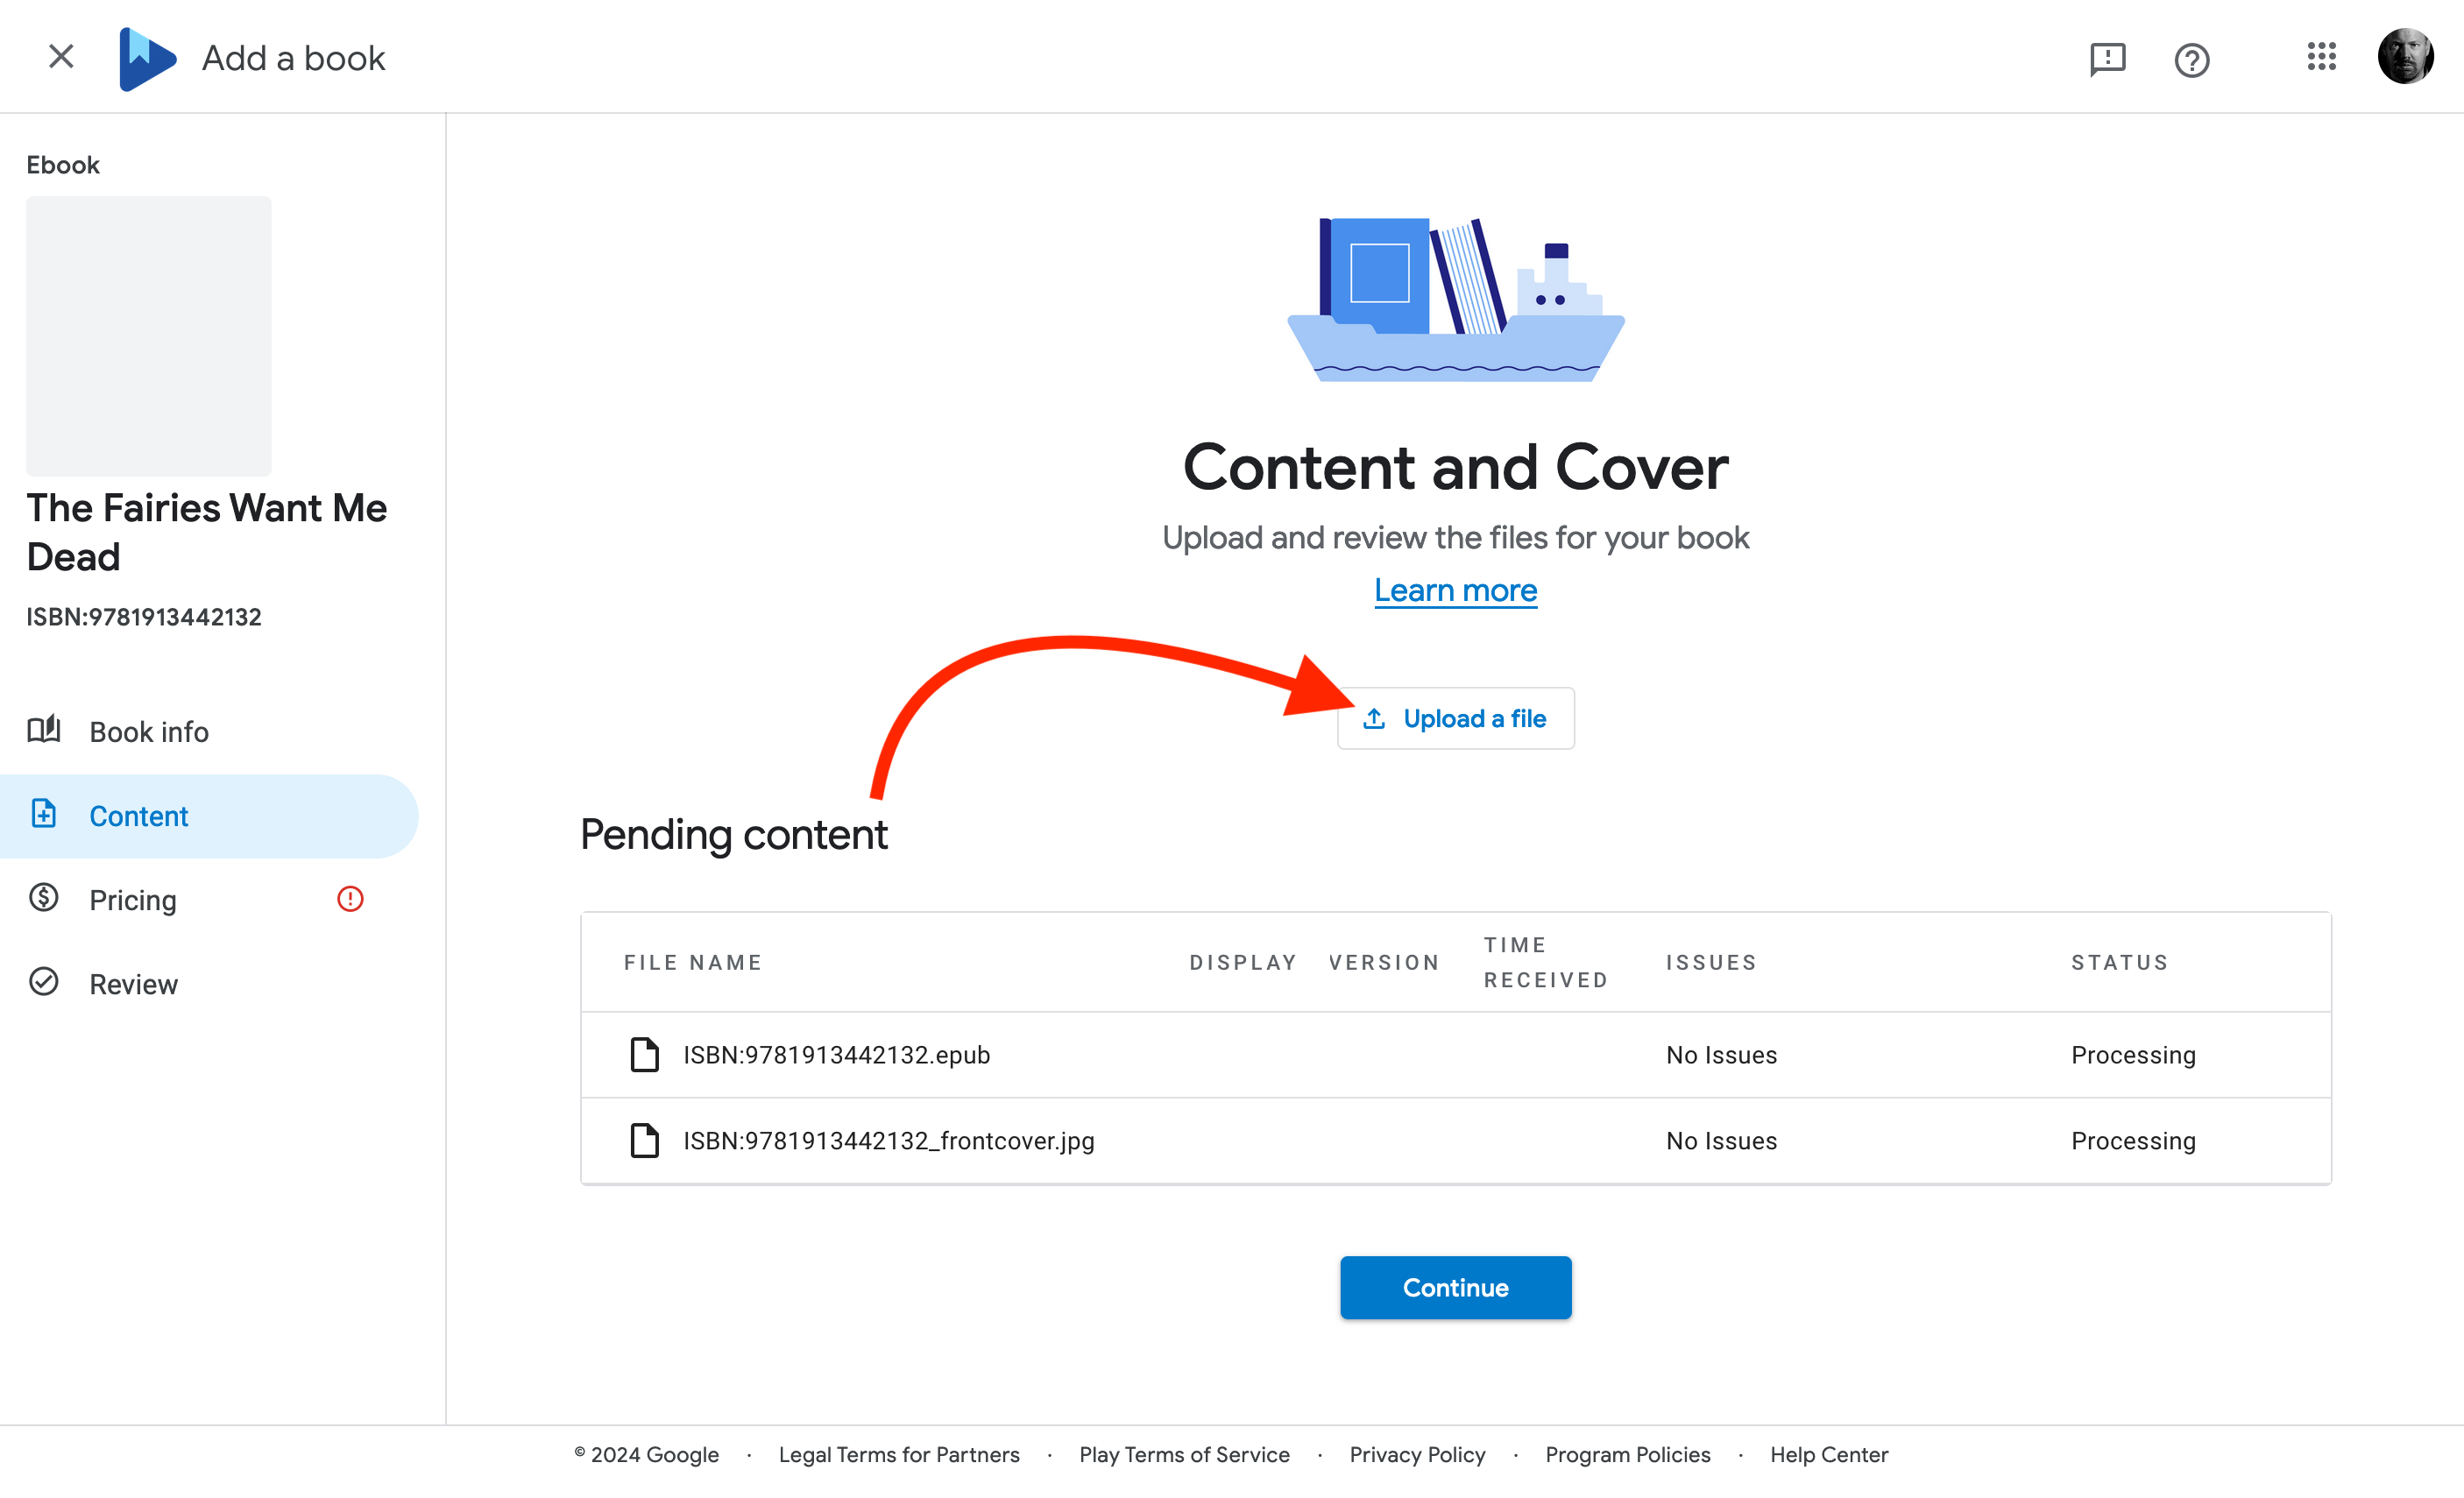
It might take a while to process, just carry on and they’ll do it behind the scenes.
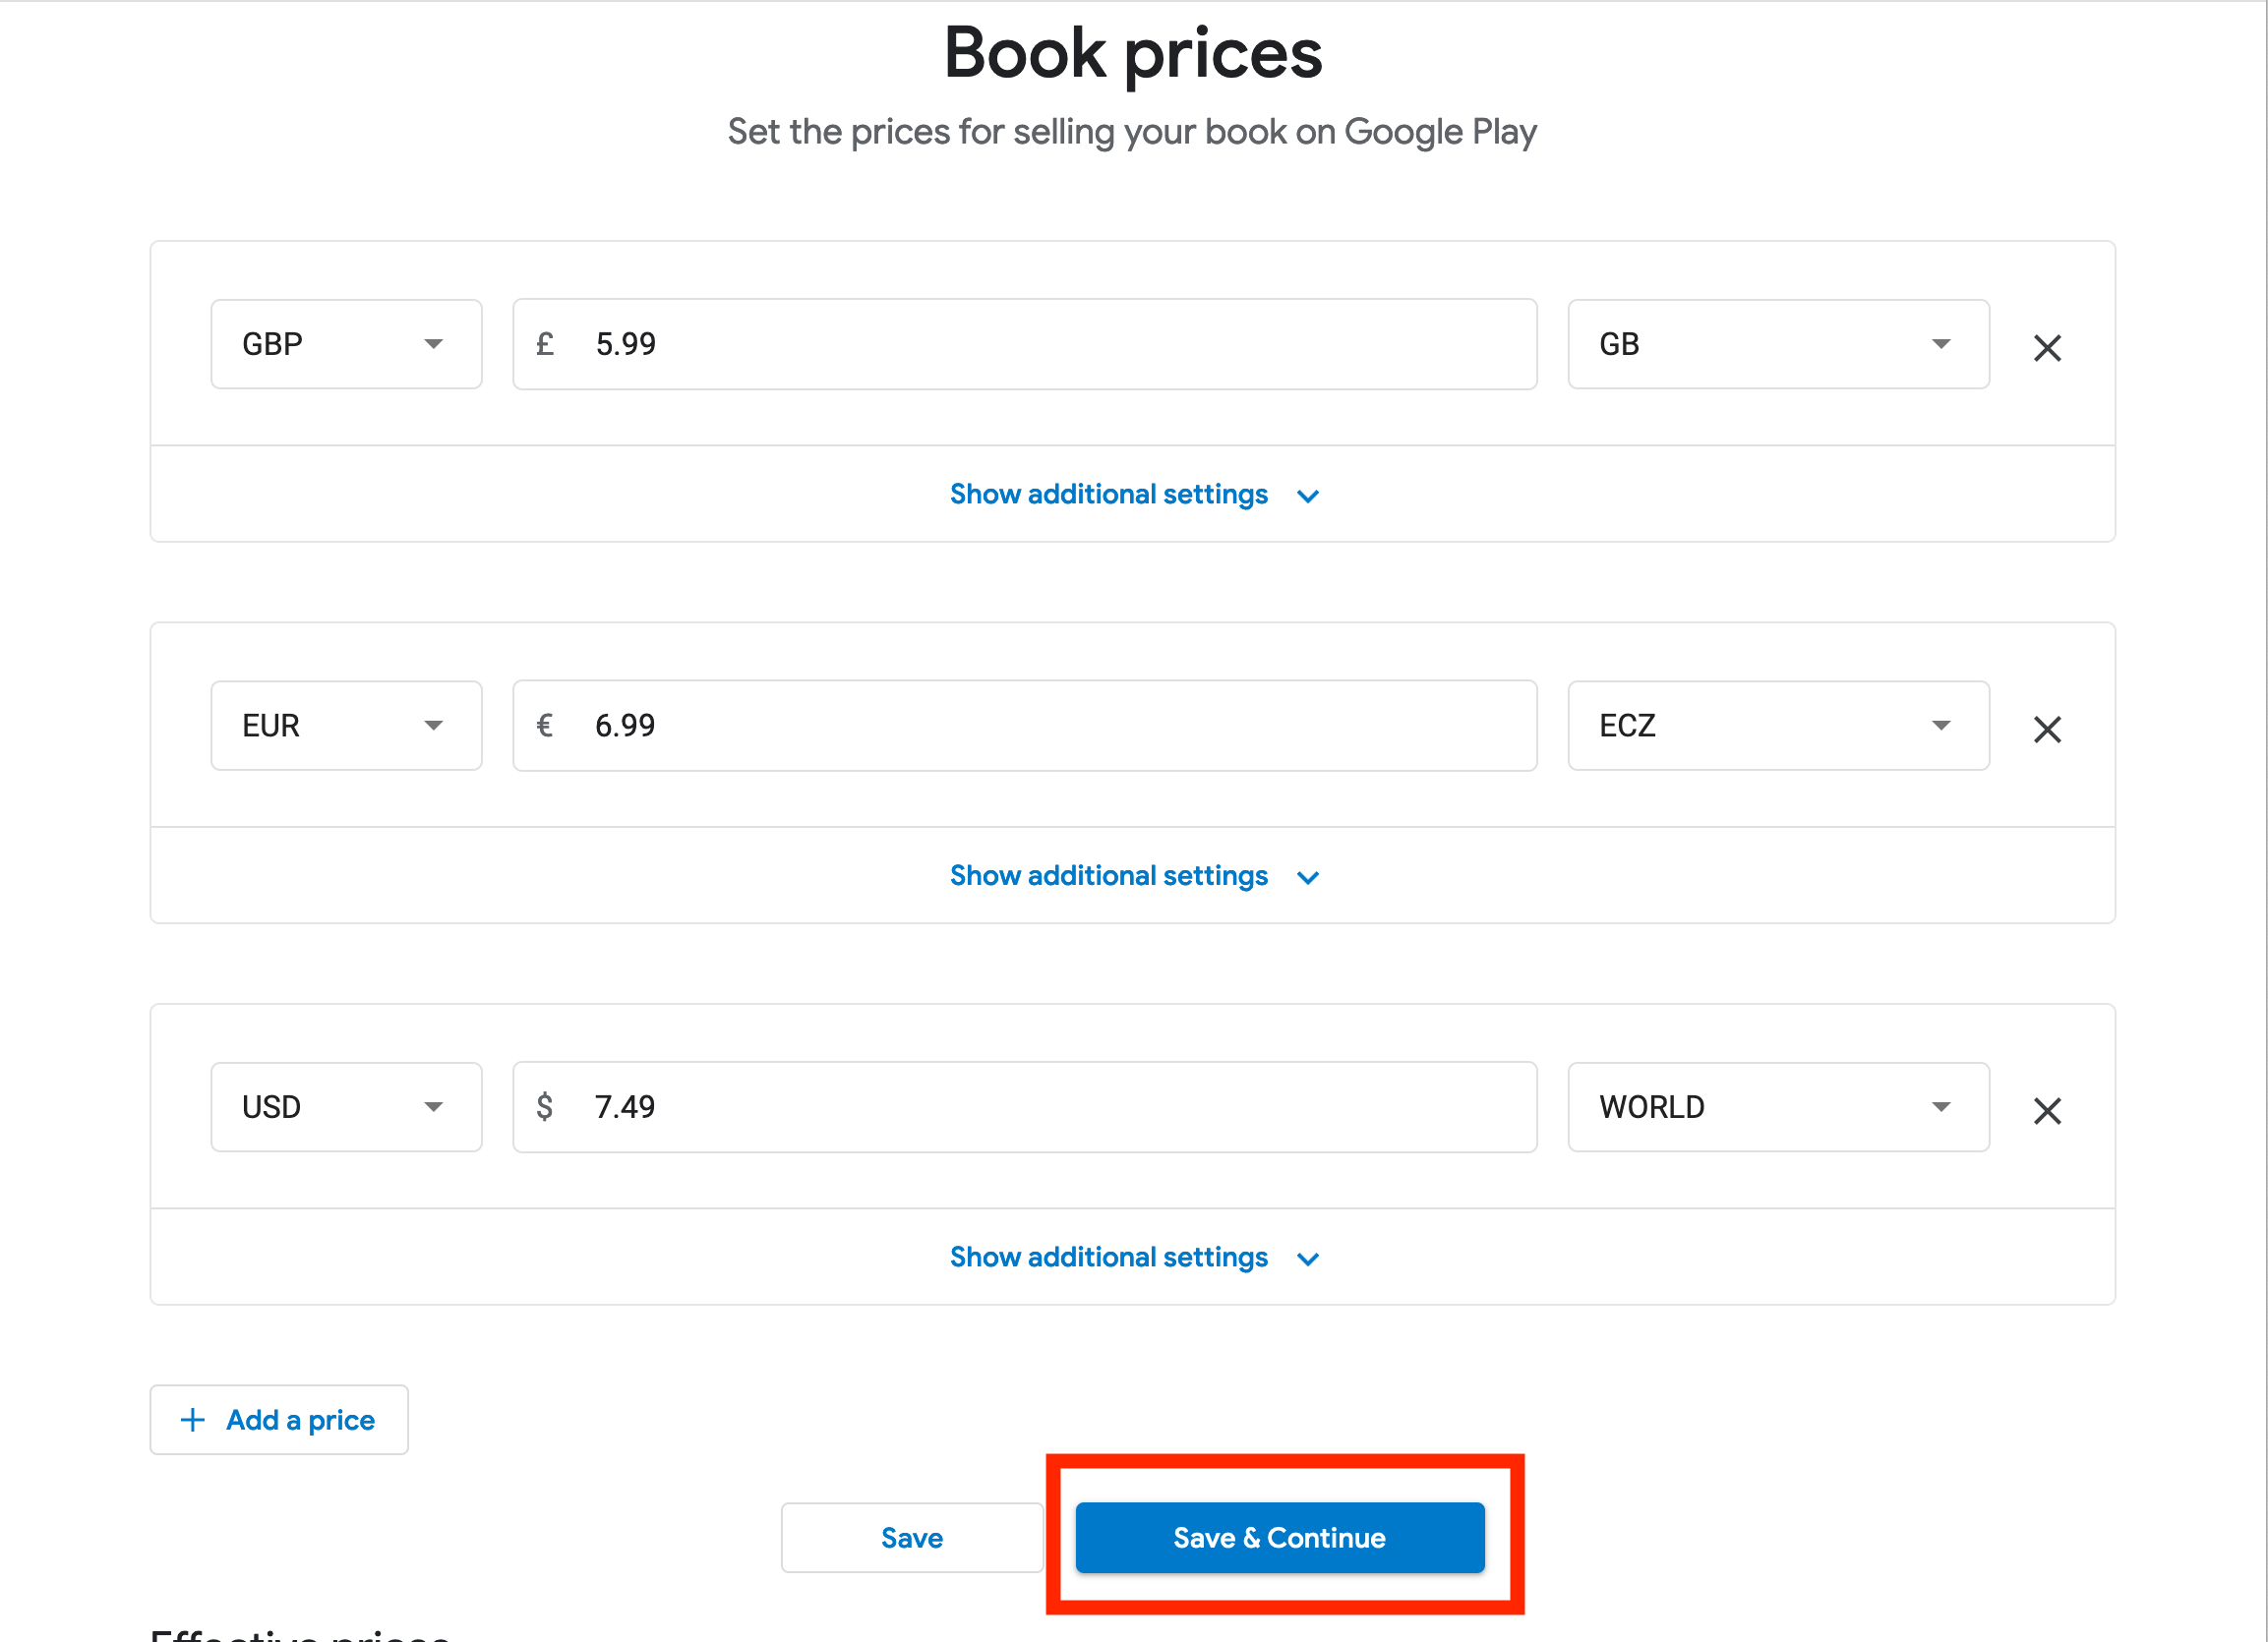
Now set a price. I’m in the UK so it’s asking me to select my UK price:
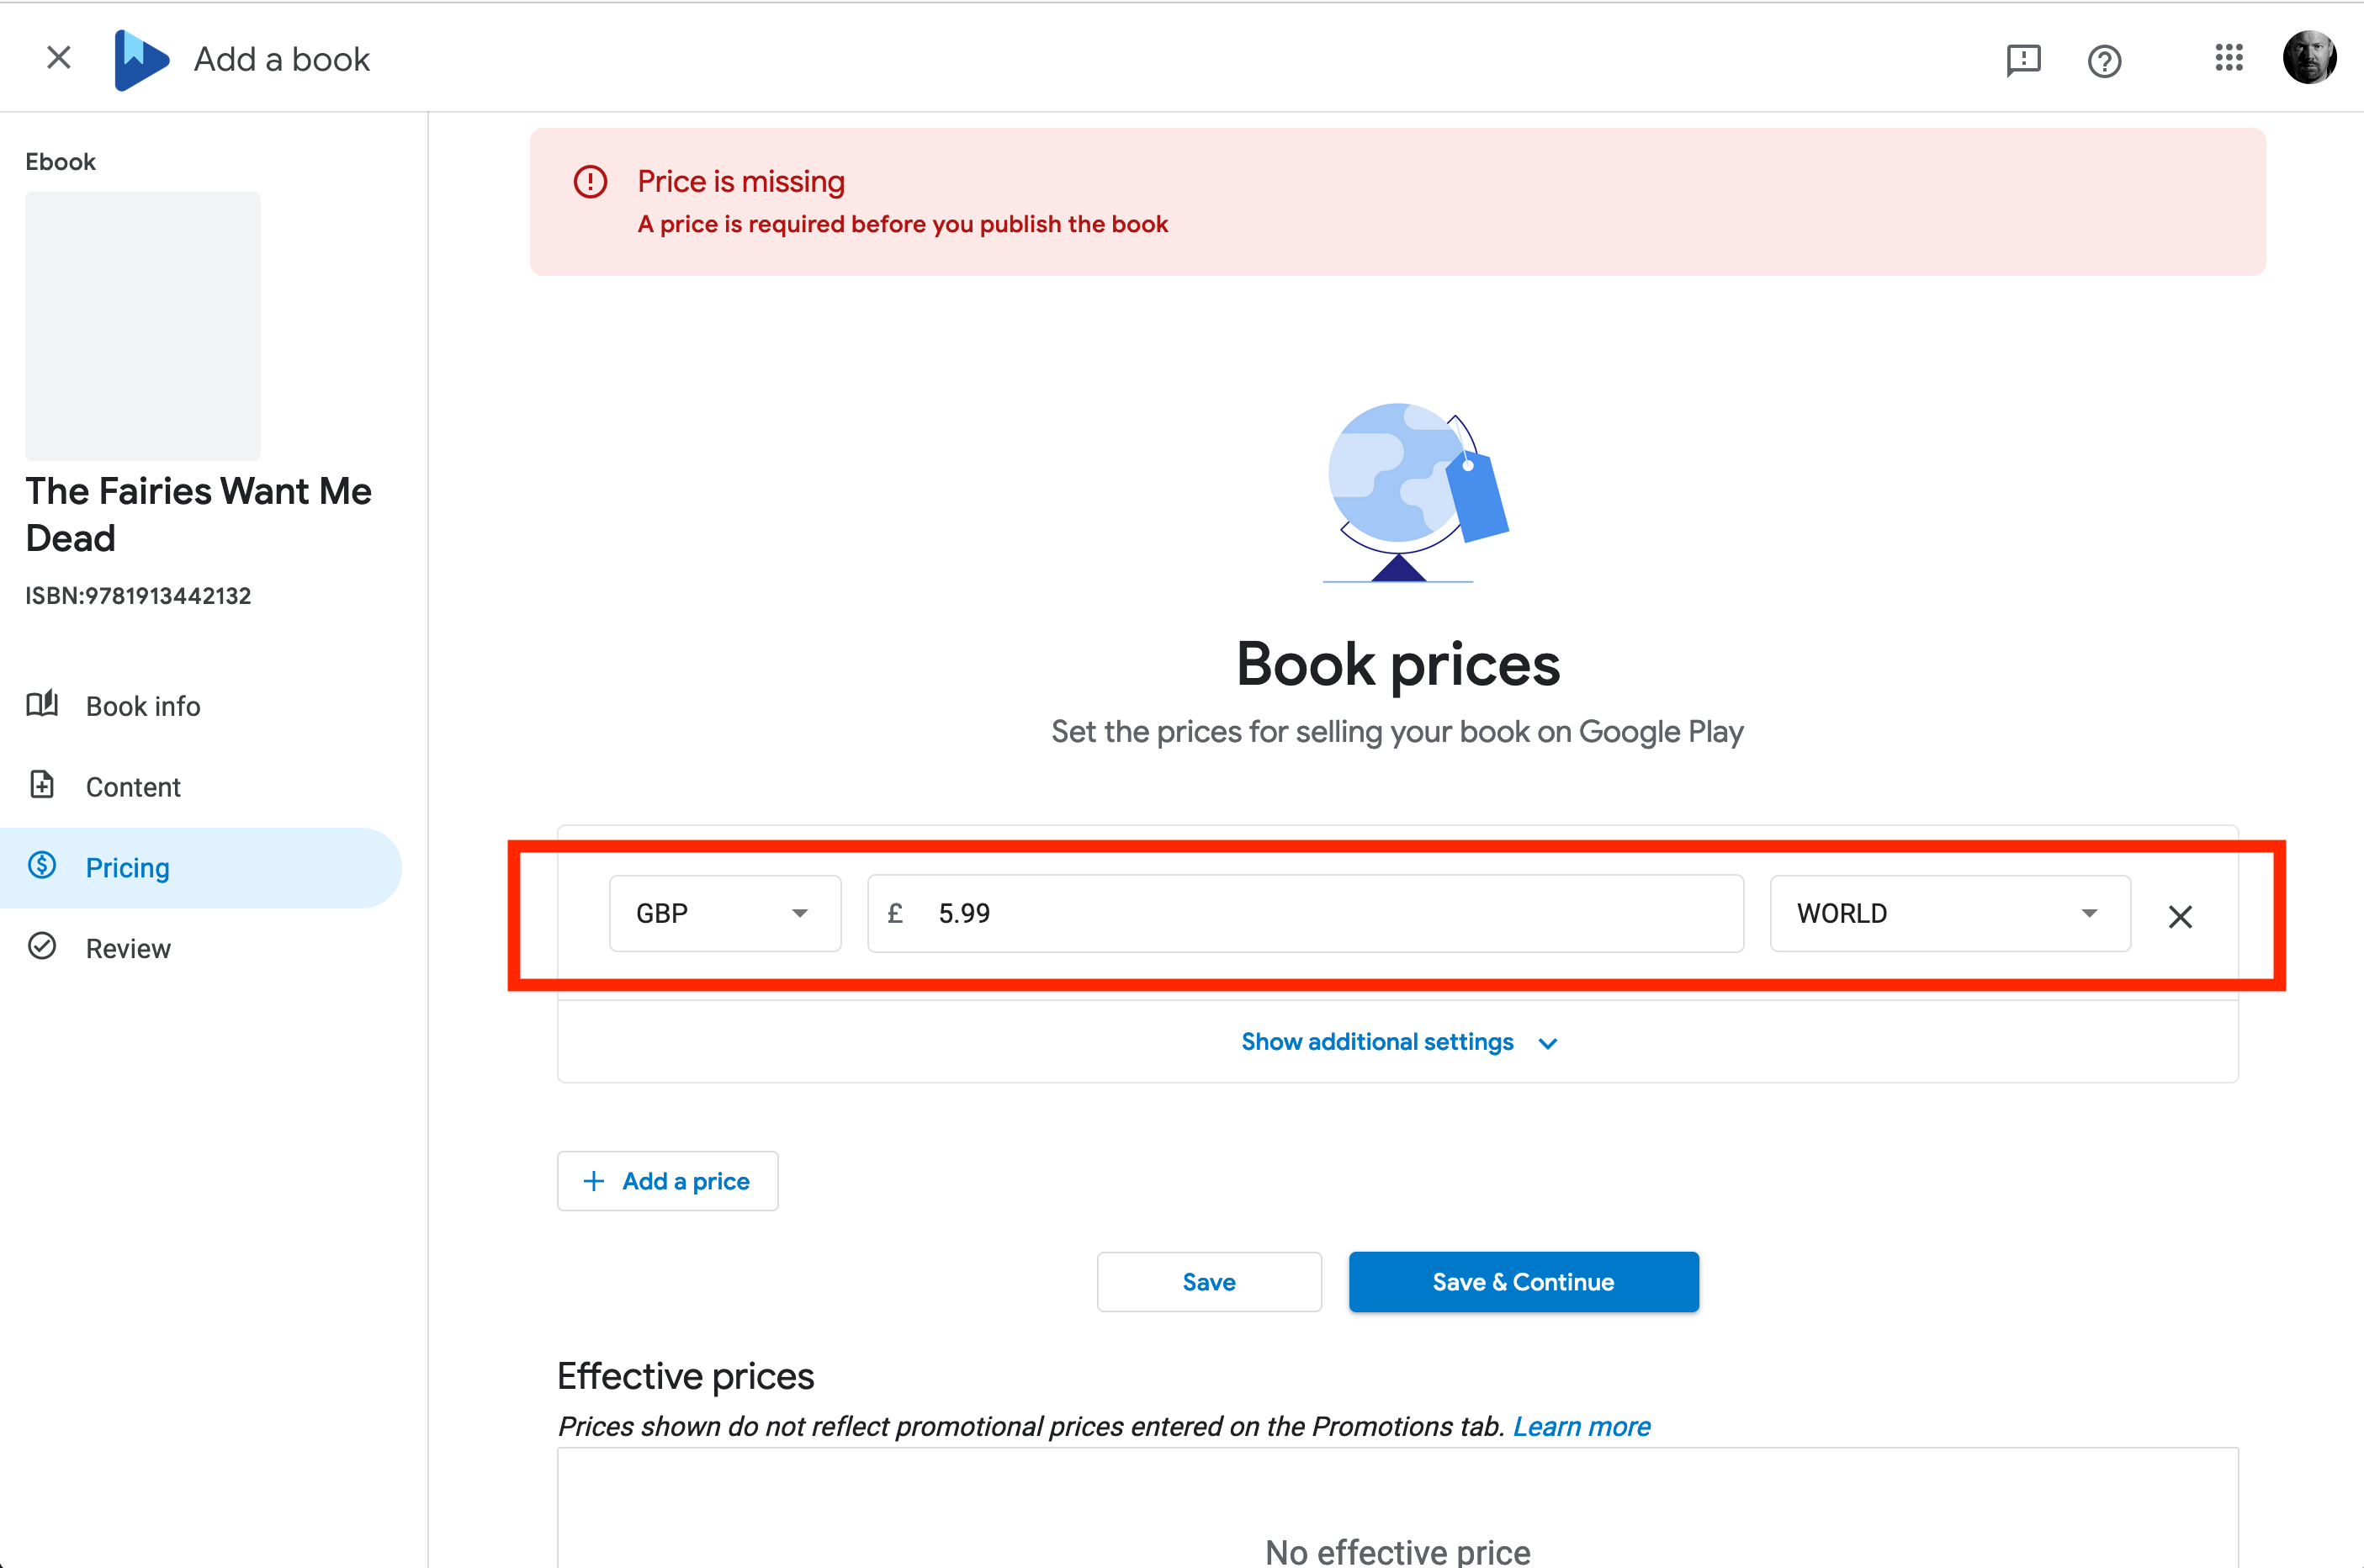
I can add one per country, but frankly that’s not necessary. I will do US and EU though, by selecting them in the right hand pull-down (selecting ‘Euro Area’ will change it to ‘ECZ’, don’t worry): I’m using US as the ‘world’ price, so everyone I didn’t select individually will see that.
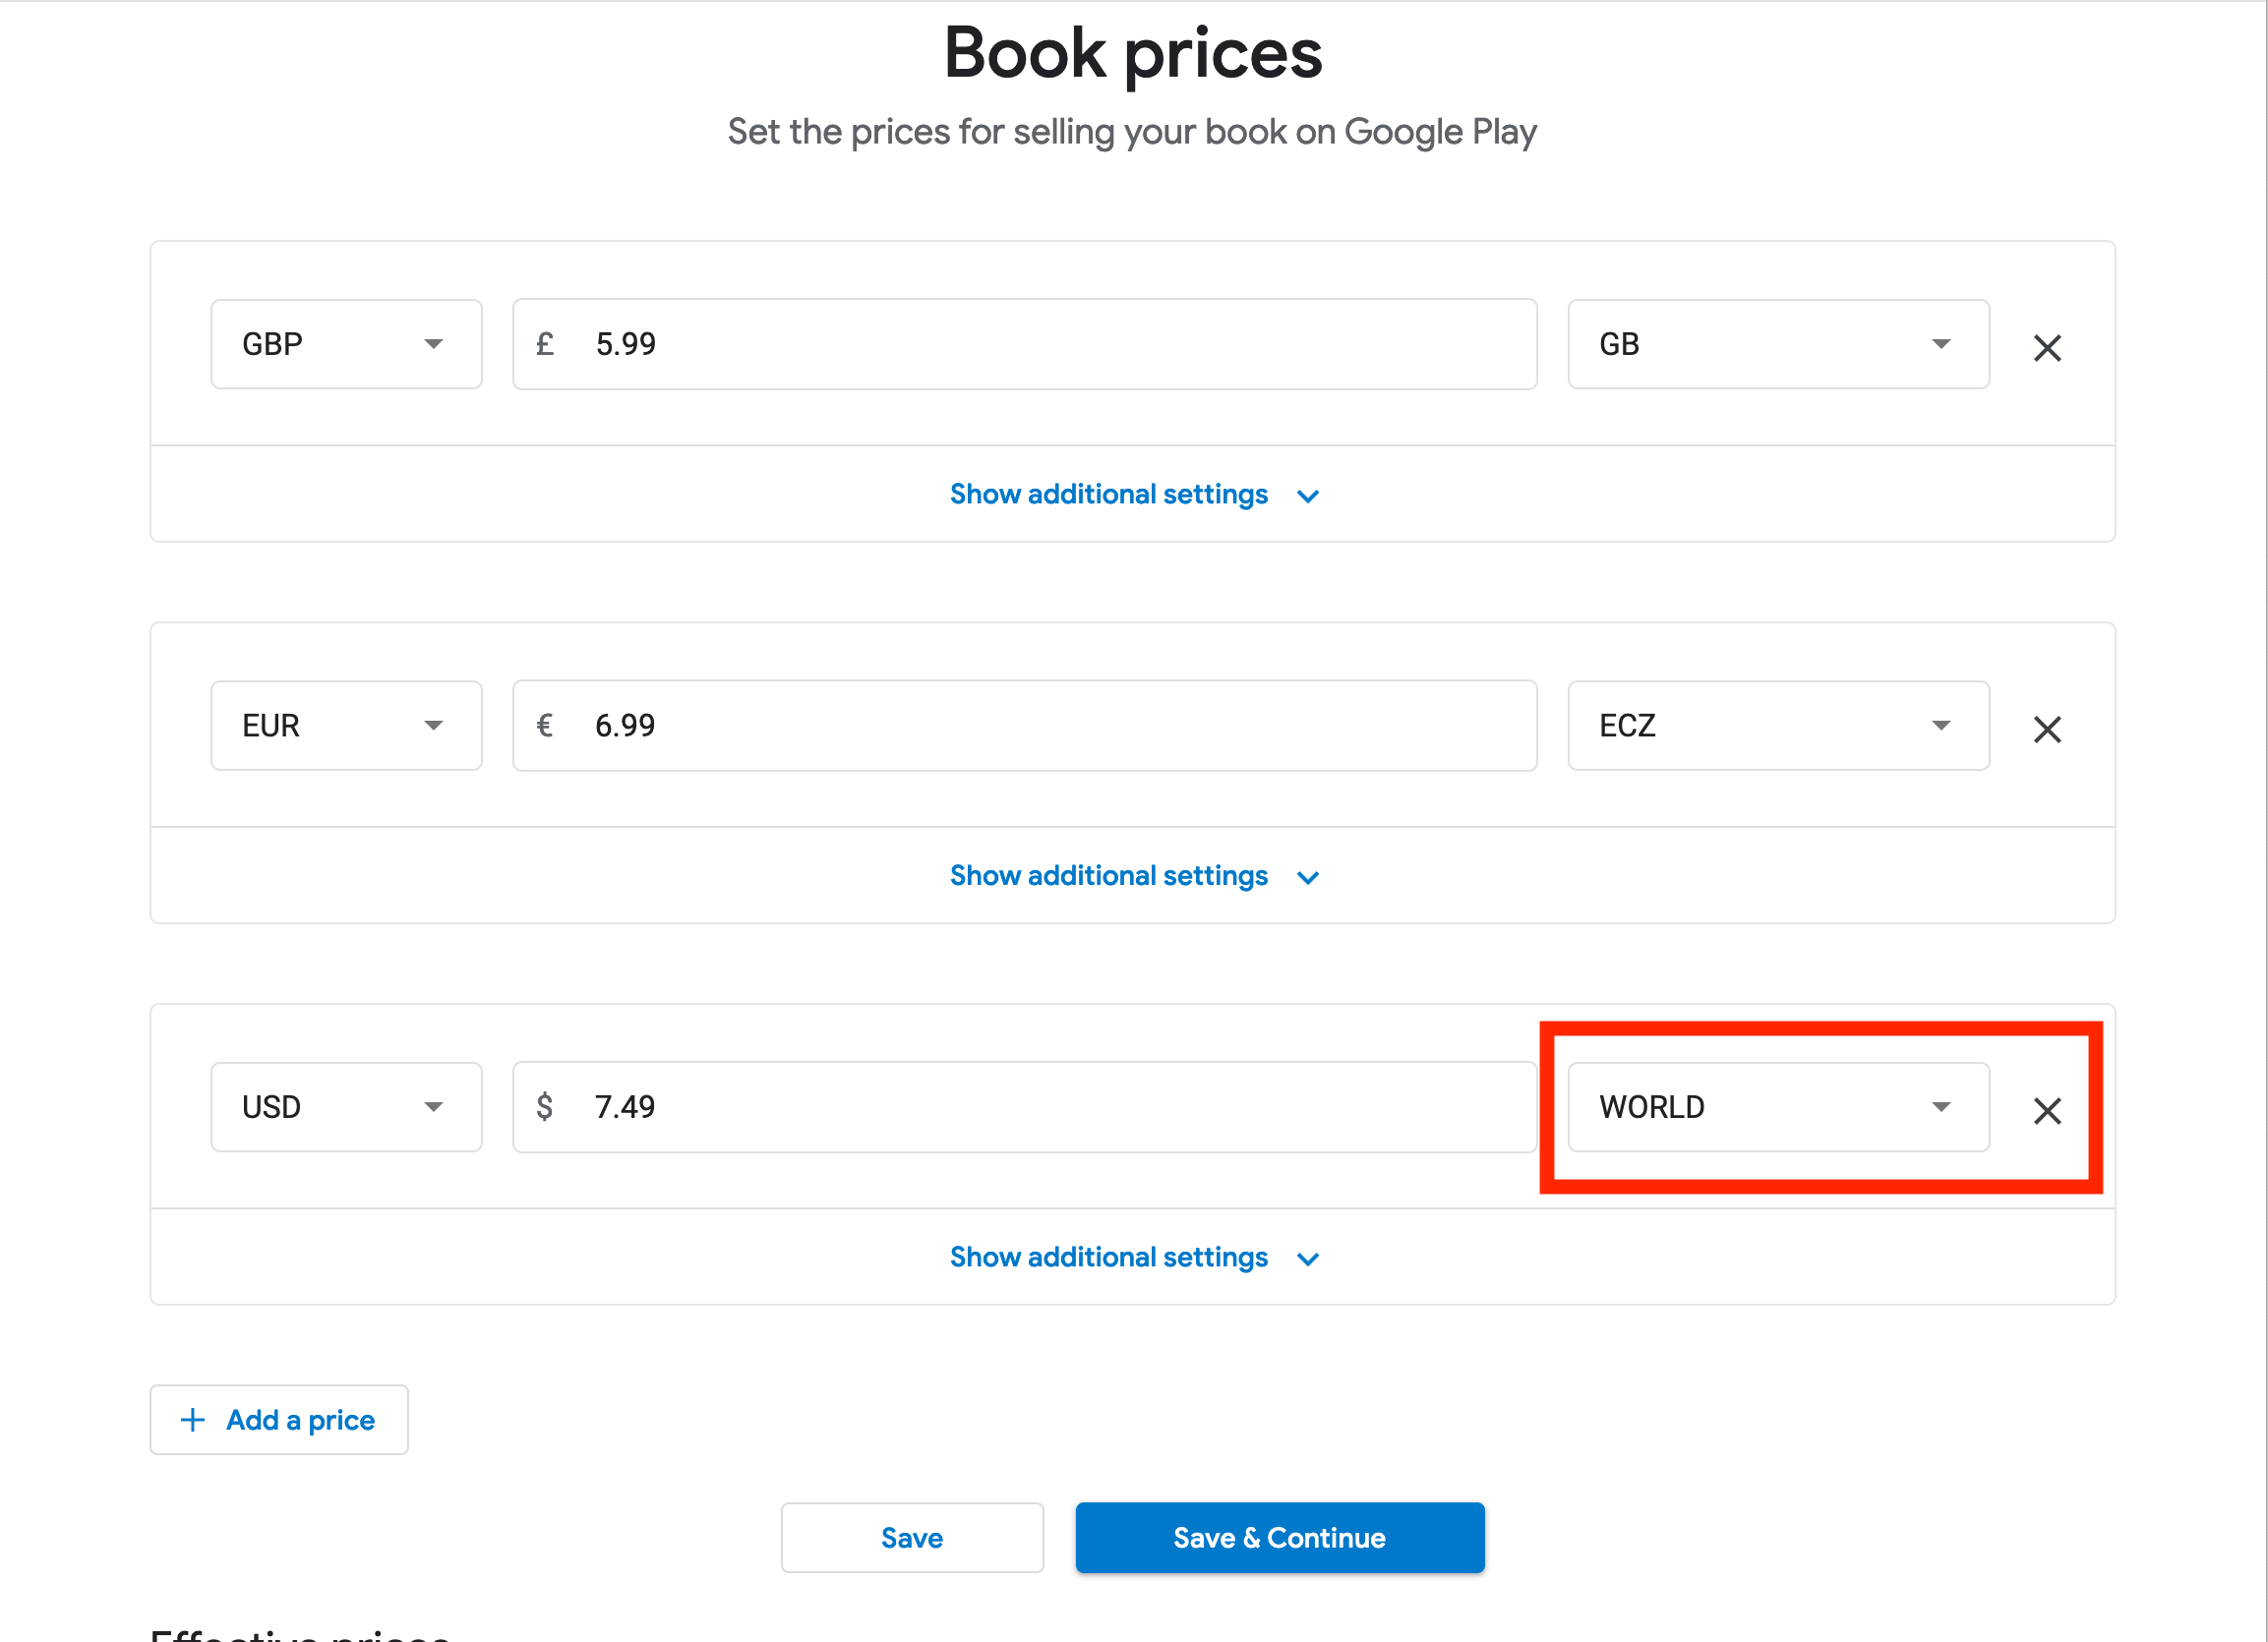
‘Effective Prices’ will be blank until you save. You can continue, or hit the ‘Save’ button (not ‘Save and Continue’) and wait for it to refresh. Then you have the option to check every price globally to see how much you make… Or trust that it’s OK and hit ‘Continue’.
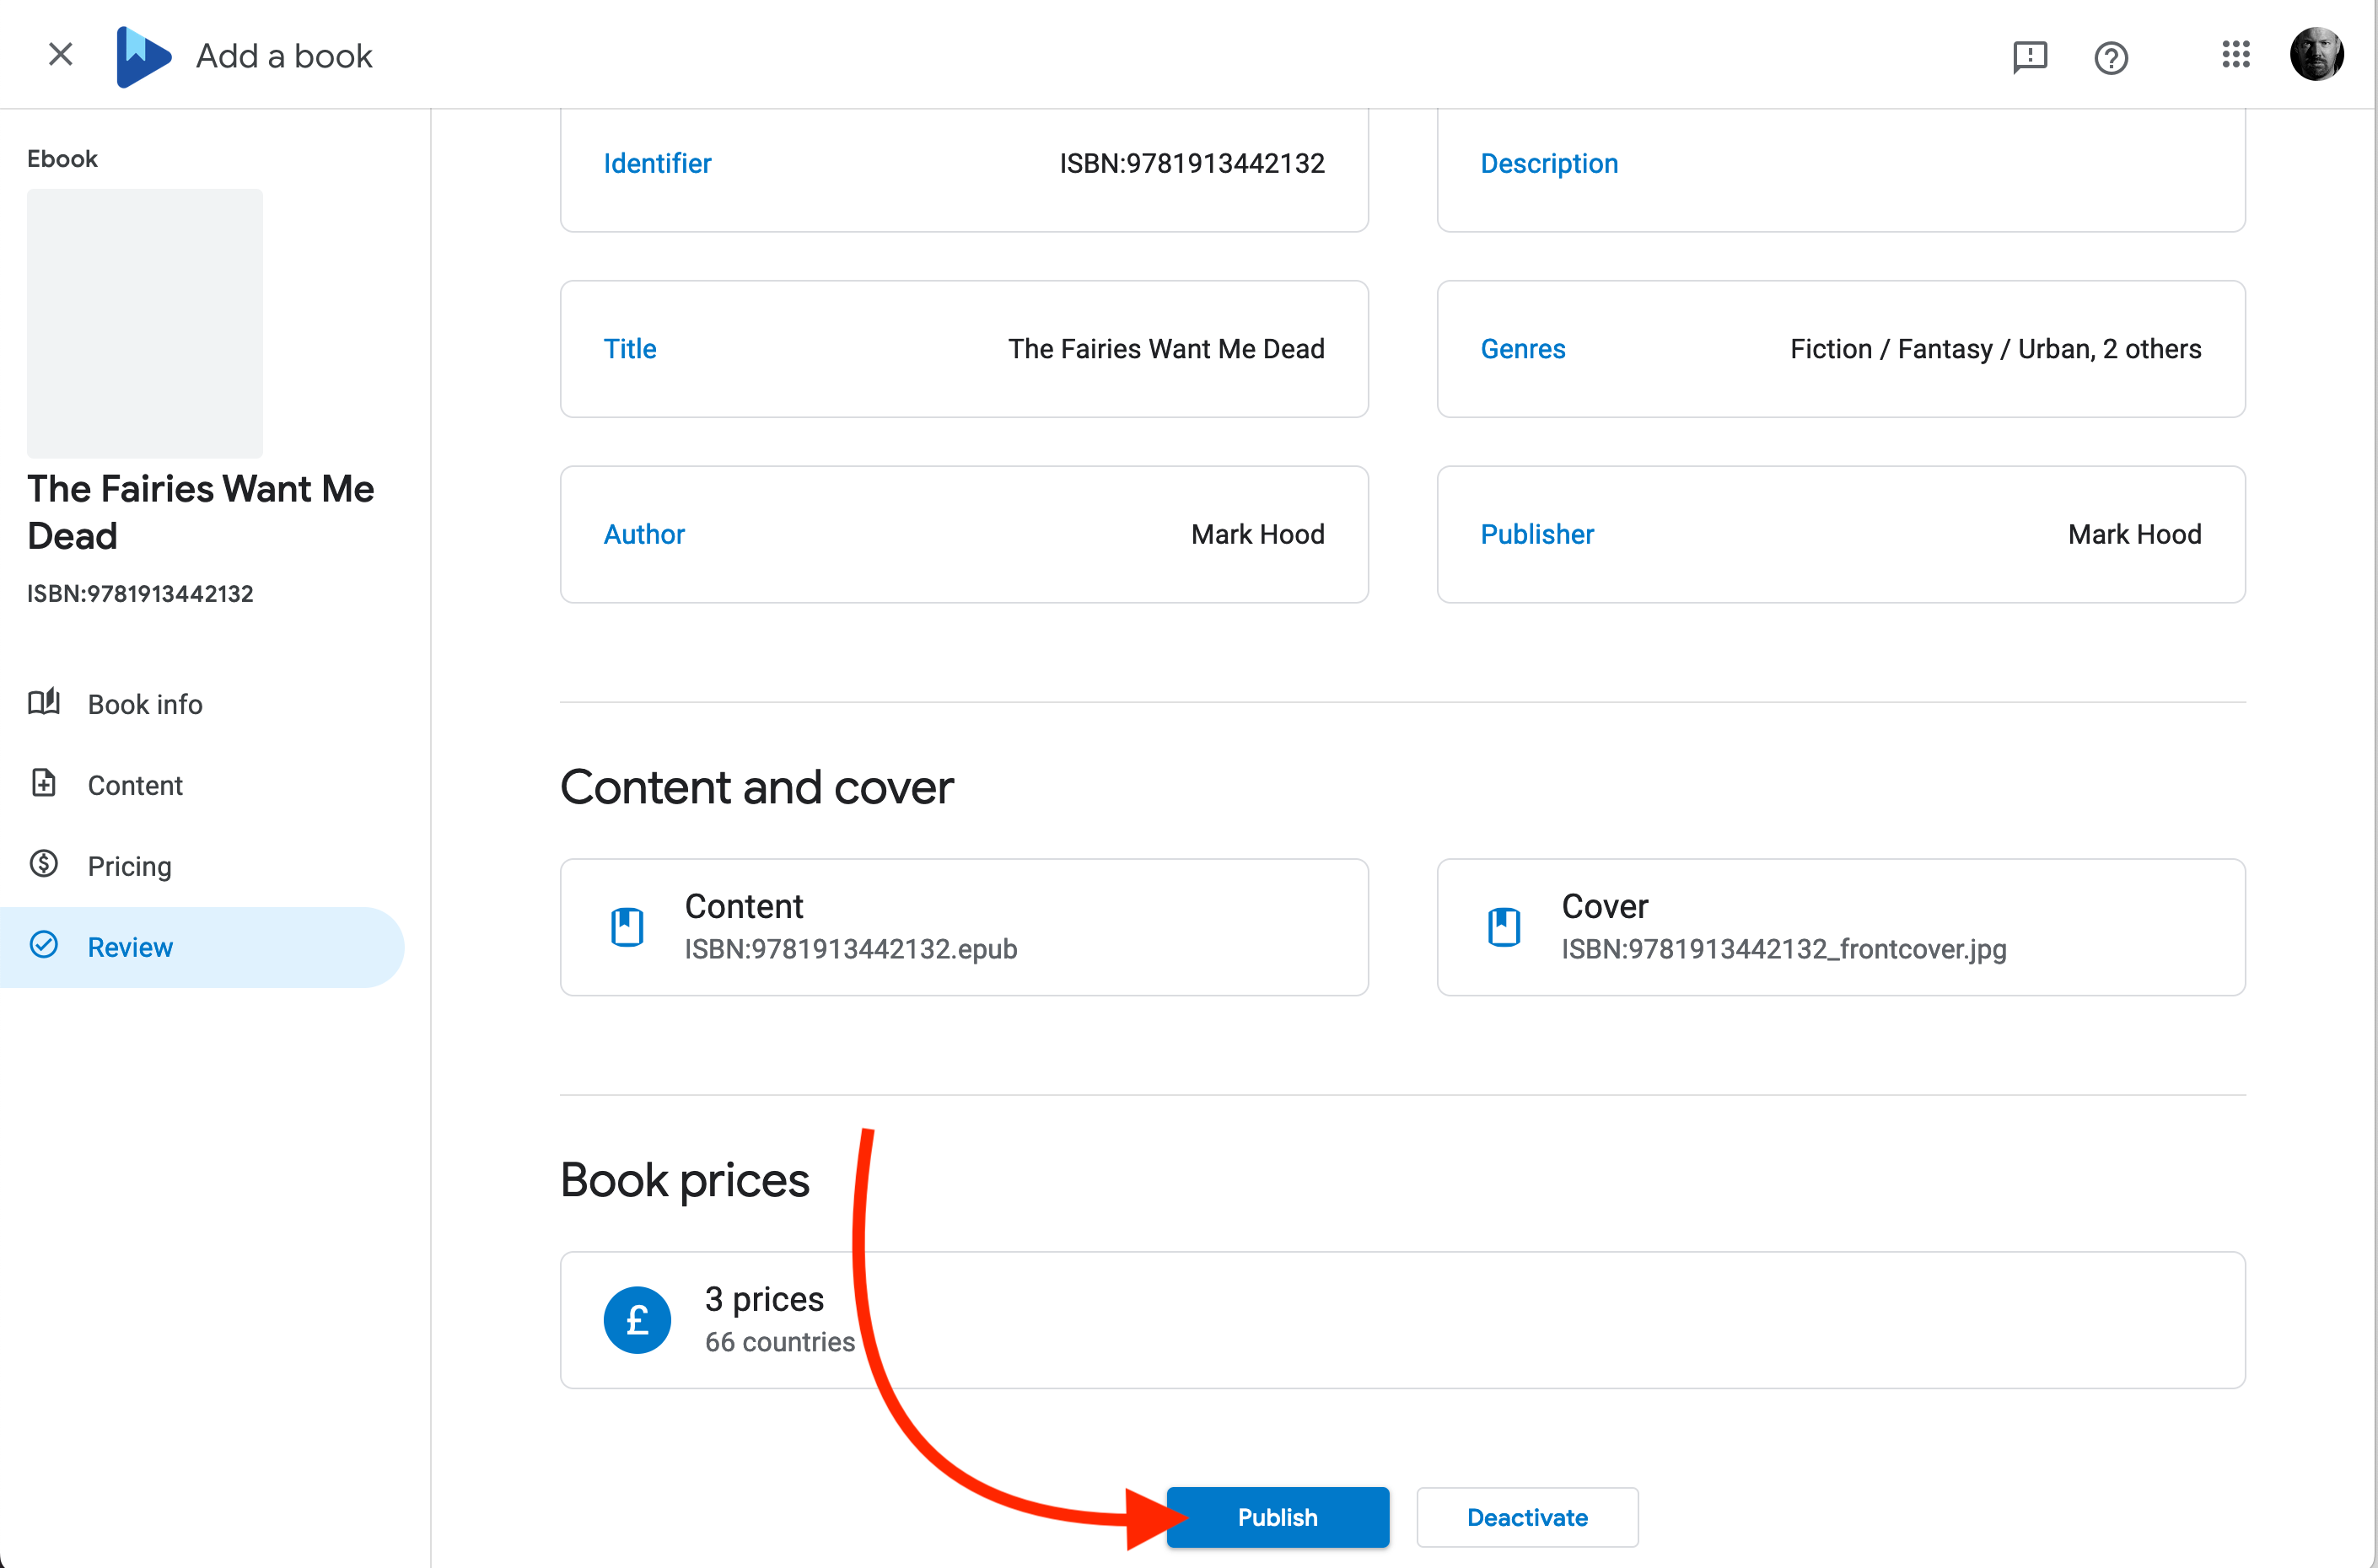
You’re done! Check and double-check the information on this screen, and if you’re happy, hit ‘Publish’.
Now have that drink, because…
Although you might not be done:
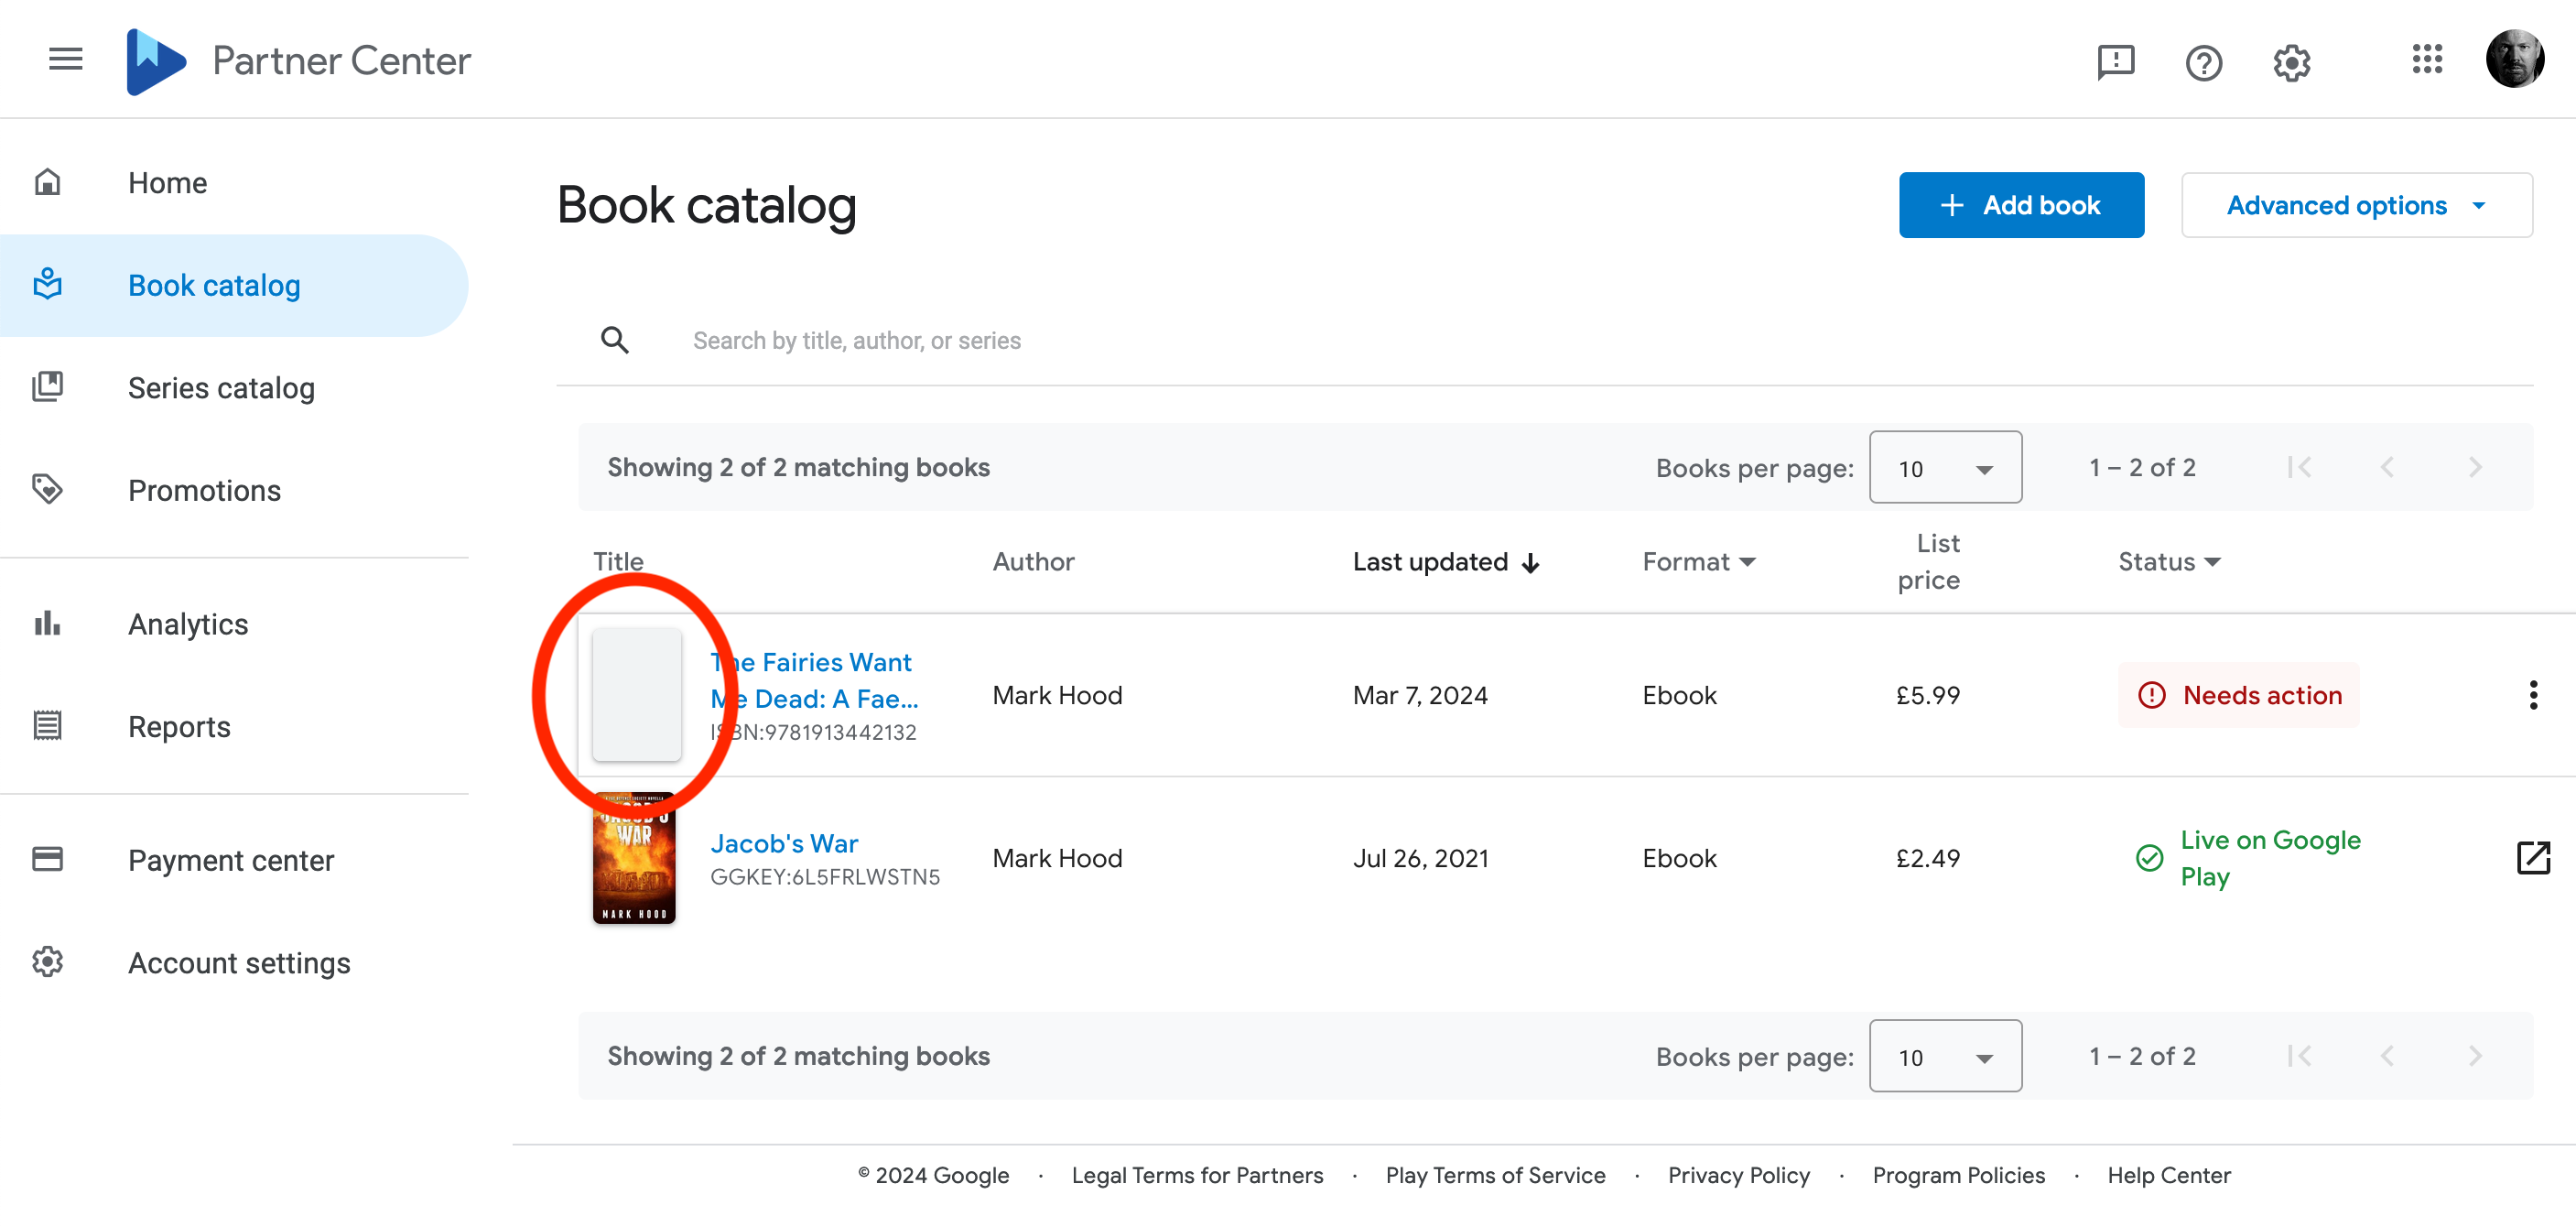
Note I have no cover image, and it’s saying I need to do something.
Hit ‘Needs Action’ and see if it really does. Mine’s just saying ‘not live’, but to only contact them after 24 hours. It takes a while, so don’t panic.
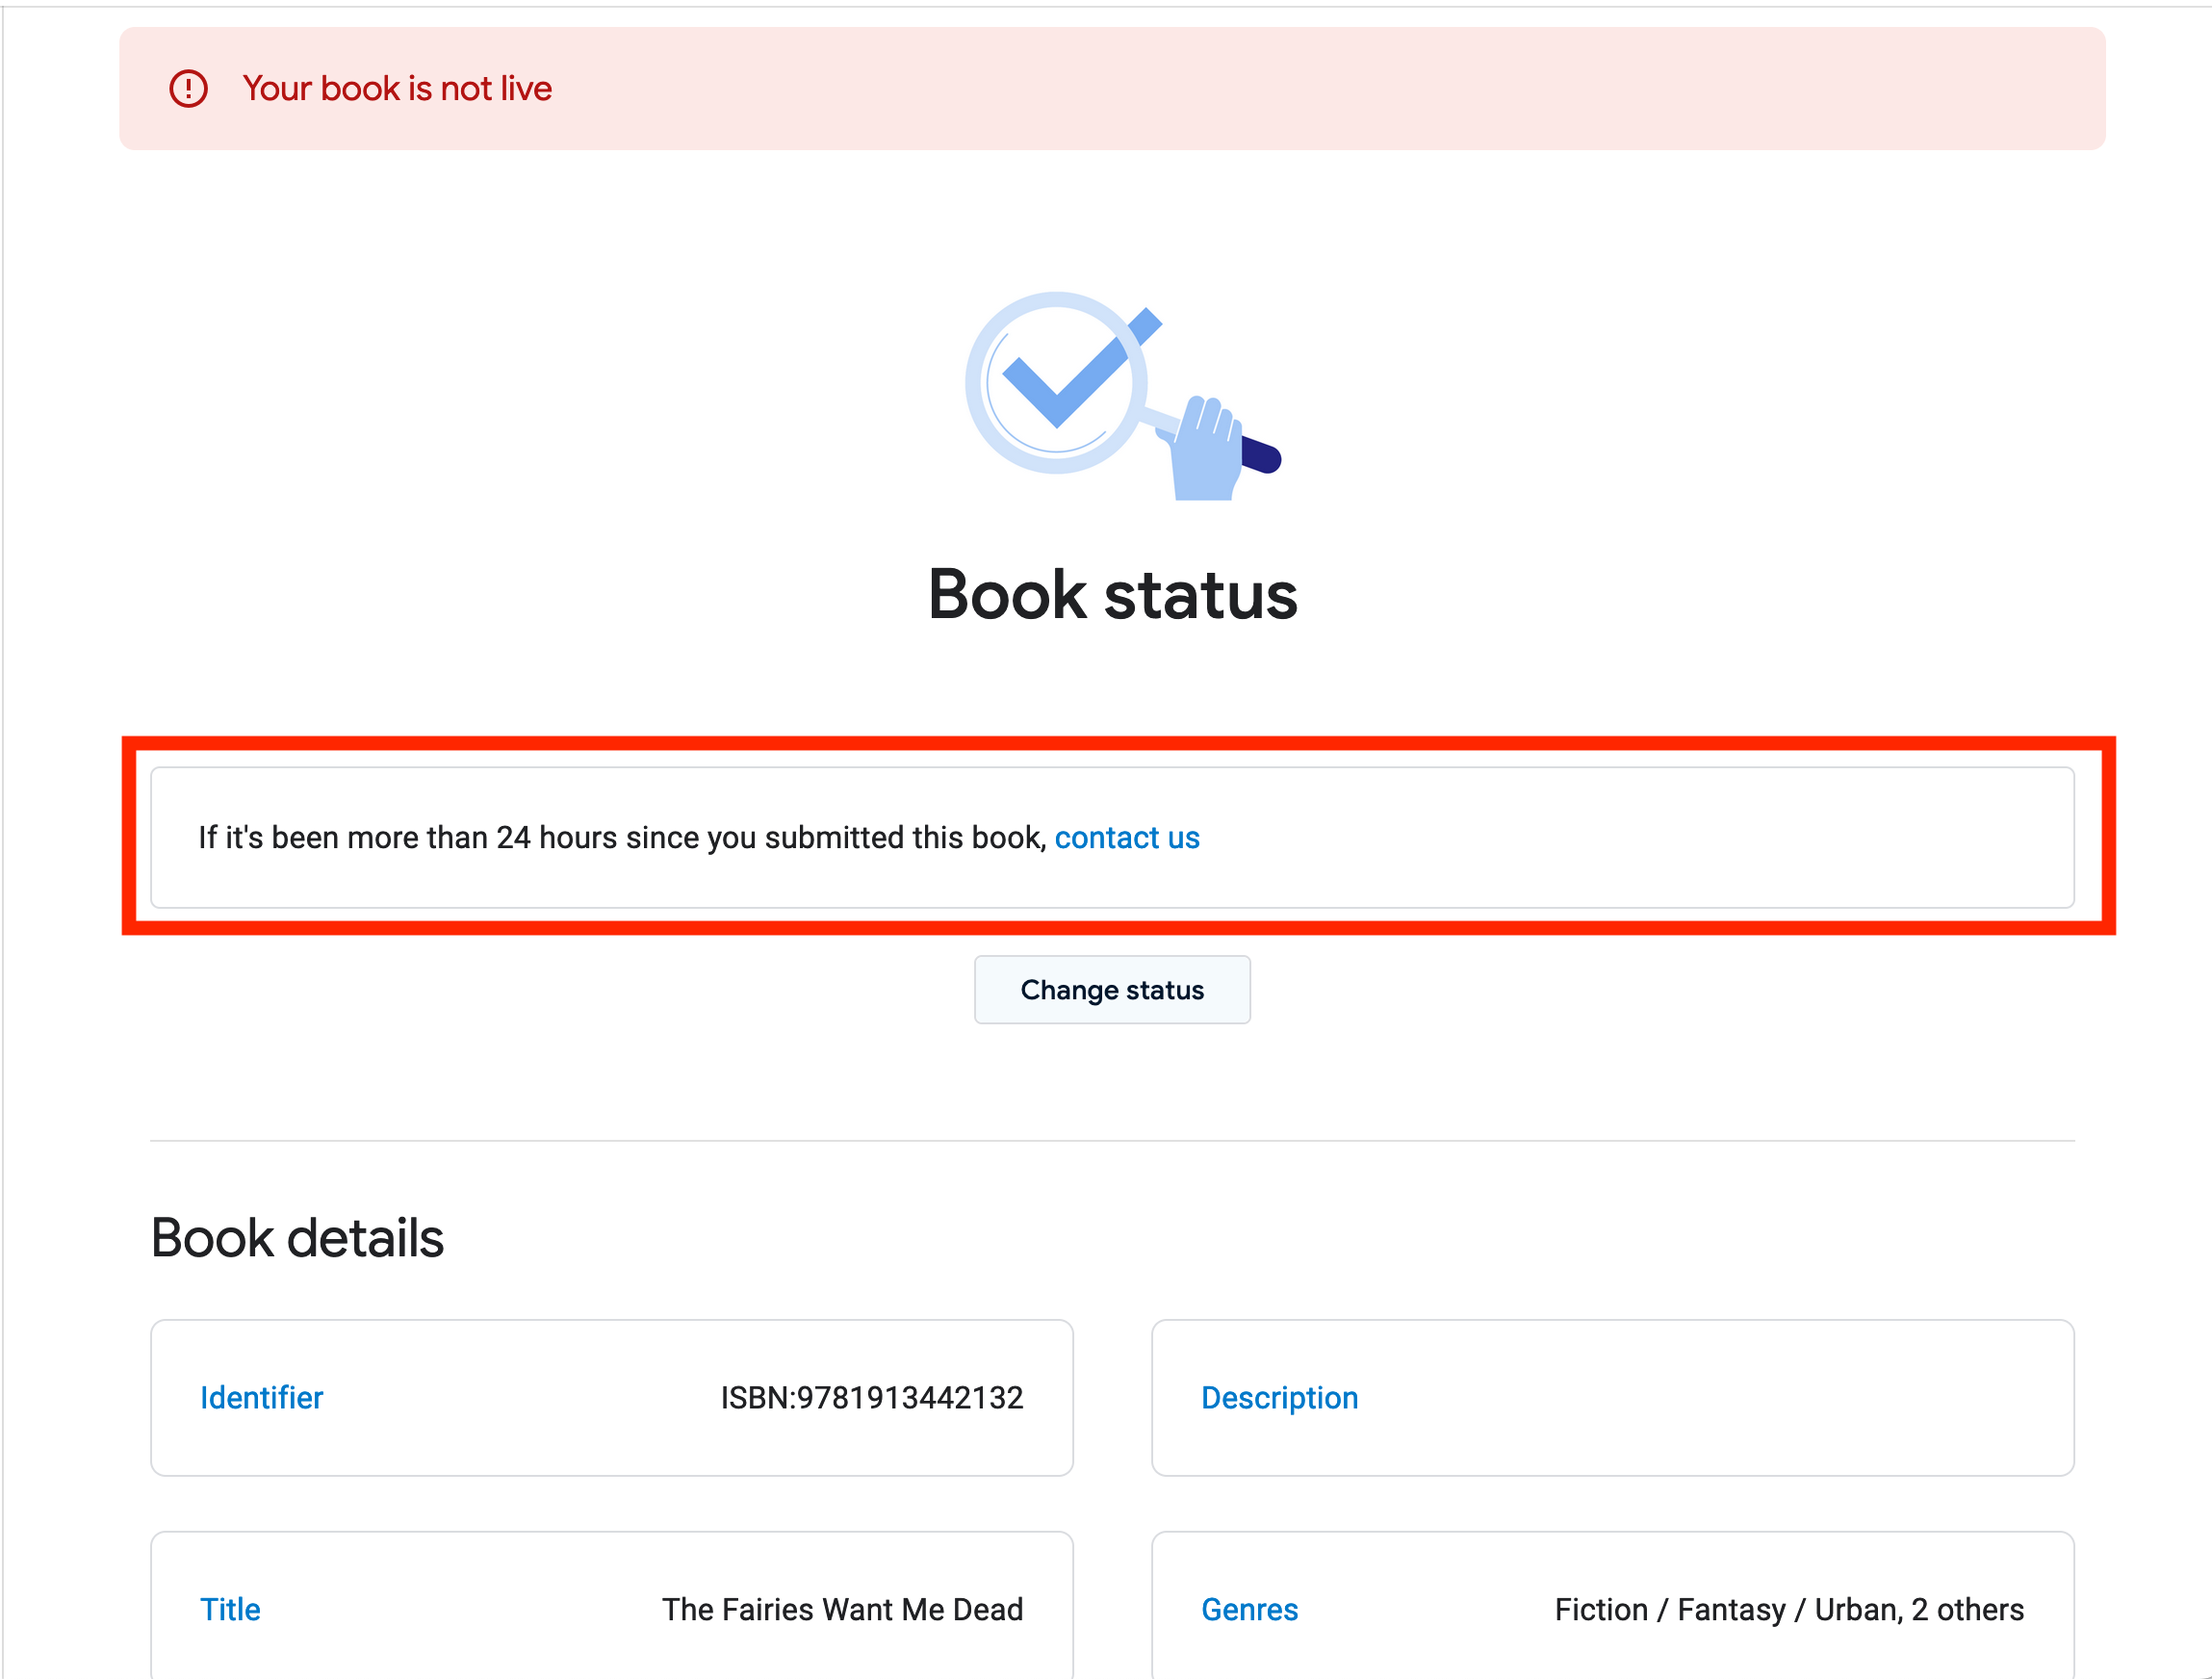
Let it be, try and avoid refreshing every two minutes, and come back later. I had problems with the ePub format not being precisely correct, and they helpfully didn’t email me at all. I came back after a while and saw the message, re-uploaded and all was well after another couple of hours.
They won’t email you when the book goes live, so you will have to keep checking.
You can upload another book, move to a new retailer, or just go and pet the dog until your blood pressure returns to normal.
Once it’s ready, grab the links by clicking on the book, selecting ‘Summary’ and looking for the link to Google Play:

Getting your book into Apple Books
Note: I’ve heard reports that this is tricky on PCs, as Apple expect you to use a Mac. I certainly couldn’t get it to work on Firefox, even on a Mac, so I’d recommend using Safari.
If you prefer to watch this walkthrough instead, I’ve prepared a video for you. Scroll down for the written instructions, along with screenshots to help you through the process.
It doesn’t look as though you lose much (and might even gain) by going via another distributor, but if you’re into doing everything yourself, here’s how.
Help is available at https://itunespartner.apple.com/books/
You will need an Apple ID, and you have to turn on two-factor authentication. If you don’t already have one, sign up here https://authors.apple.com/epub-upload by selecting ‘Create iTunes Connect Account’. Yes, iTunes. Even though it’s been called ‘Music’ since 2019, and even though you don’t buy books through it.
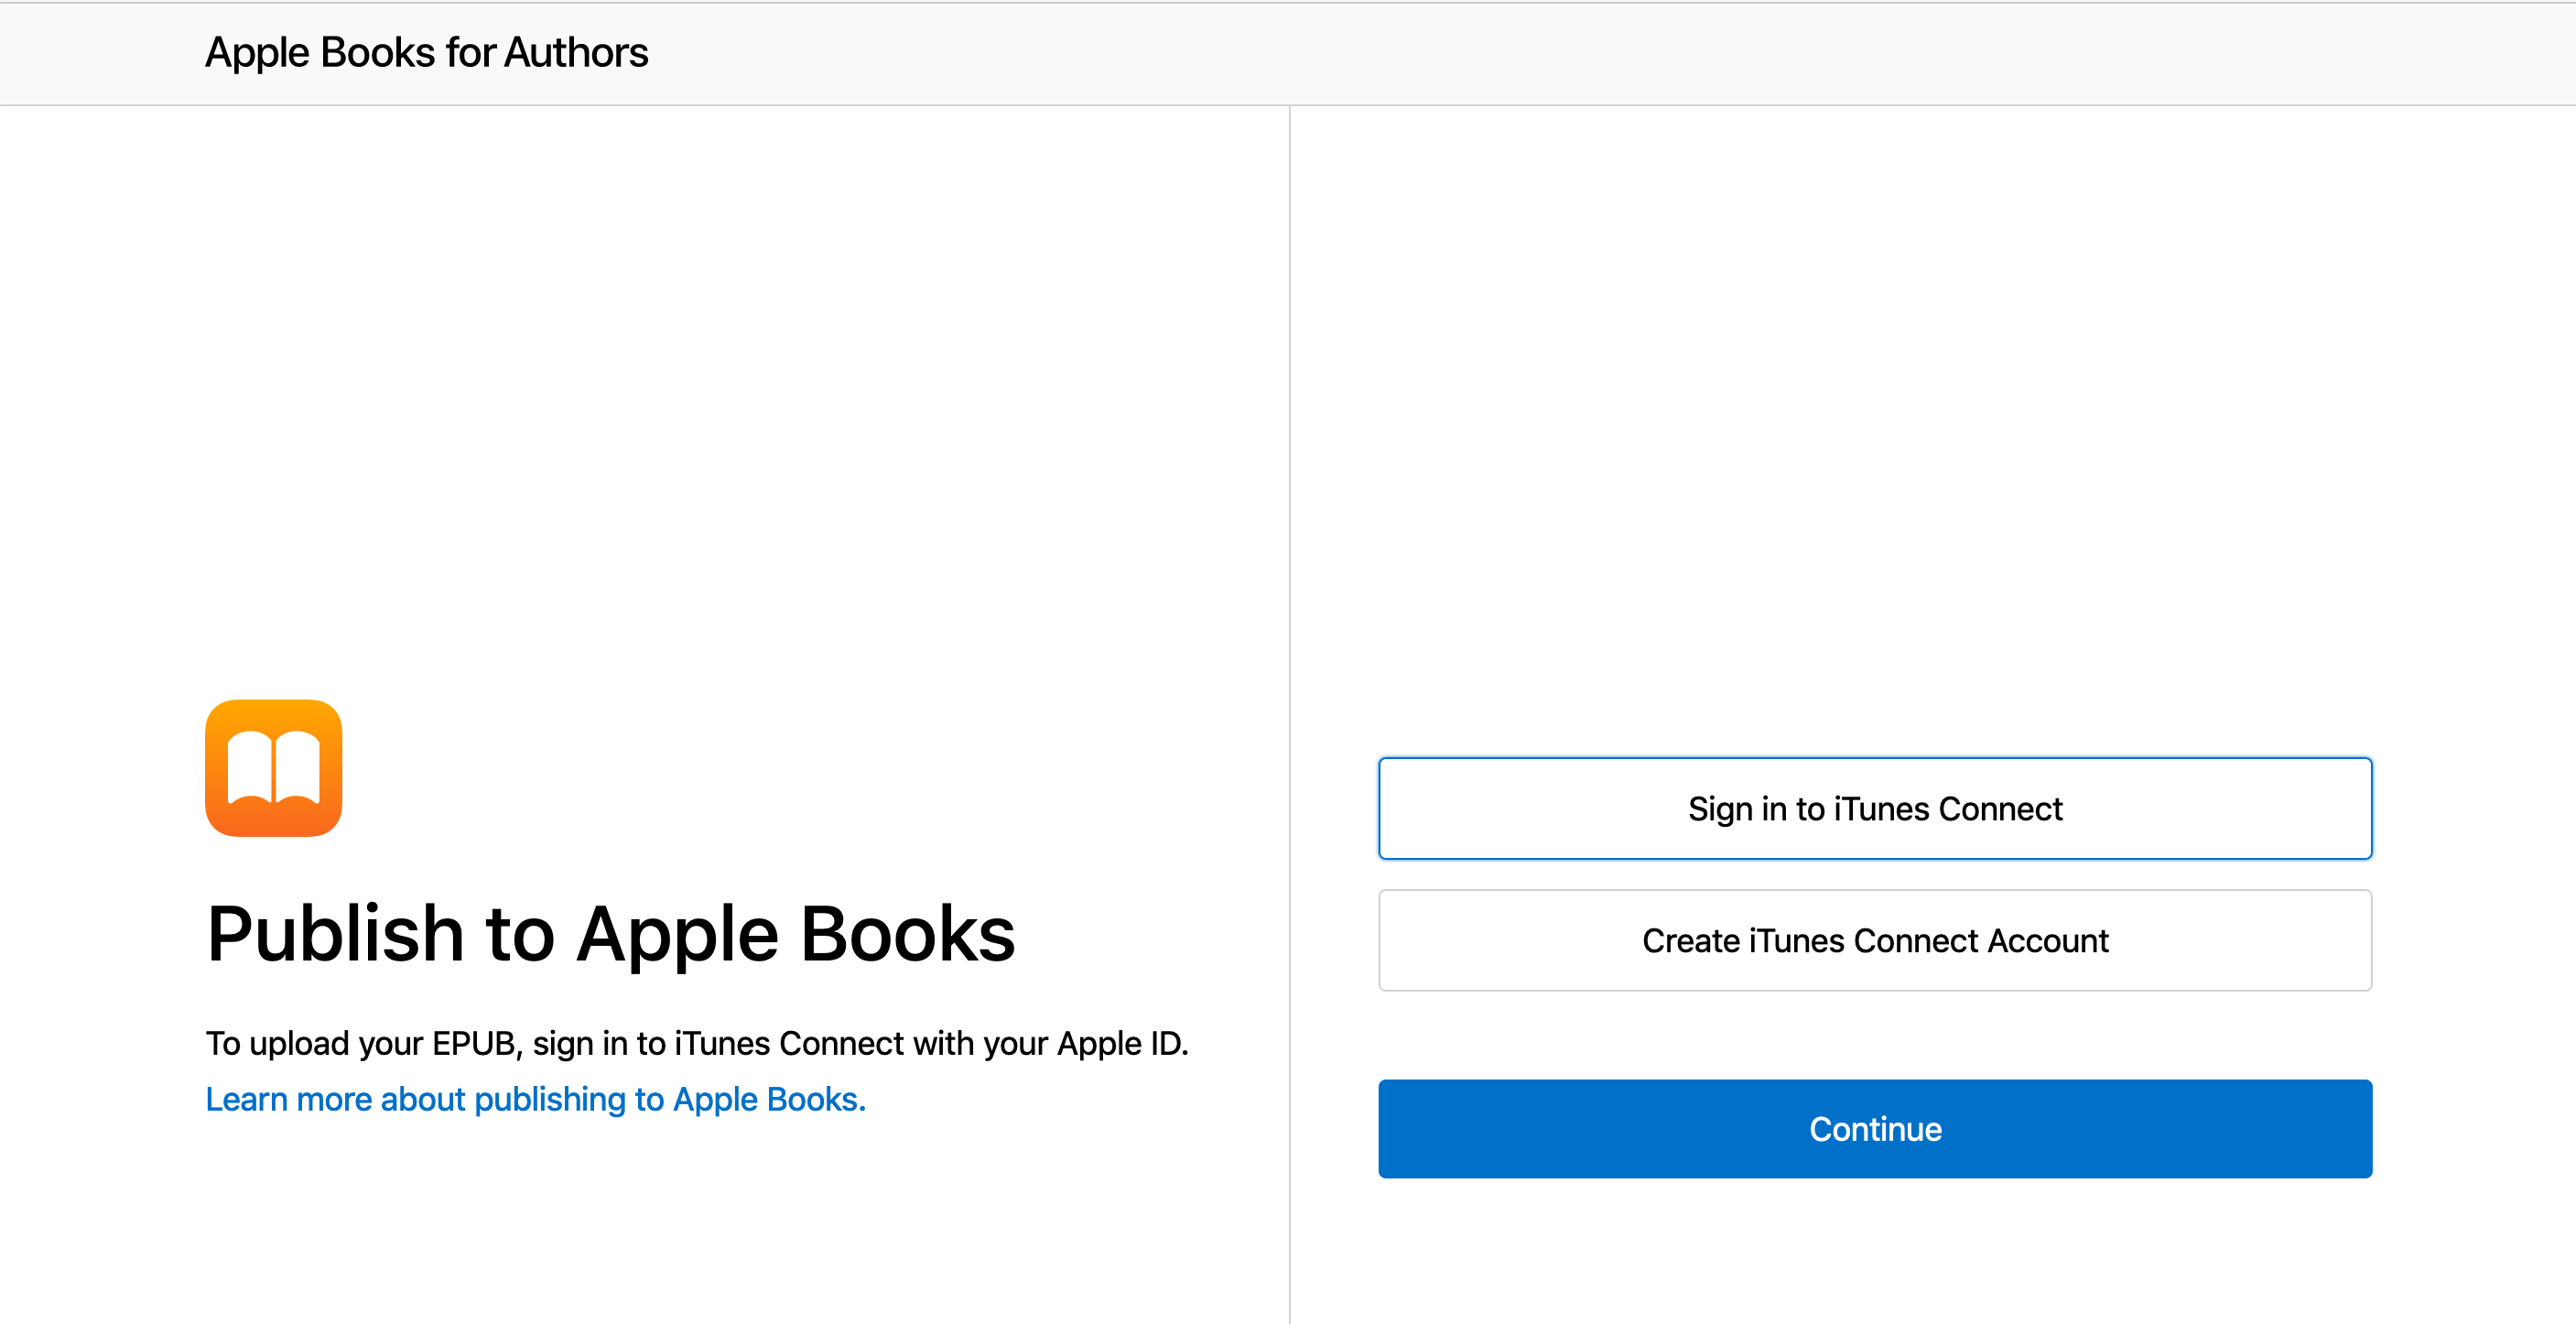
If you do, you can log in directly by choosing ‘Sign in to iTunes Connect’ instead.
Now set up your business information (if it’s just you, that’s fine also) and the usual tax and bank account information.
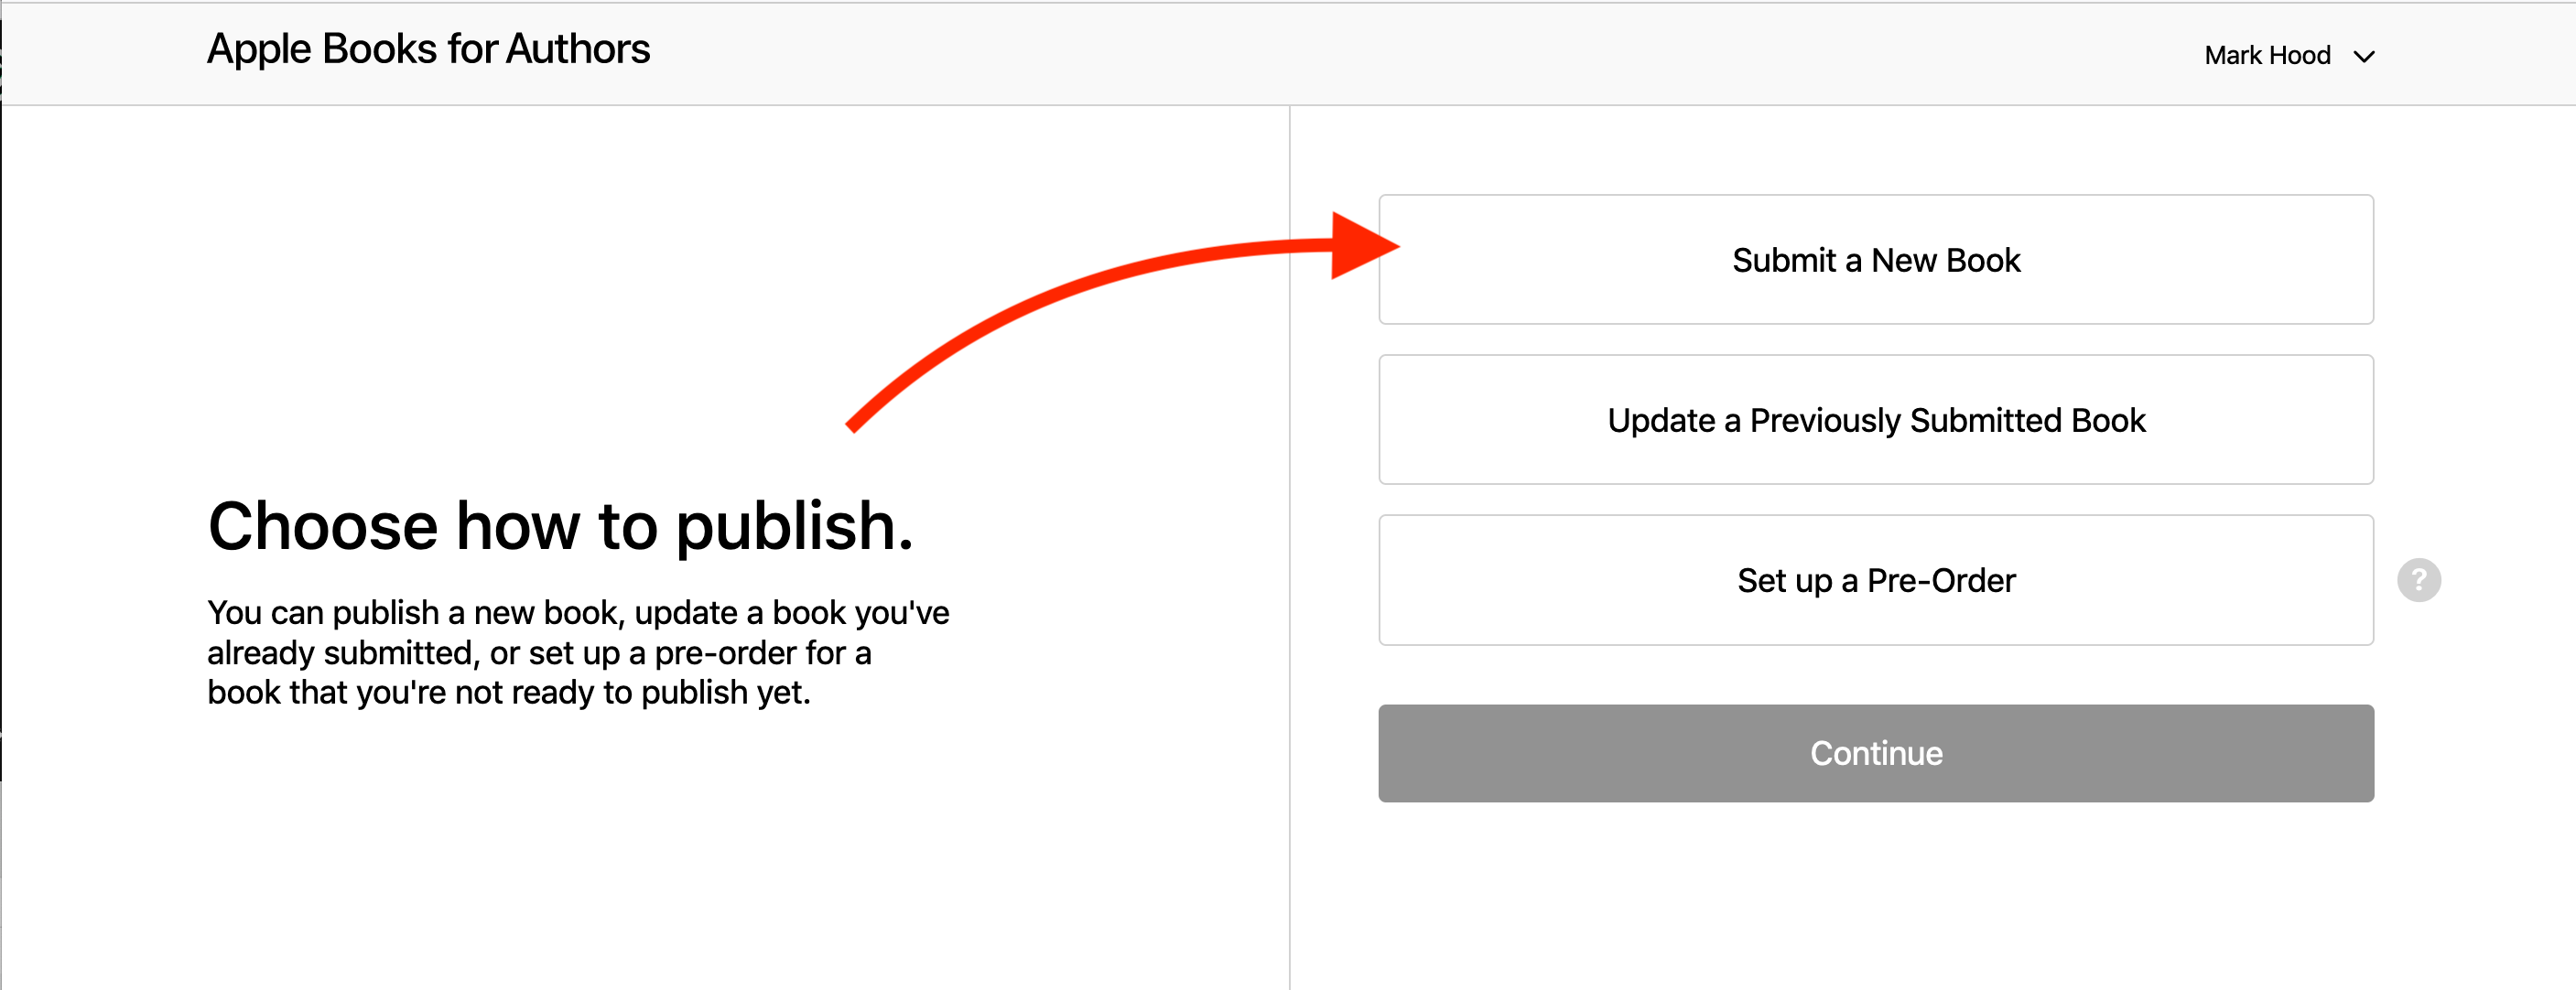
We can then select to ‘Submit a new book’, and hit continue.
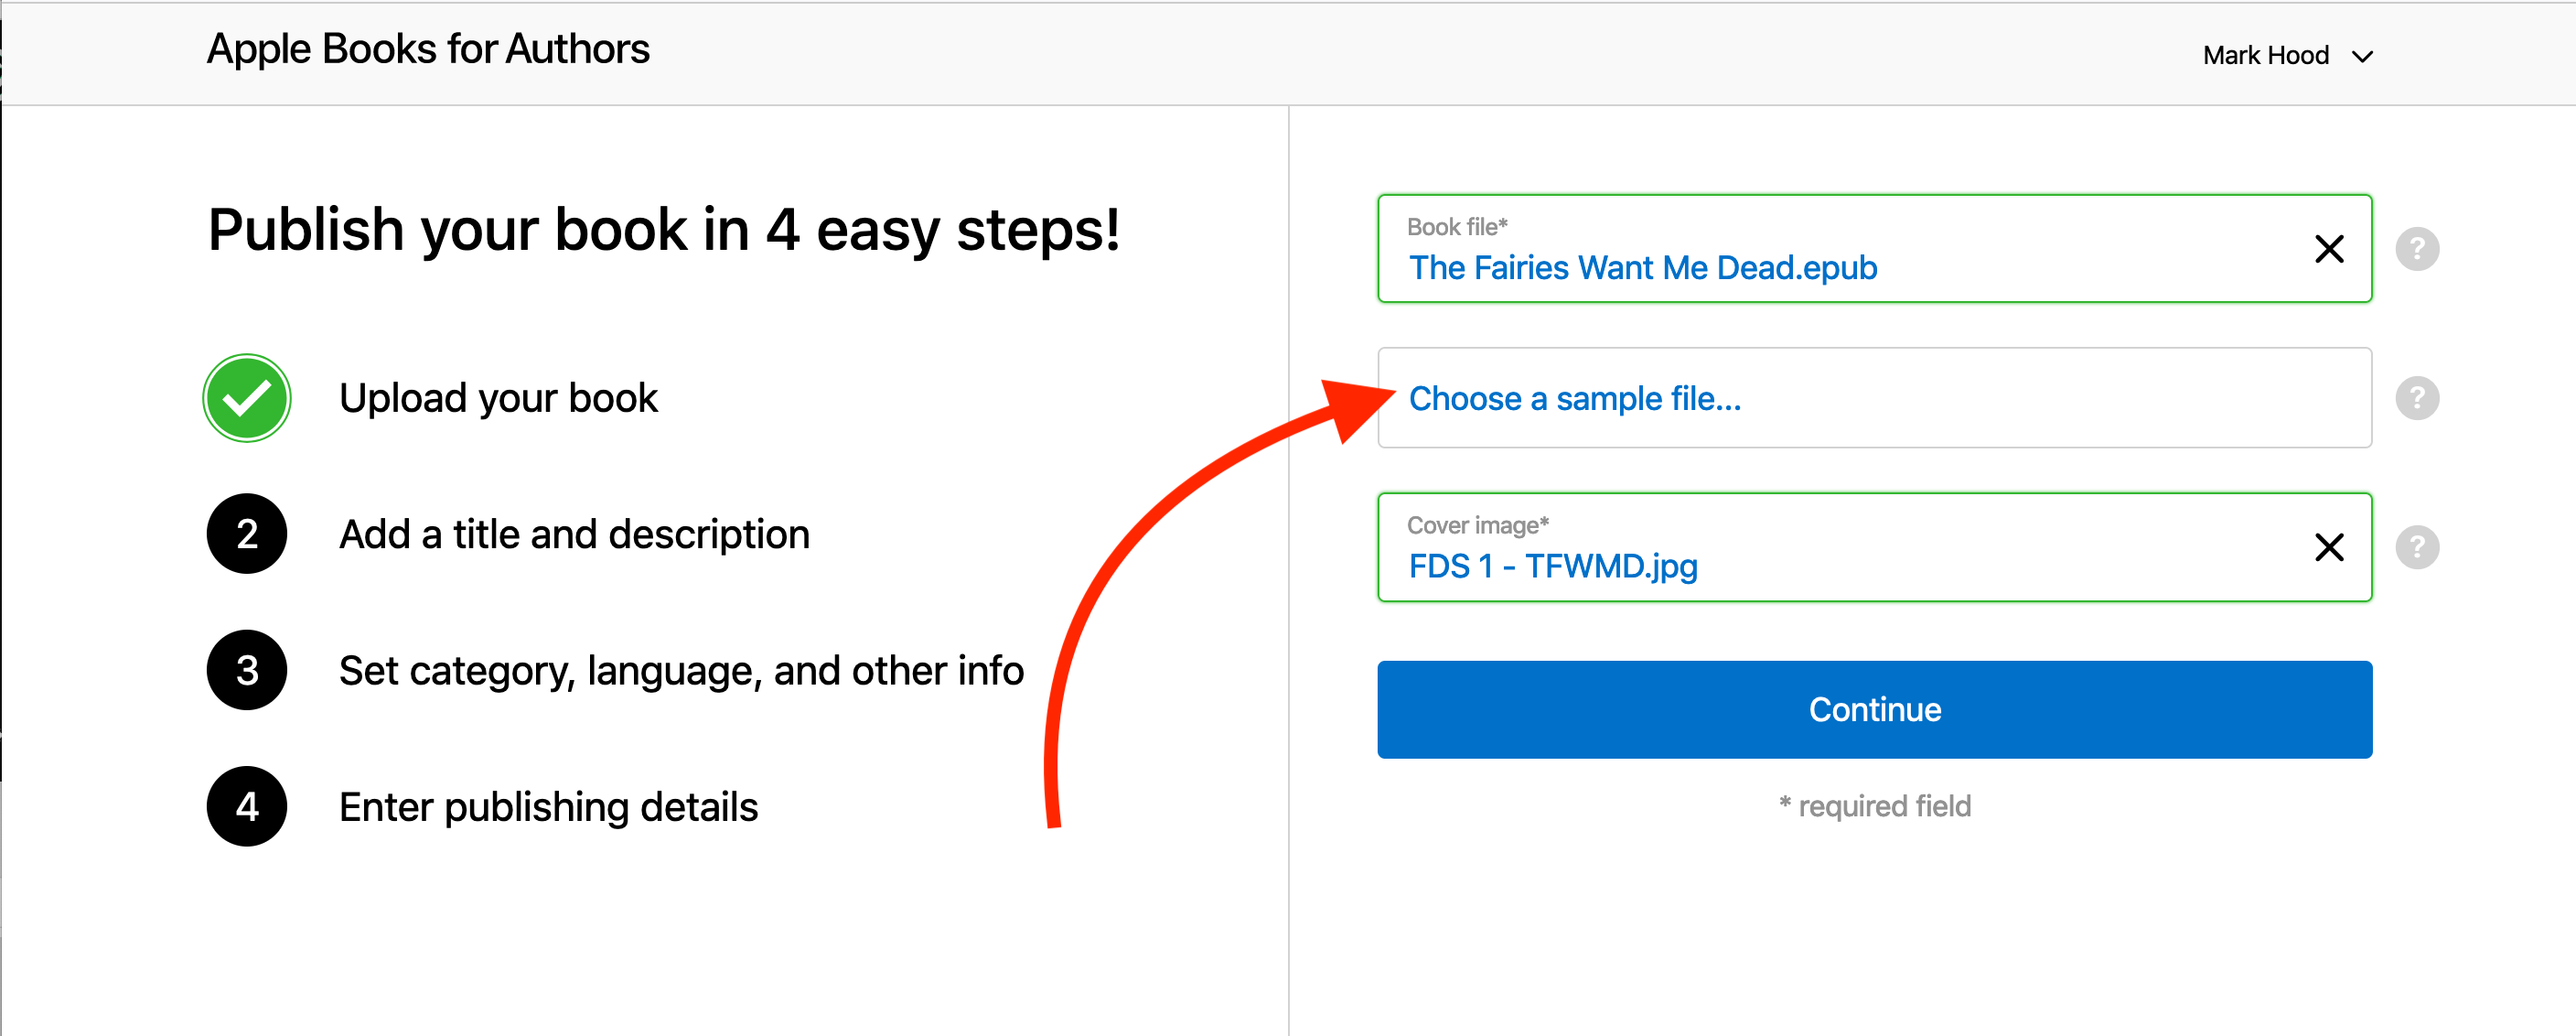
In contrast to Google which makes you do everything else first, Apple wants the files right away:
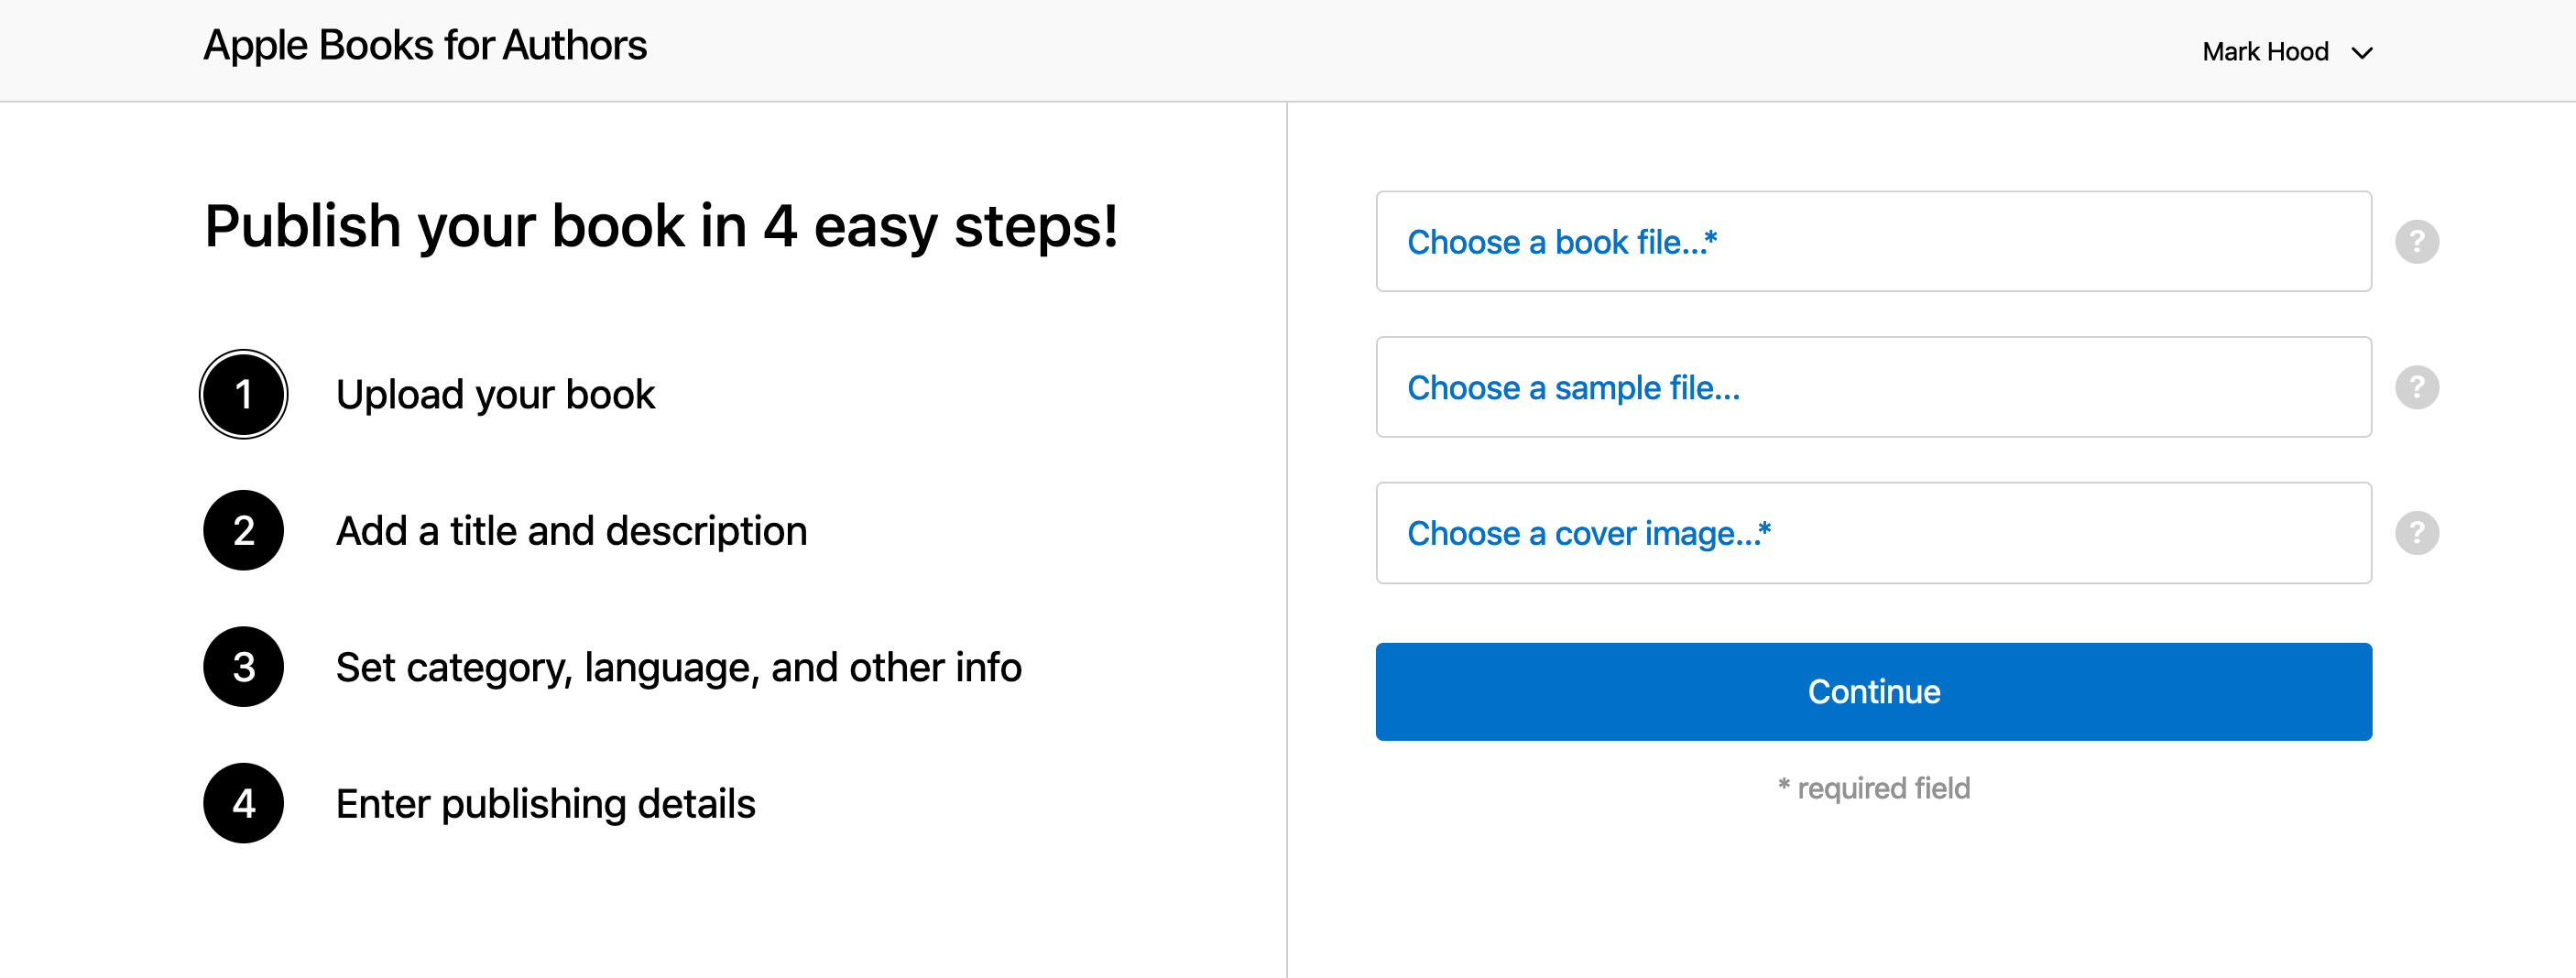
Even better, it validates them immediately, so you know if there’s a problem. If all is green, carry on. I chose not to include a sample, since Apple will create one themselves, even though it doesn’t mention it. If you have a specific portion you wish to share, perhaps ending on a cliffhanger, then you can choose to do so here.
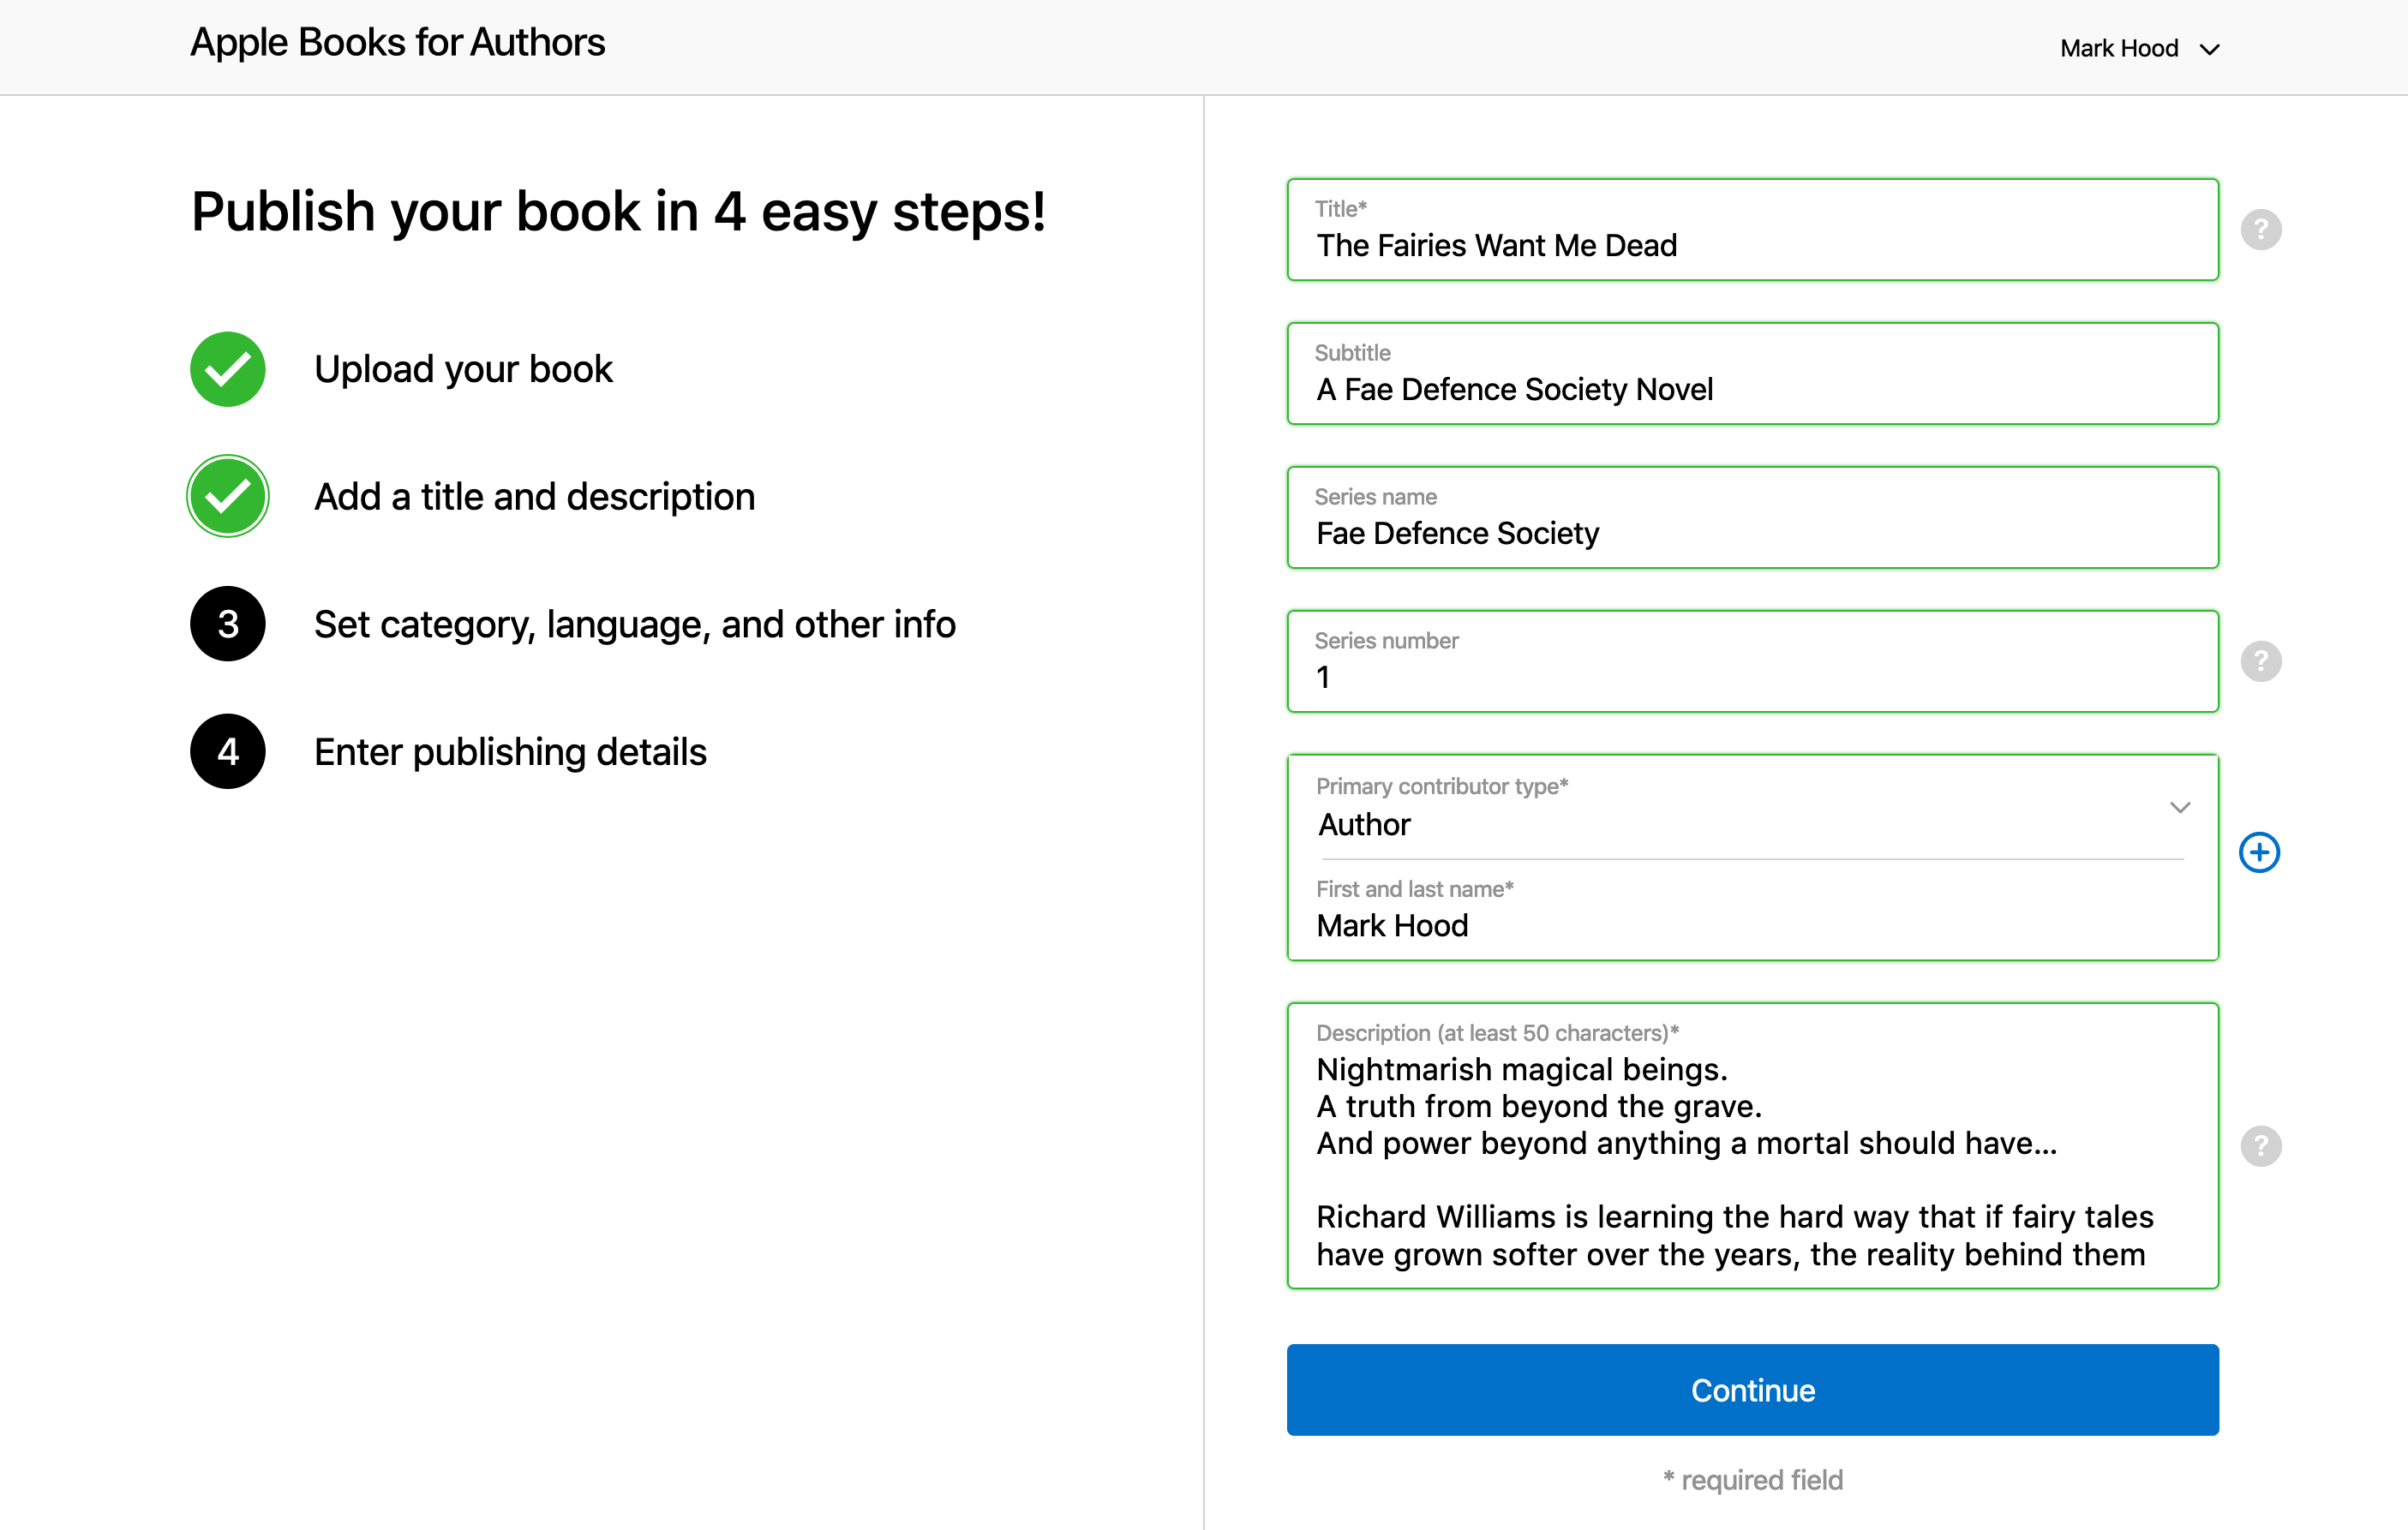
You can’t use formatting in the description, so bear that in mind.
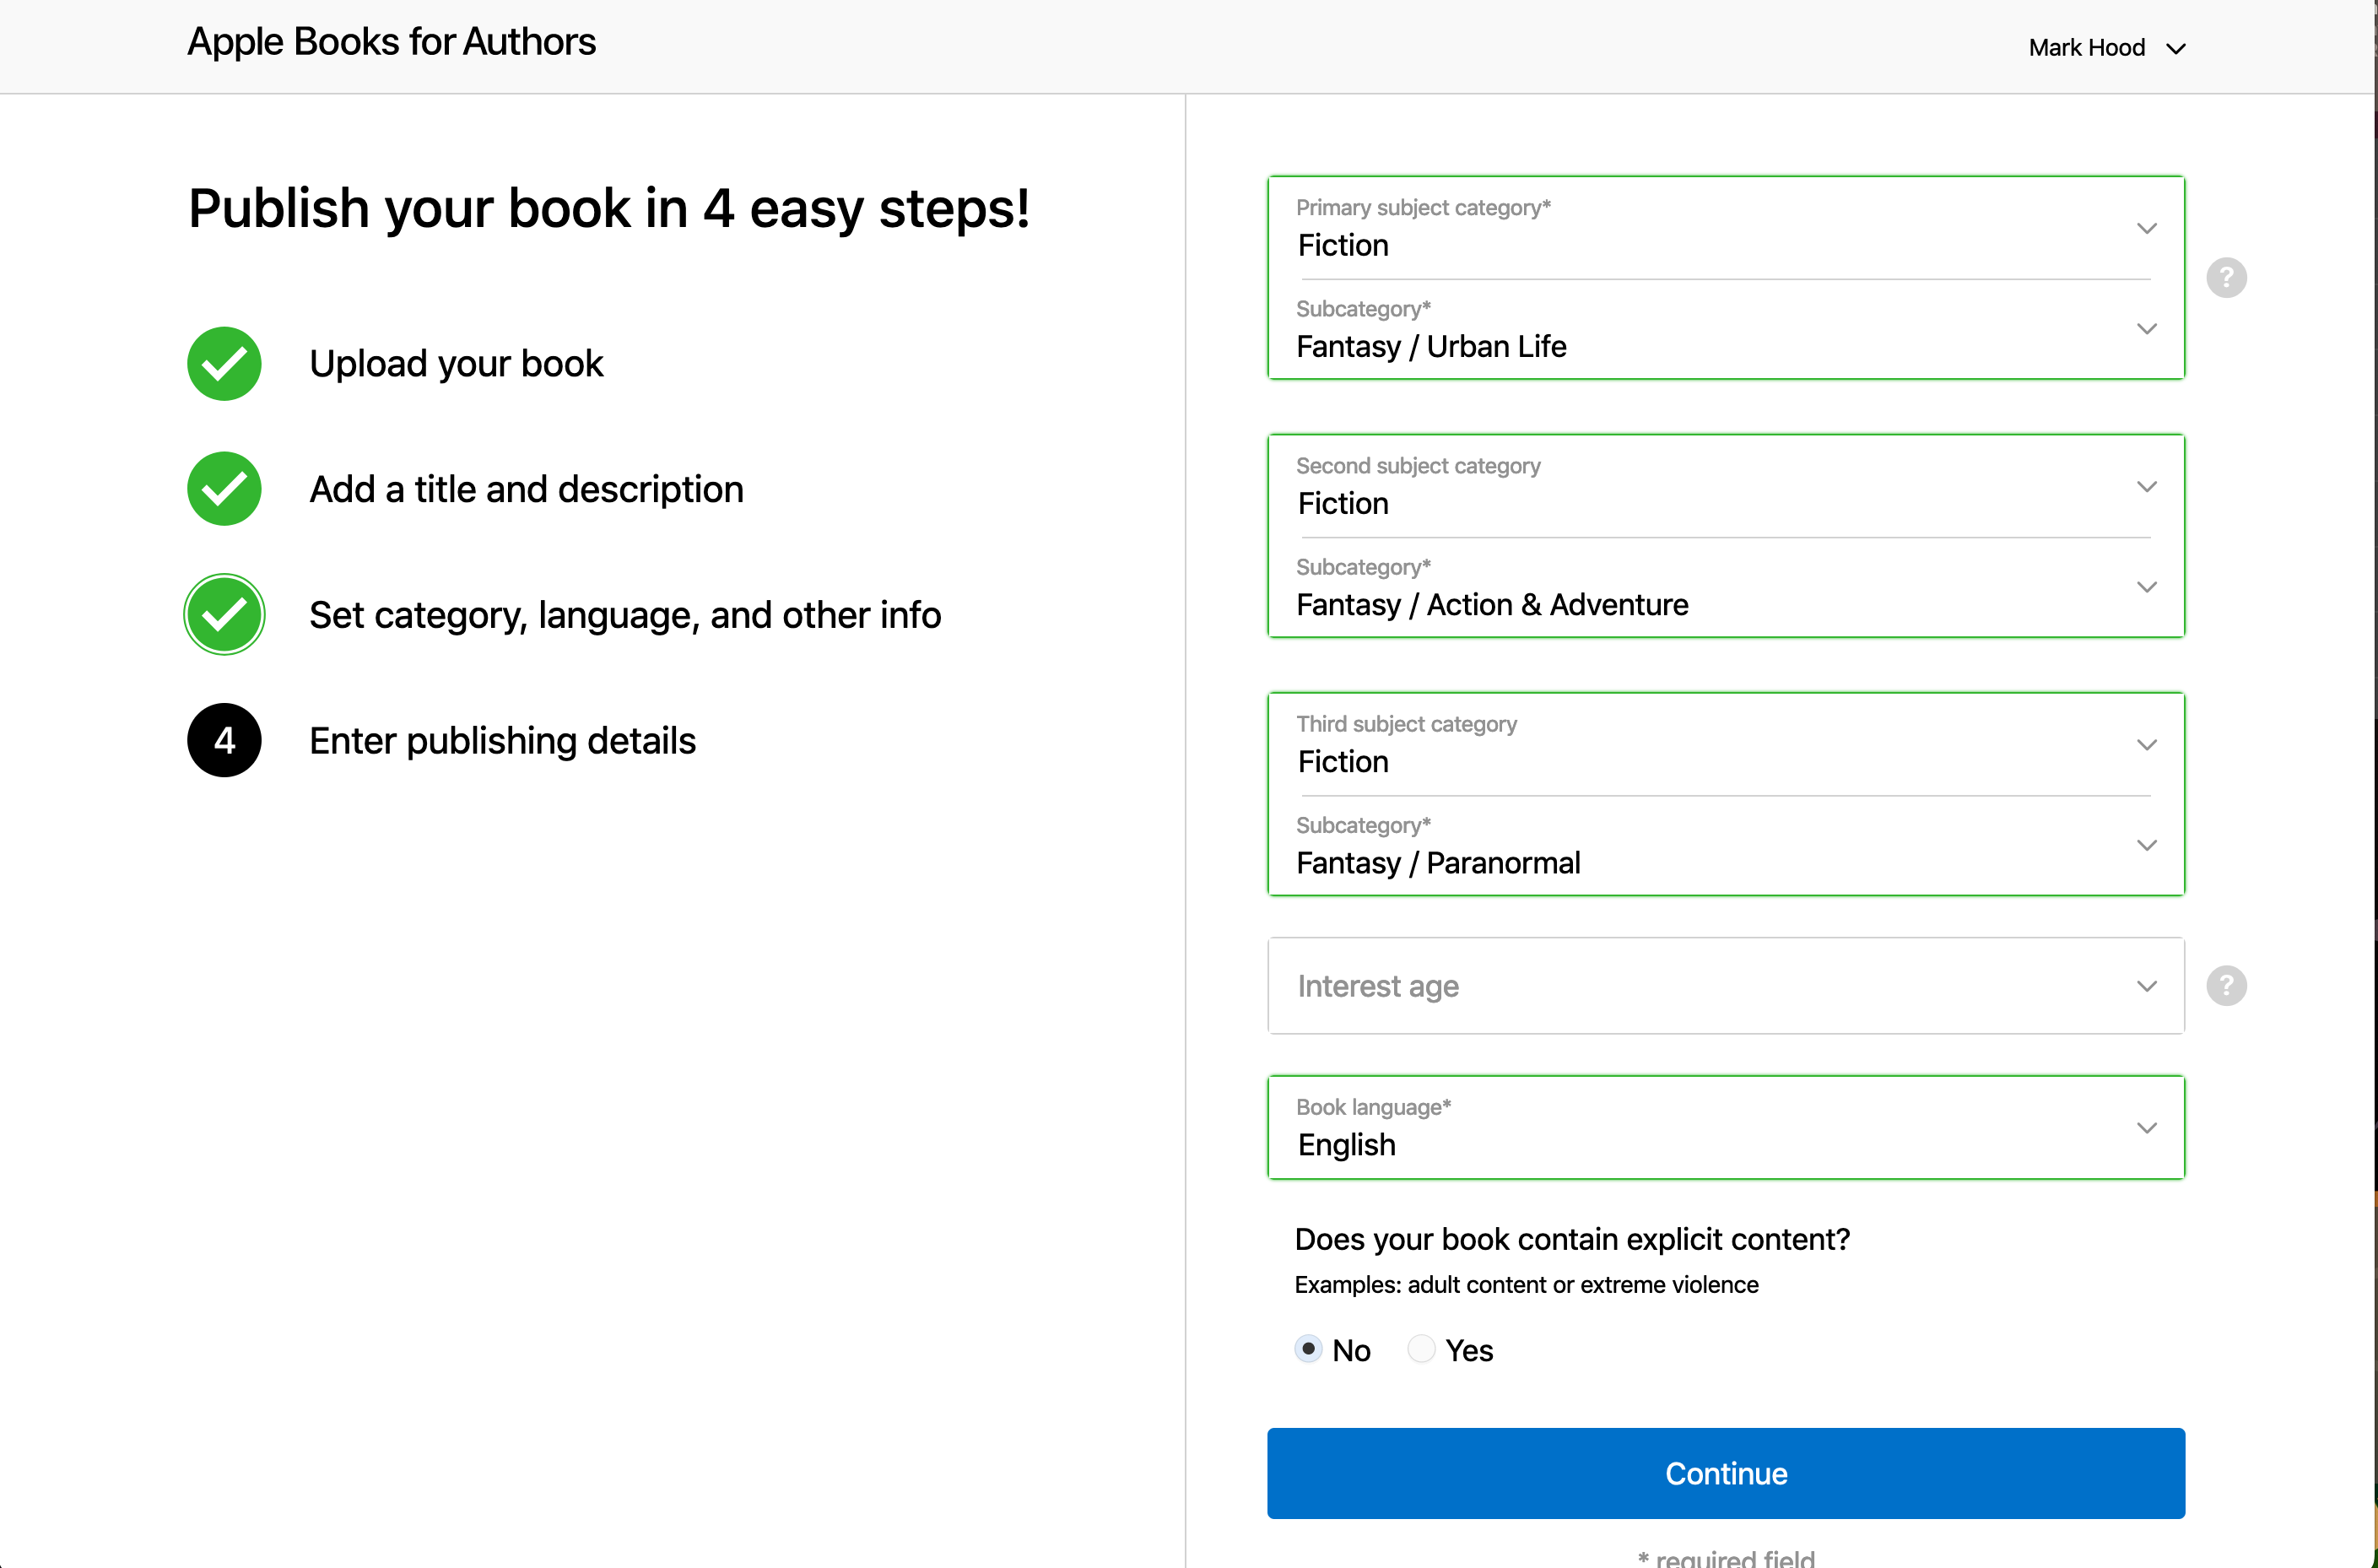
Now you pick your categories, language and whether it’s for children or not:
And then your publishing info. If you don’t have a publisher name, you can use your own name. Mine isn’t set up as a company, by the way - I just picked a name to use that wasn’t already taken.
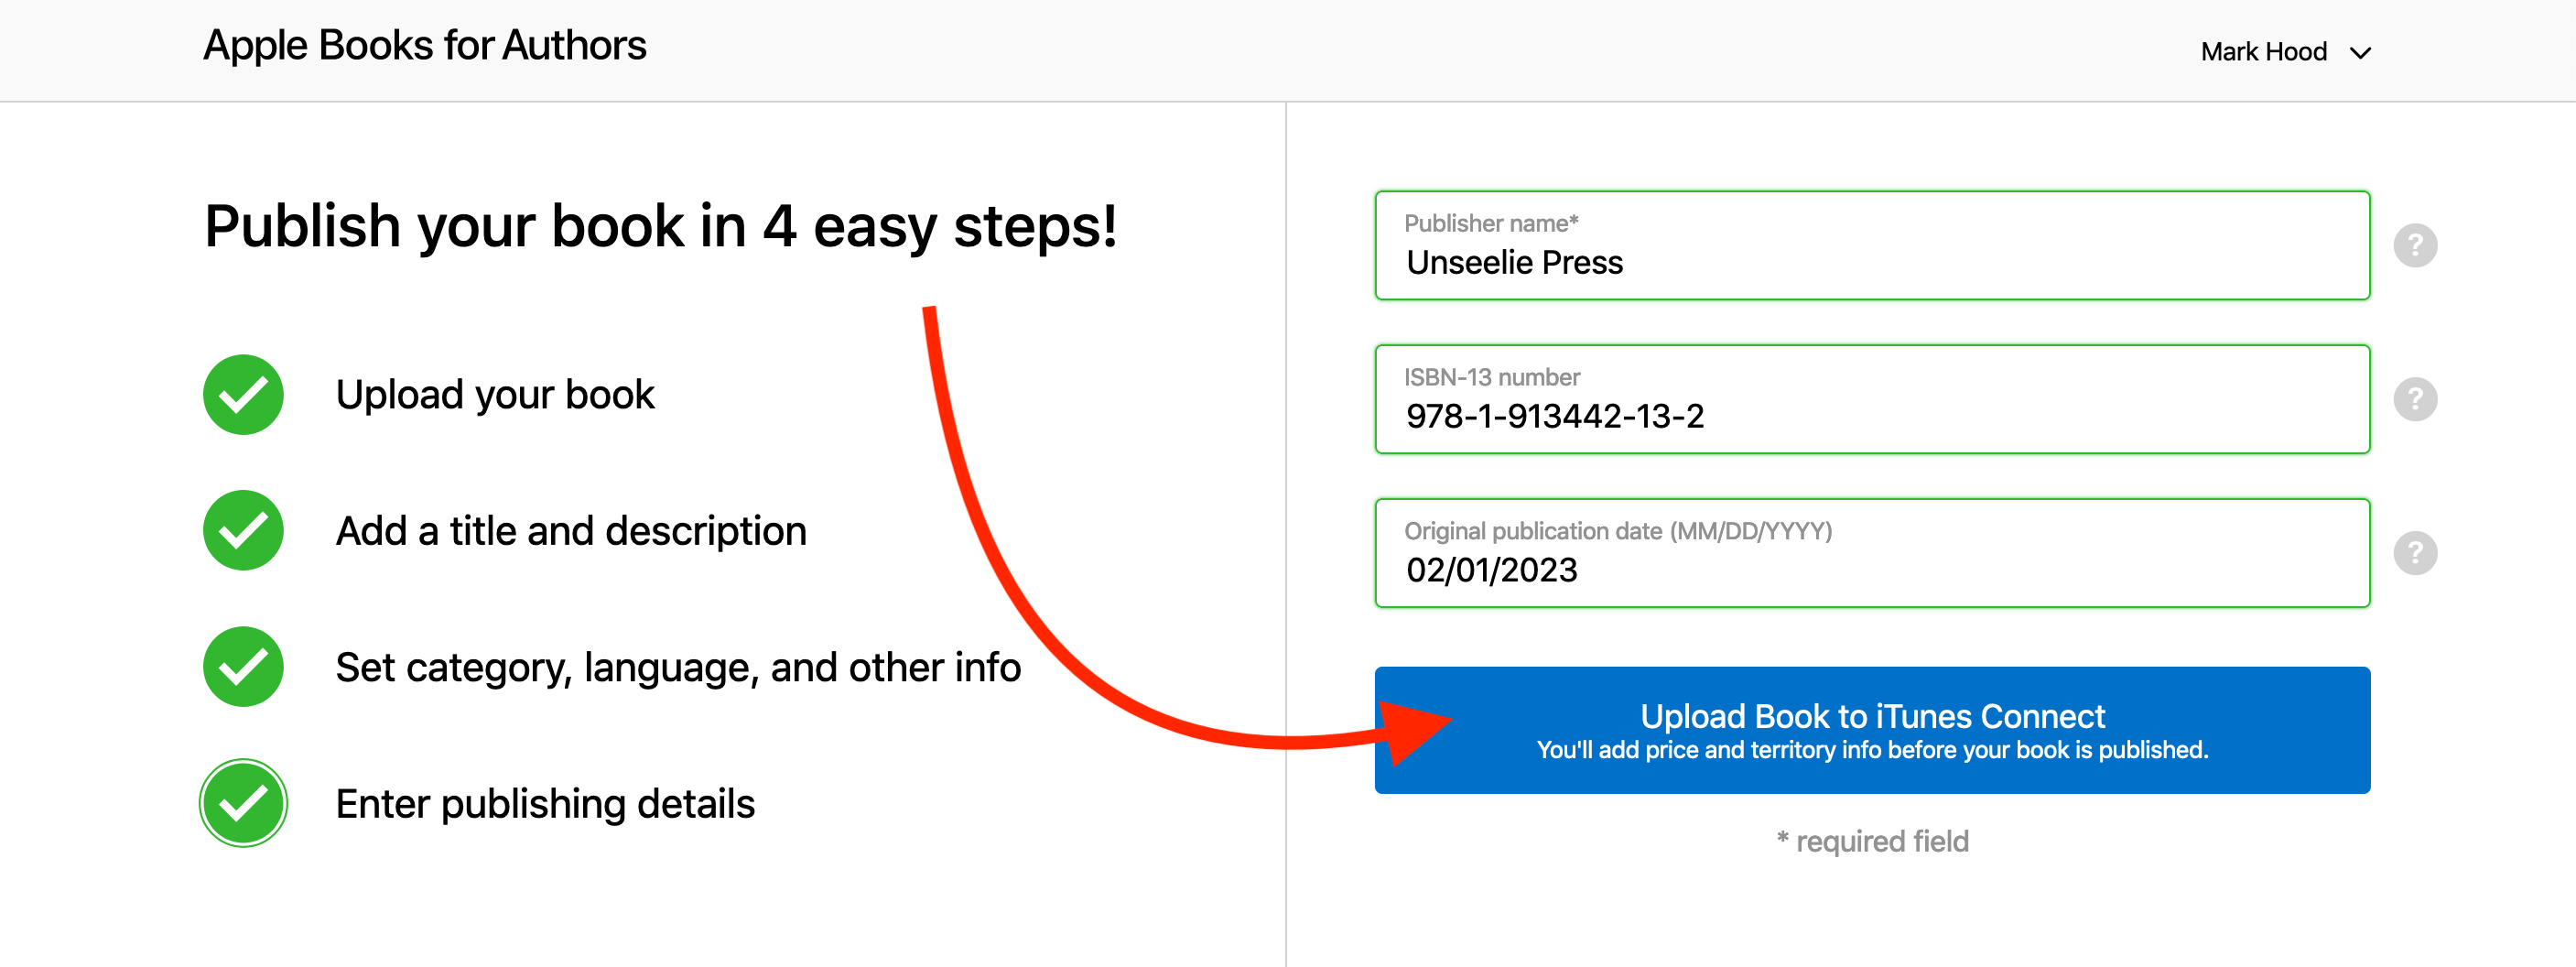
Hit upload, and wait a minute or seven for it to process.
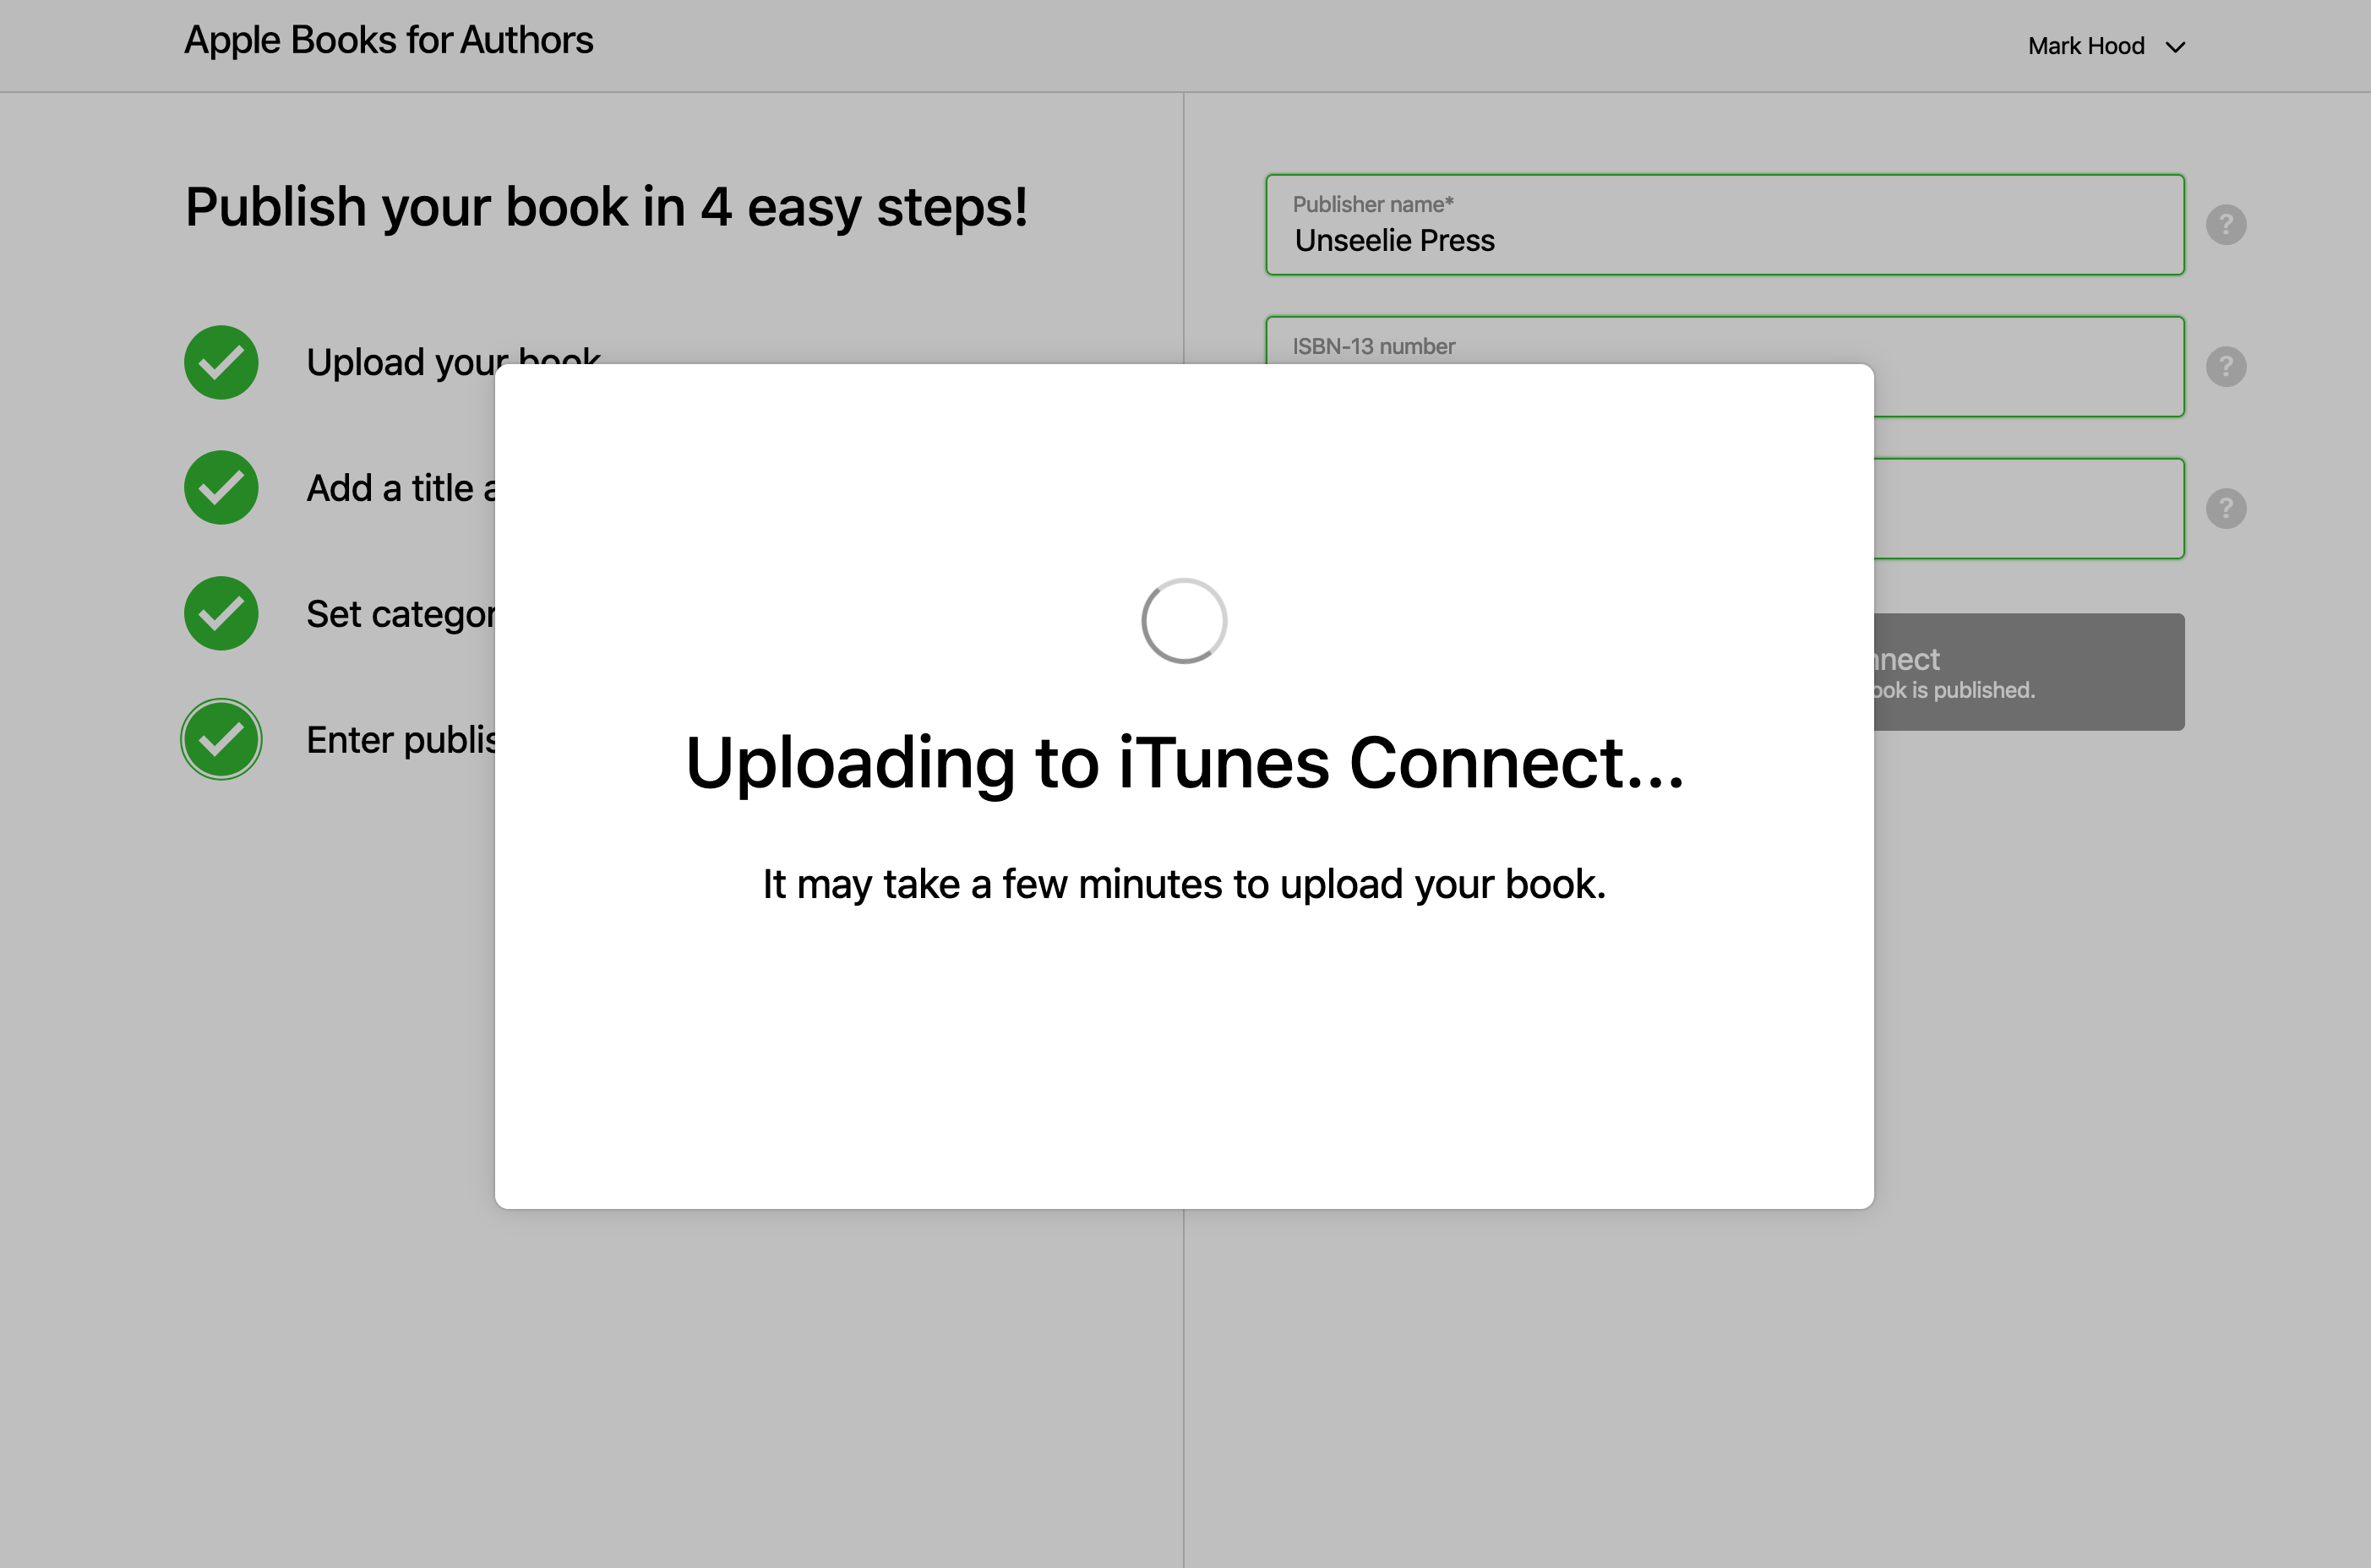
Then you need to go somewhere else entirely to finish the job, luckily it can send you straight there:
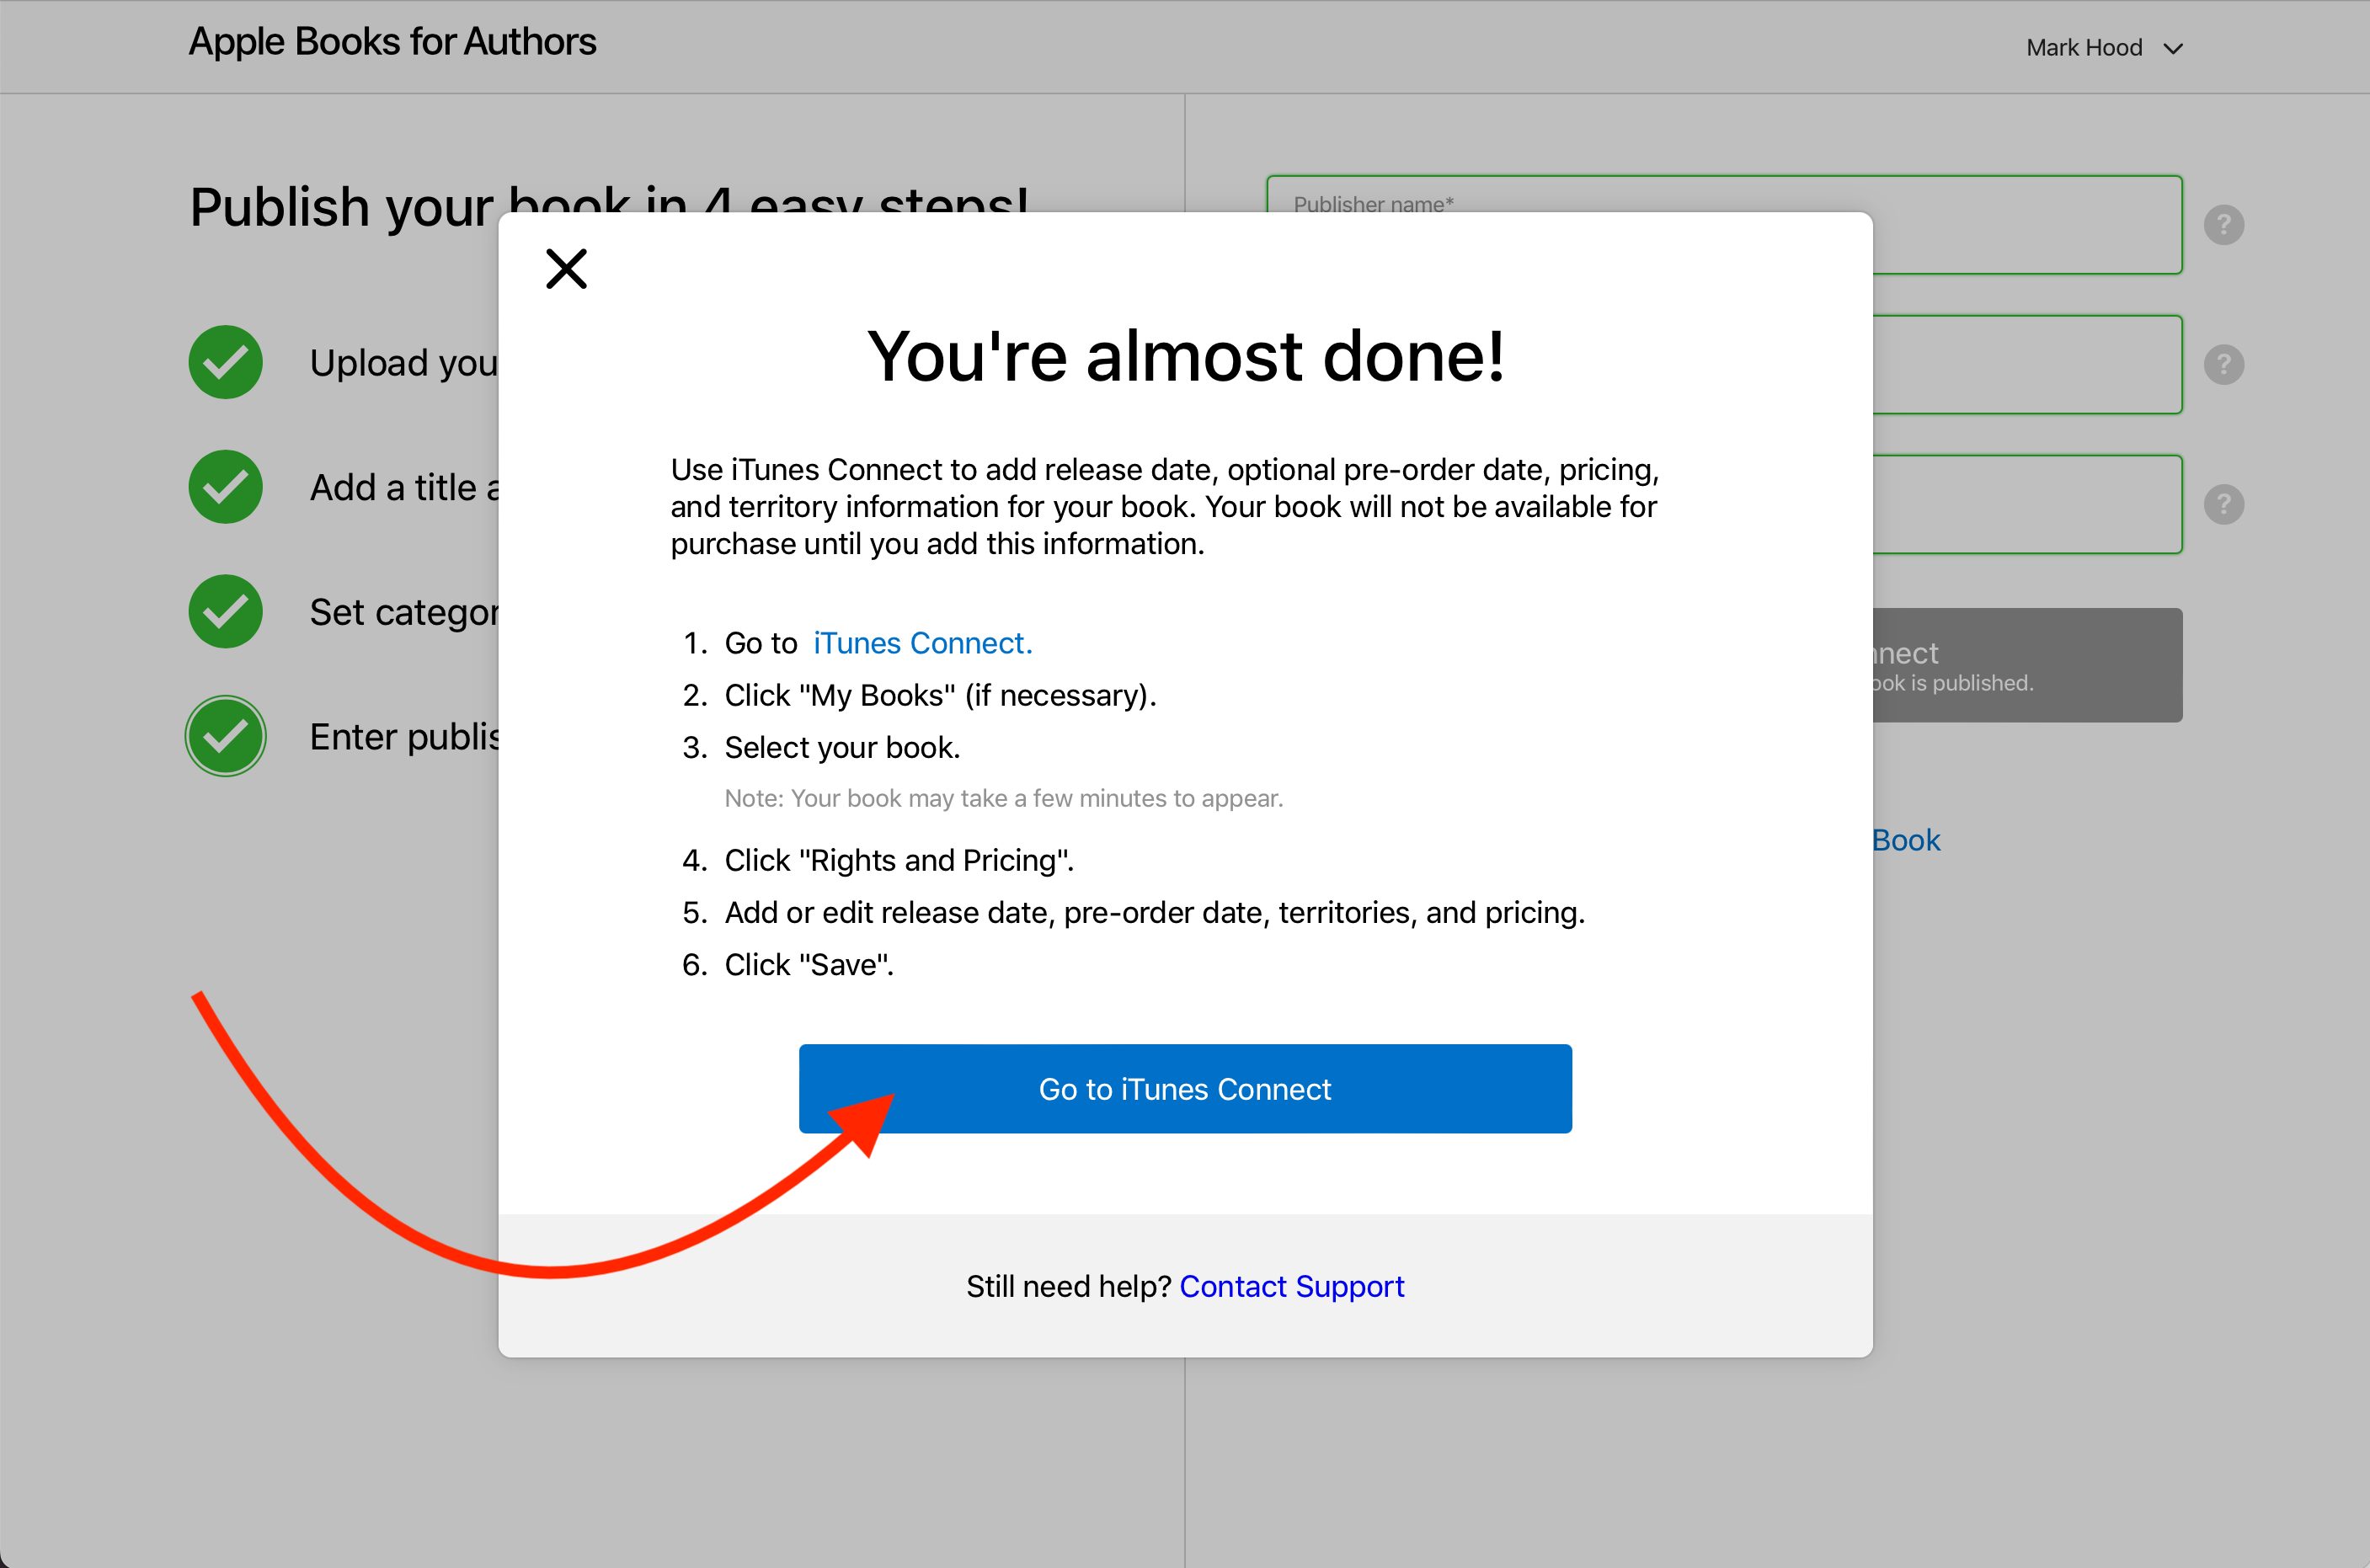
My new book didn’t show up right away, so you might need to wait (as it says) a few minutes.
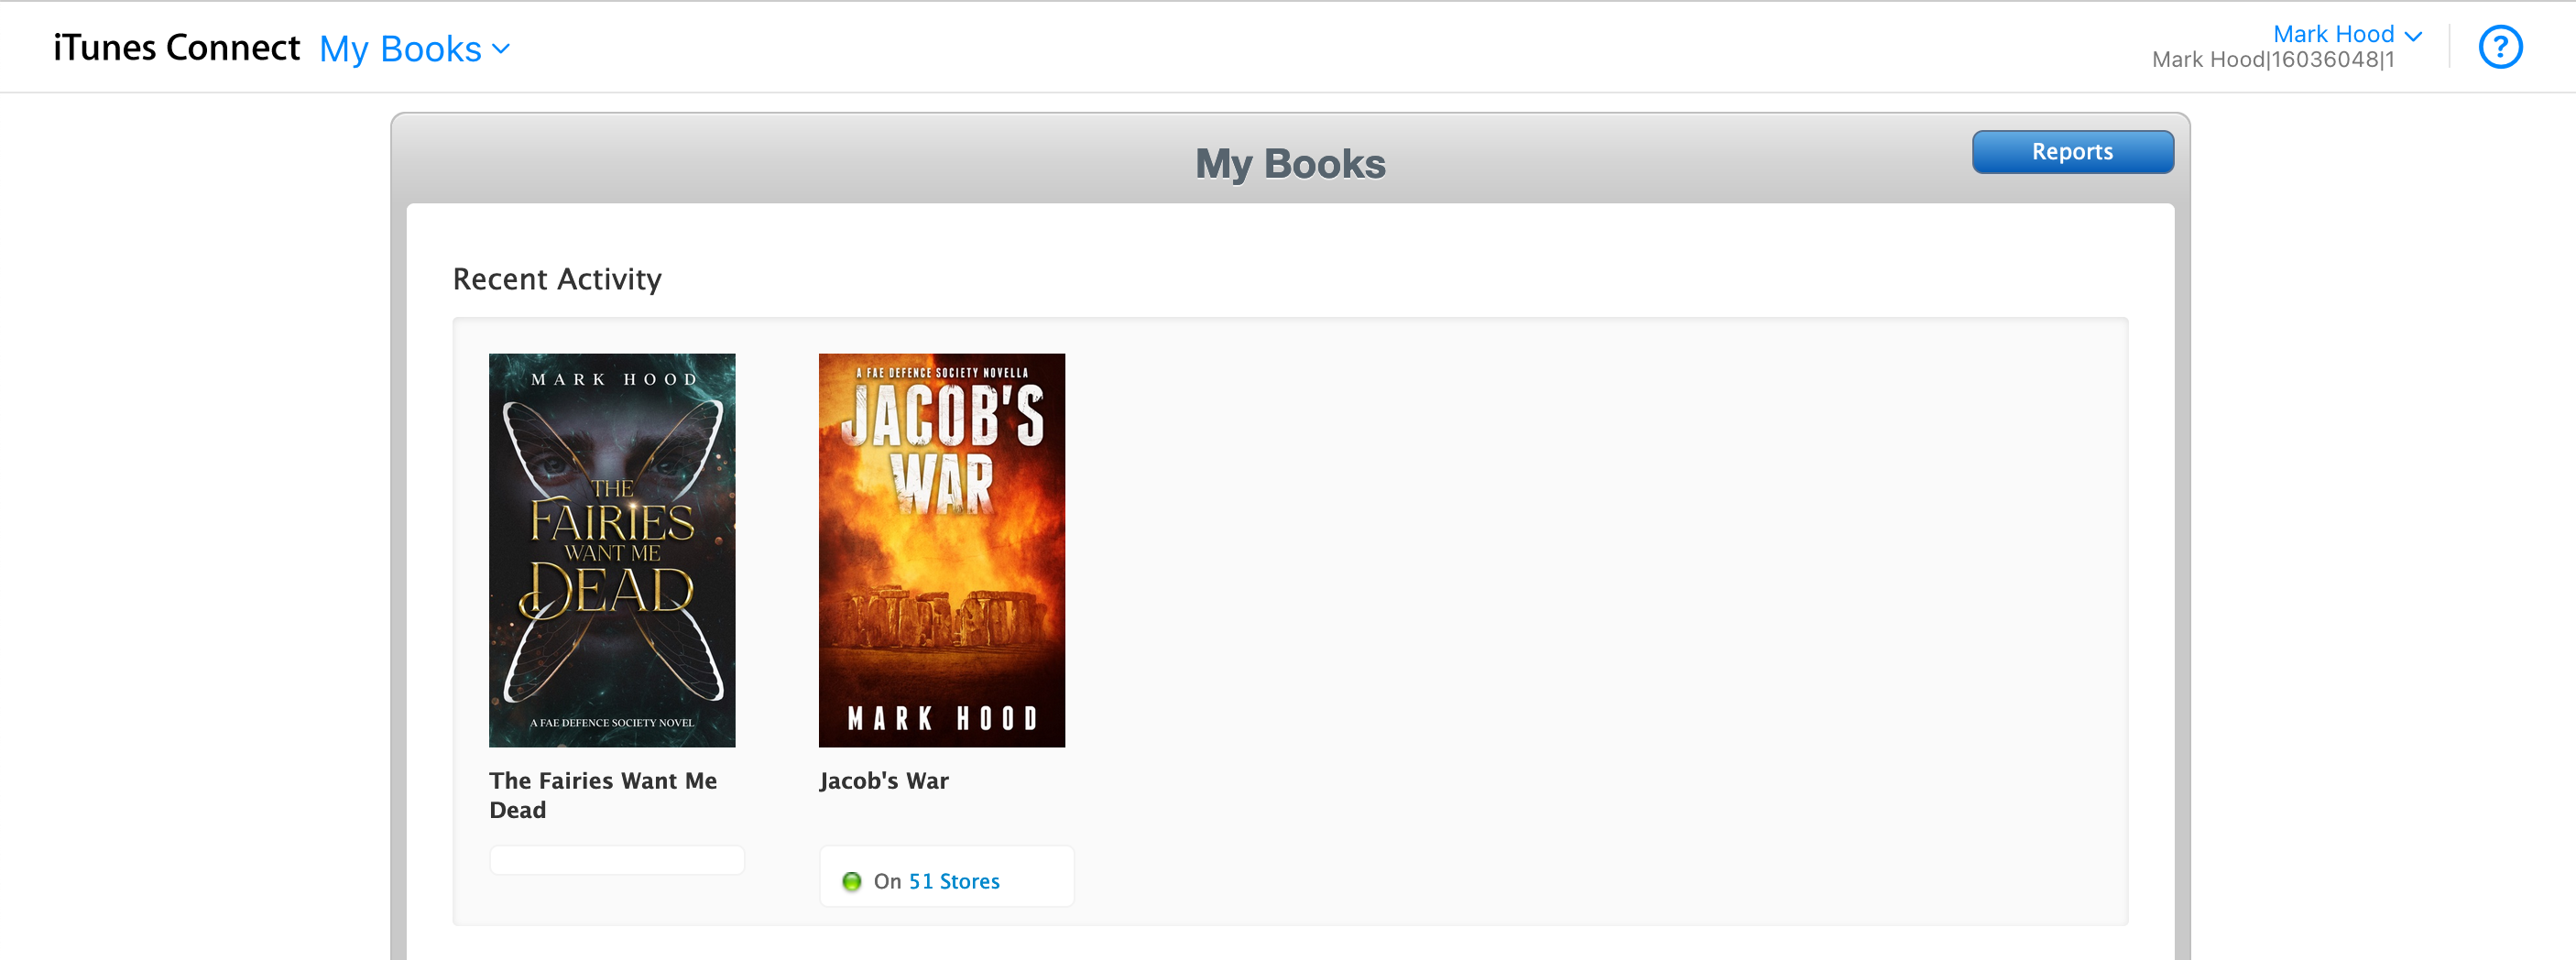
Once it does, you can click on it and enter the necessary information. Check the info you entered already is OK, and hit ‘Rights and Pricing’
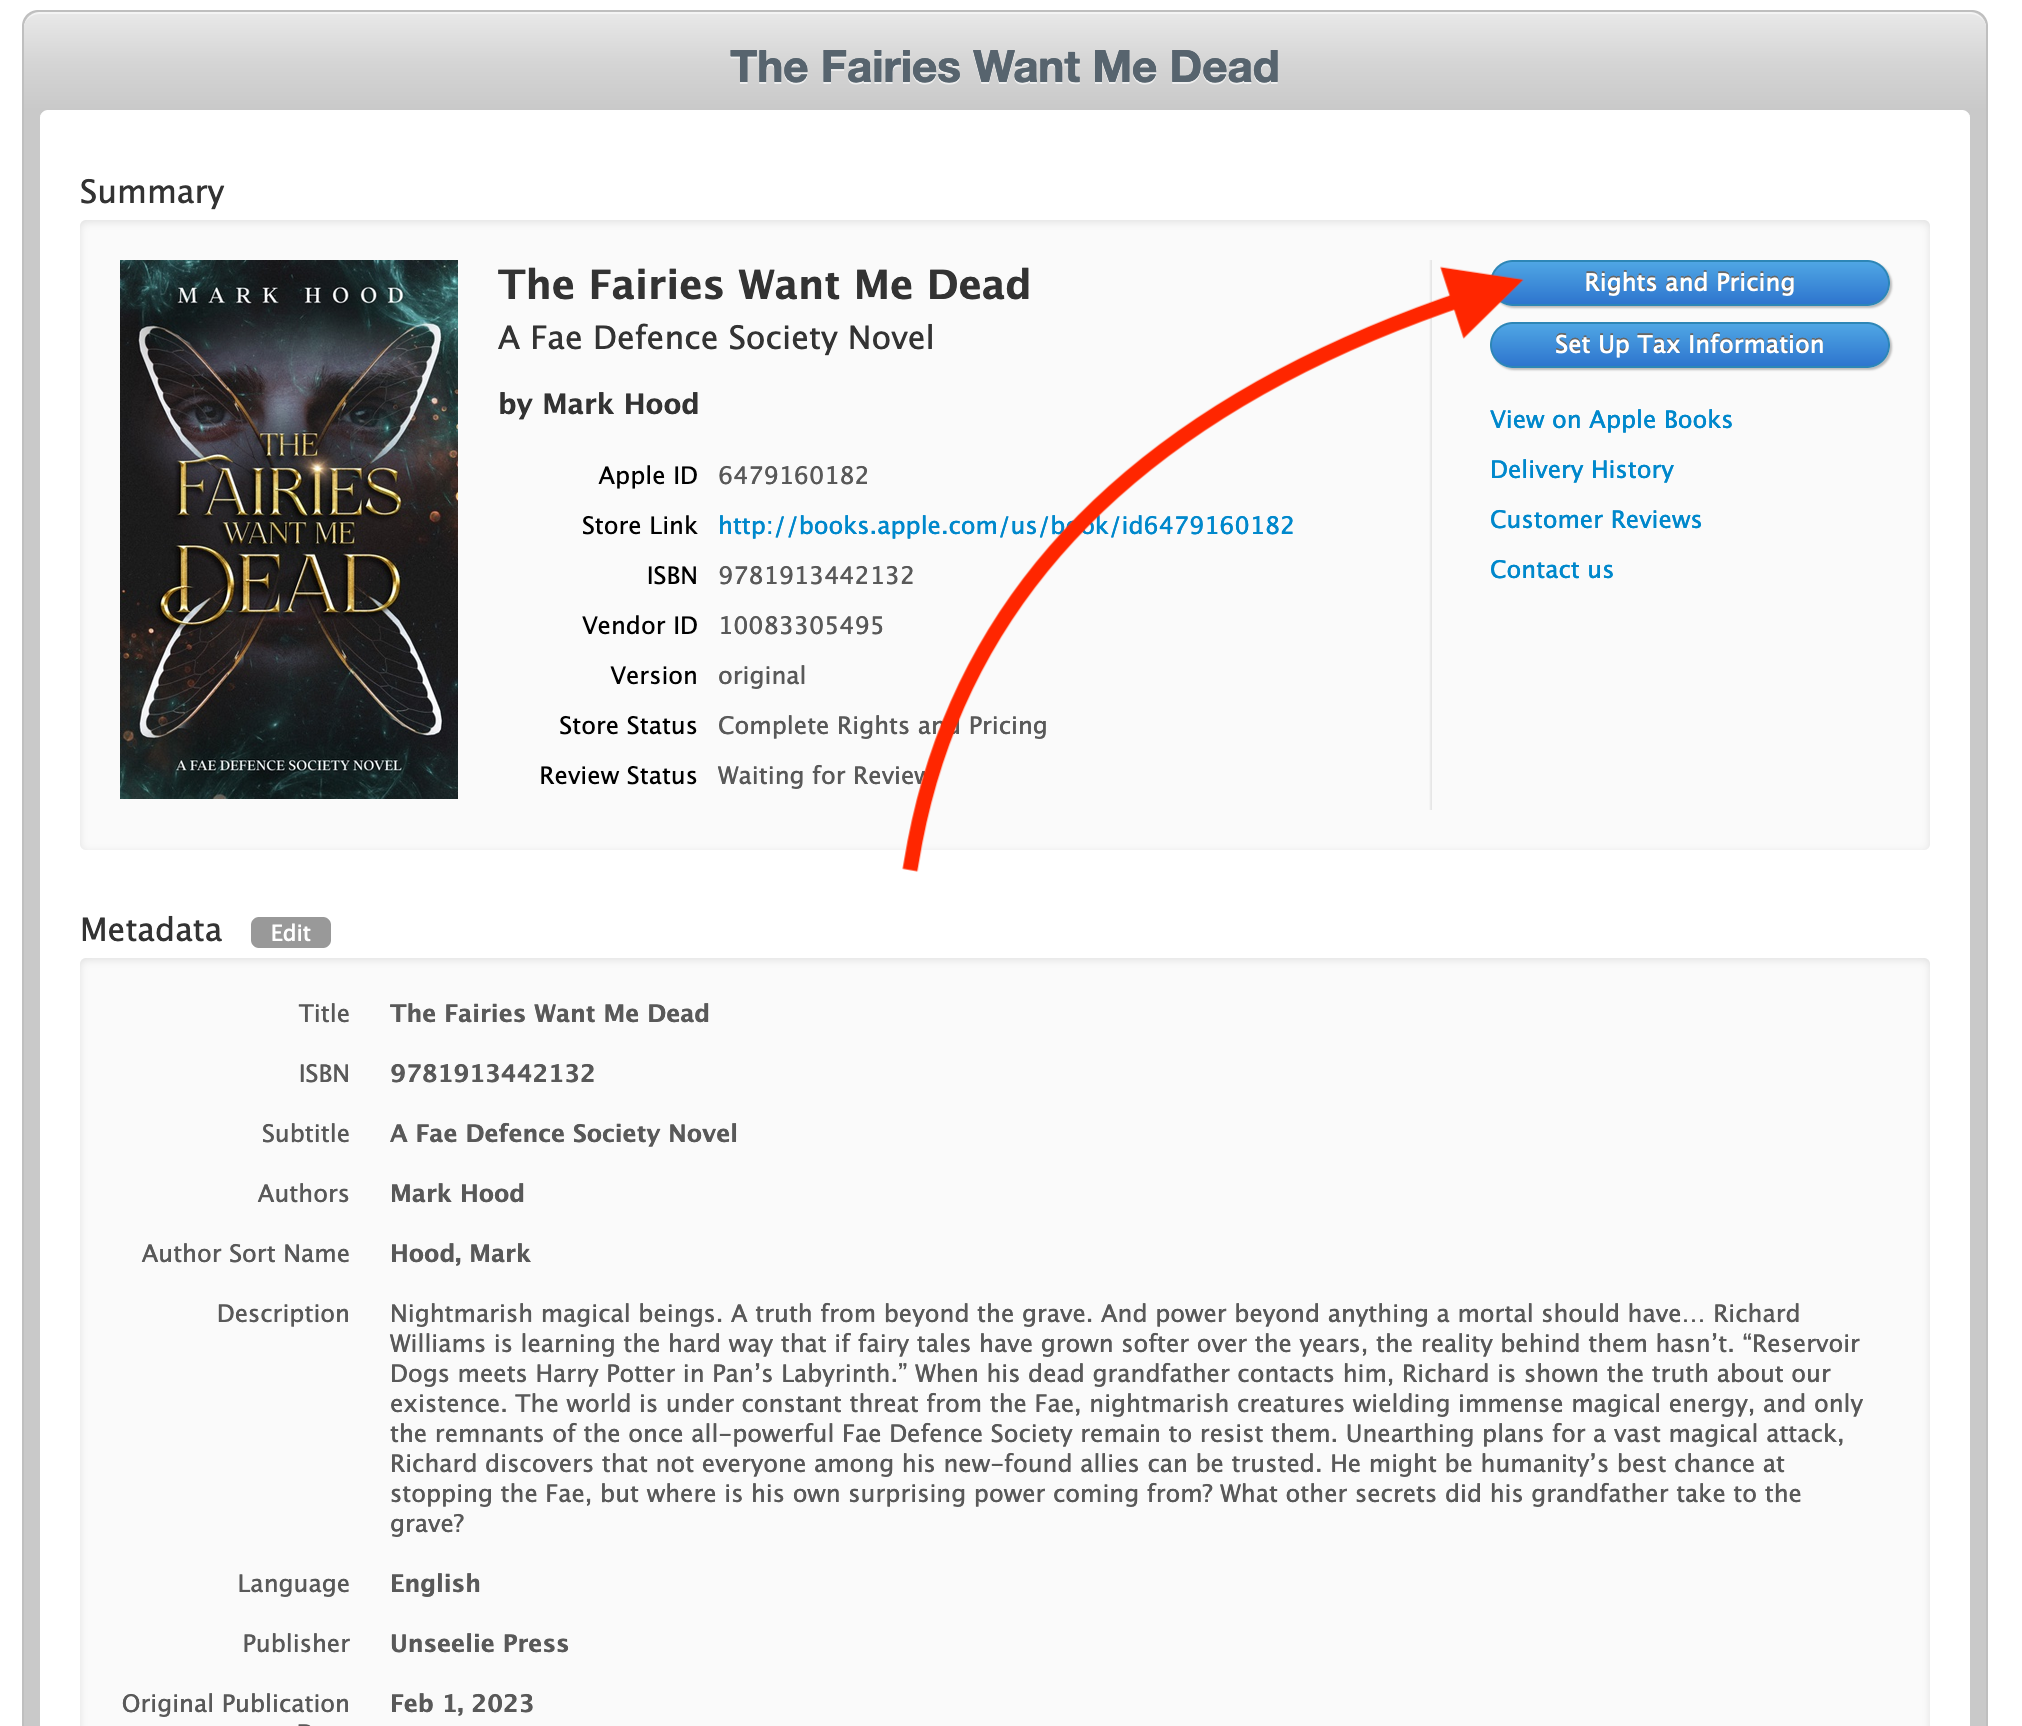
Add new countries / regions:
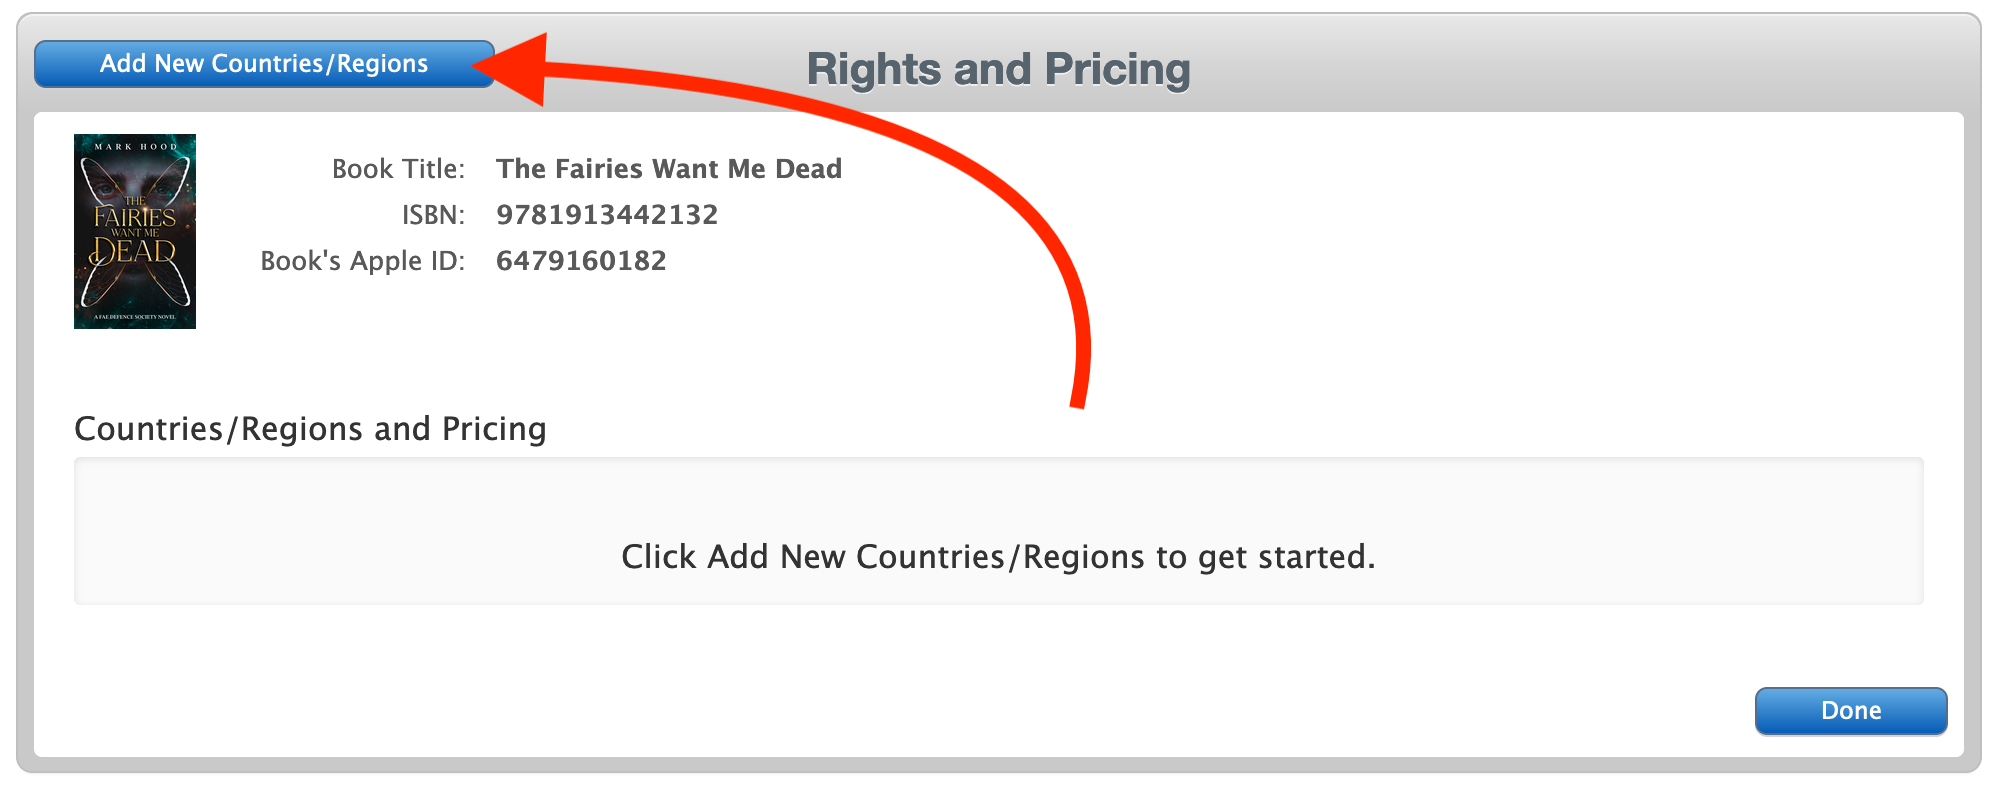
You can choose DRM or not (I chose not) and a release date. Note that you can’t set it in the past, so the best you can do is pick today’s date. If you want it in the future, do so here. Note that it’s best not to click in either box. I accidentally did and ended up having to pick tomorrow as my release date, since it complained the pre-order date had to be earlier.
You will pick a ‘base currency’ for your pricing - I tend to pick GBP since I’m in the UK, but if most of your audience will be elsewhere you might want to change it. I also pick every country (there’s a button to do that) since I sell worldwide.
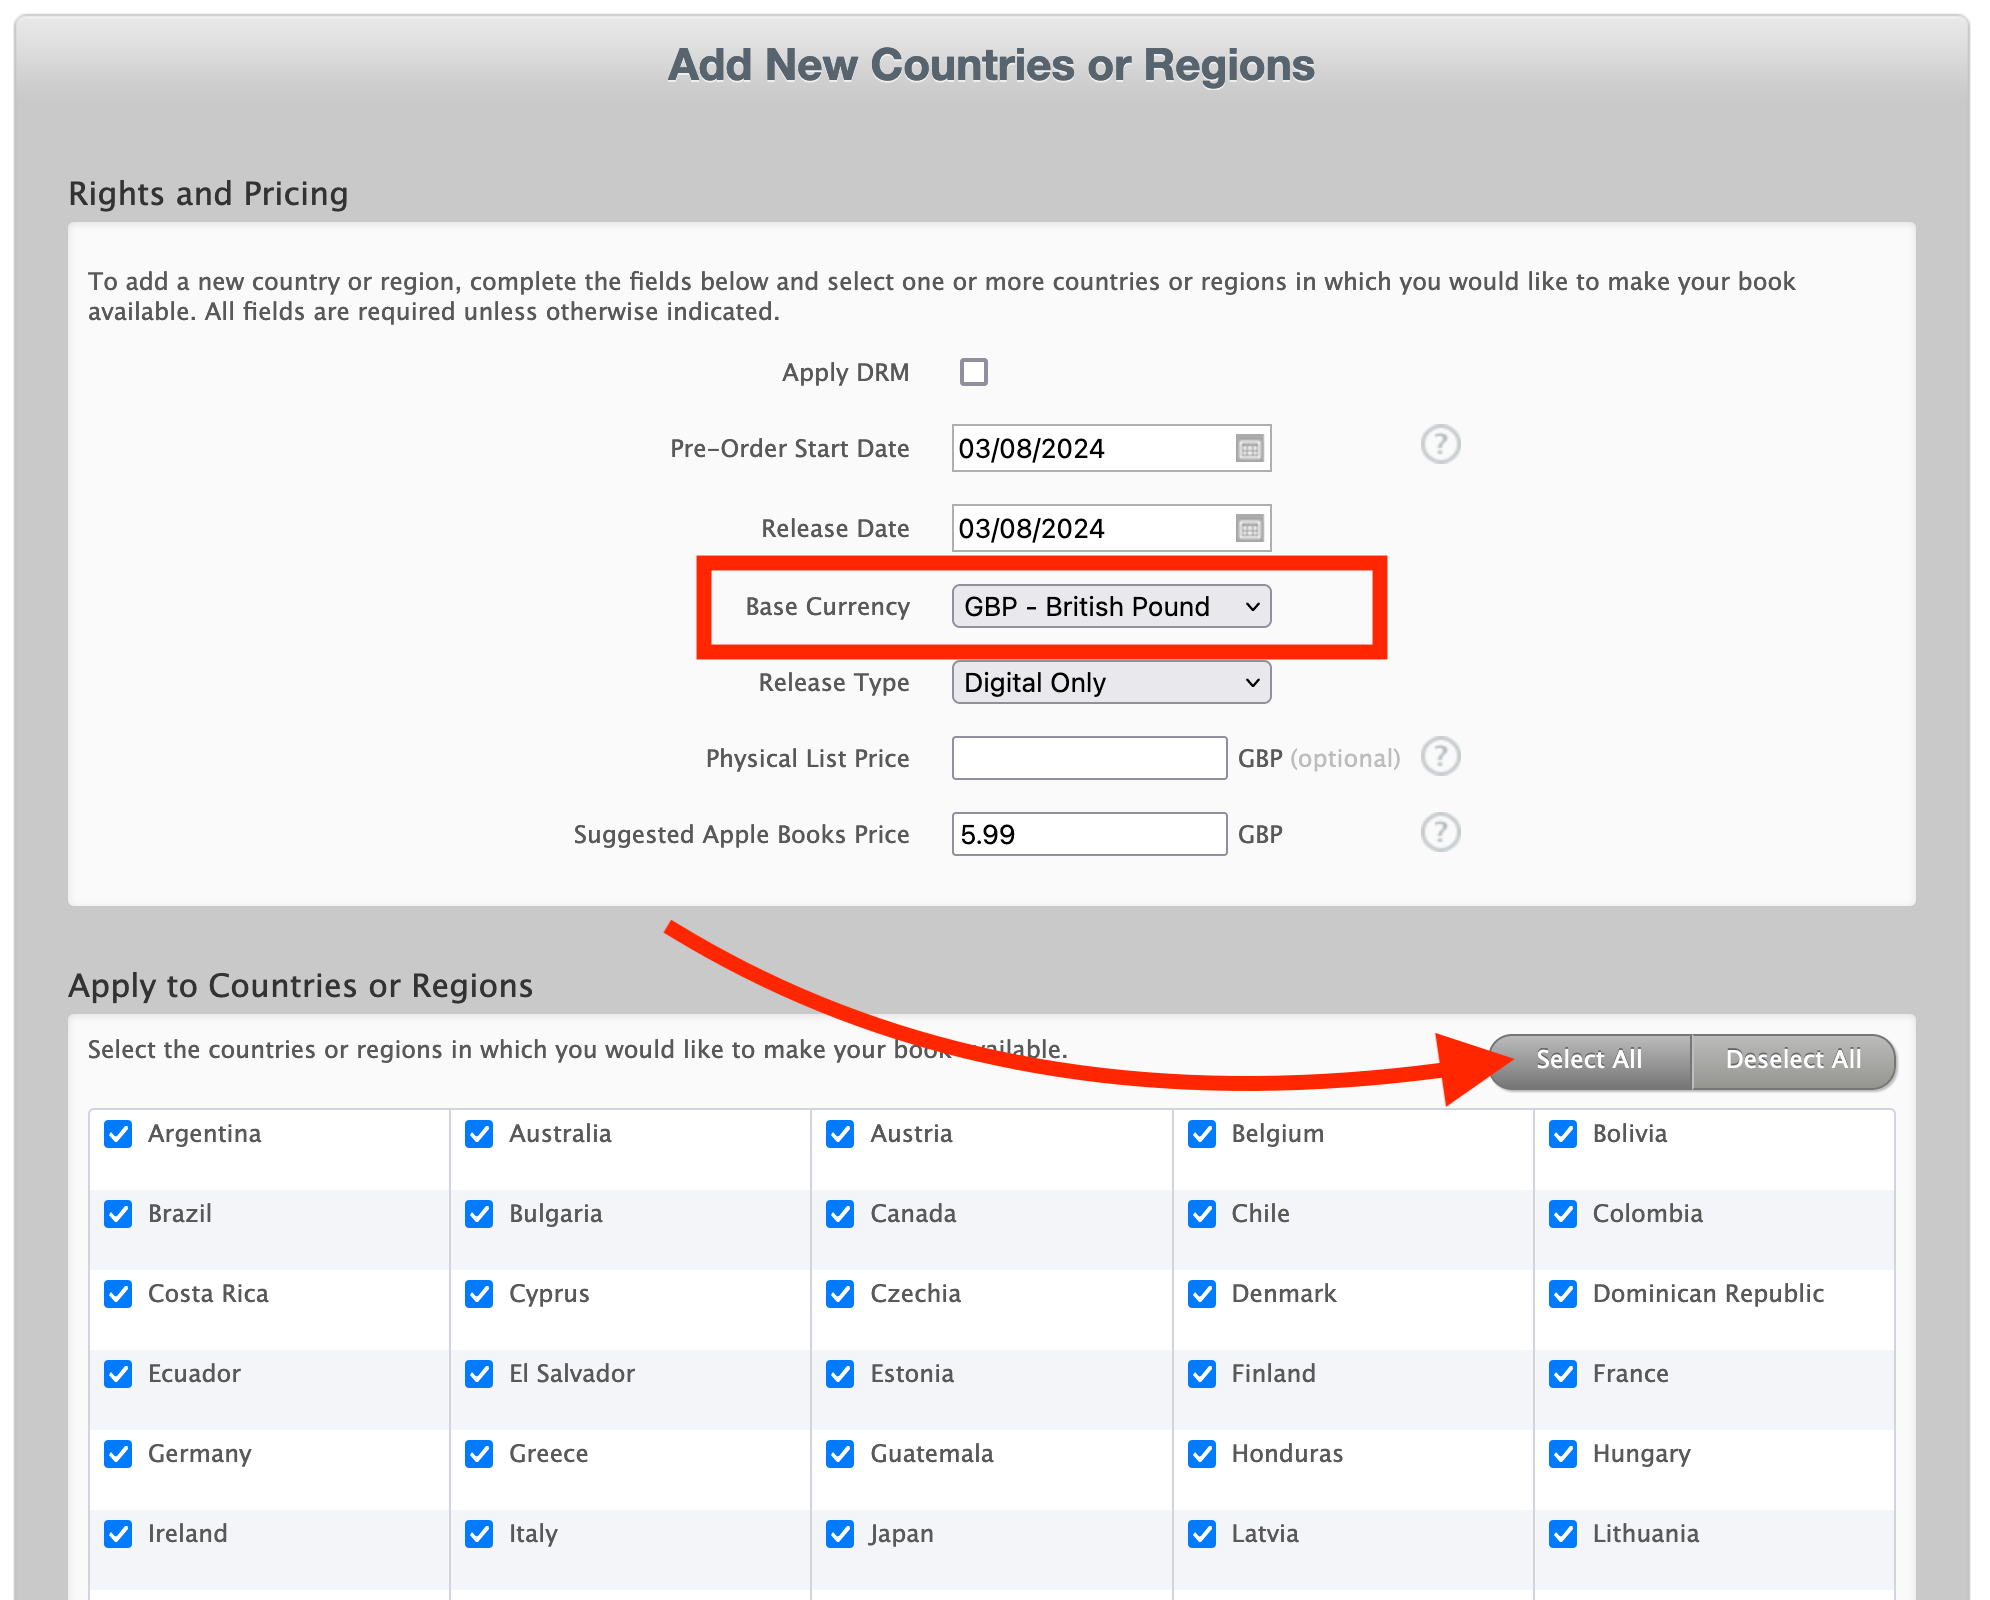
Scroll down and hit Continue. It’ll then give you the option to set the price in every country by hand. Fortunately it also pre-selects the most likely value in each country, so you don’t have to.
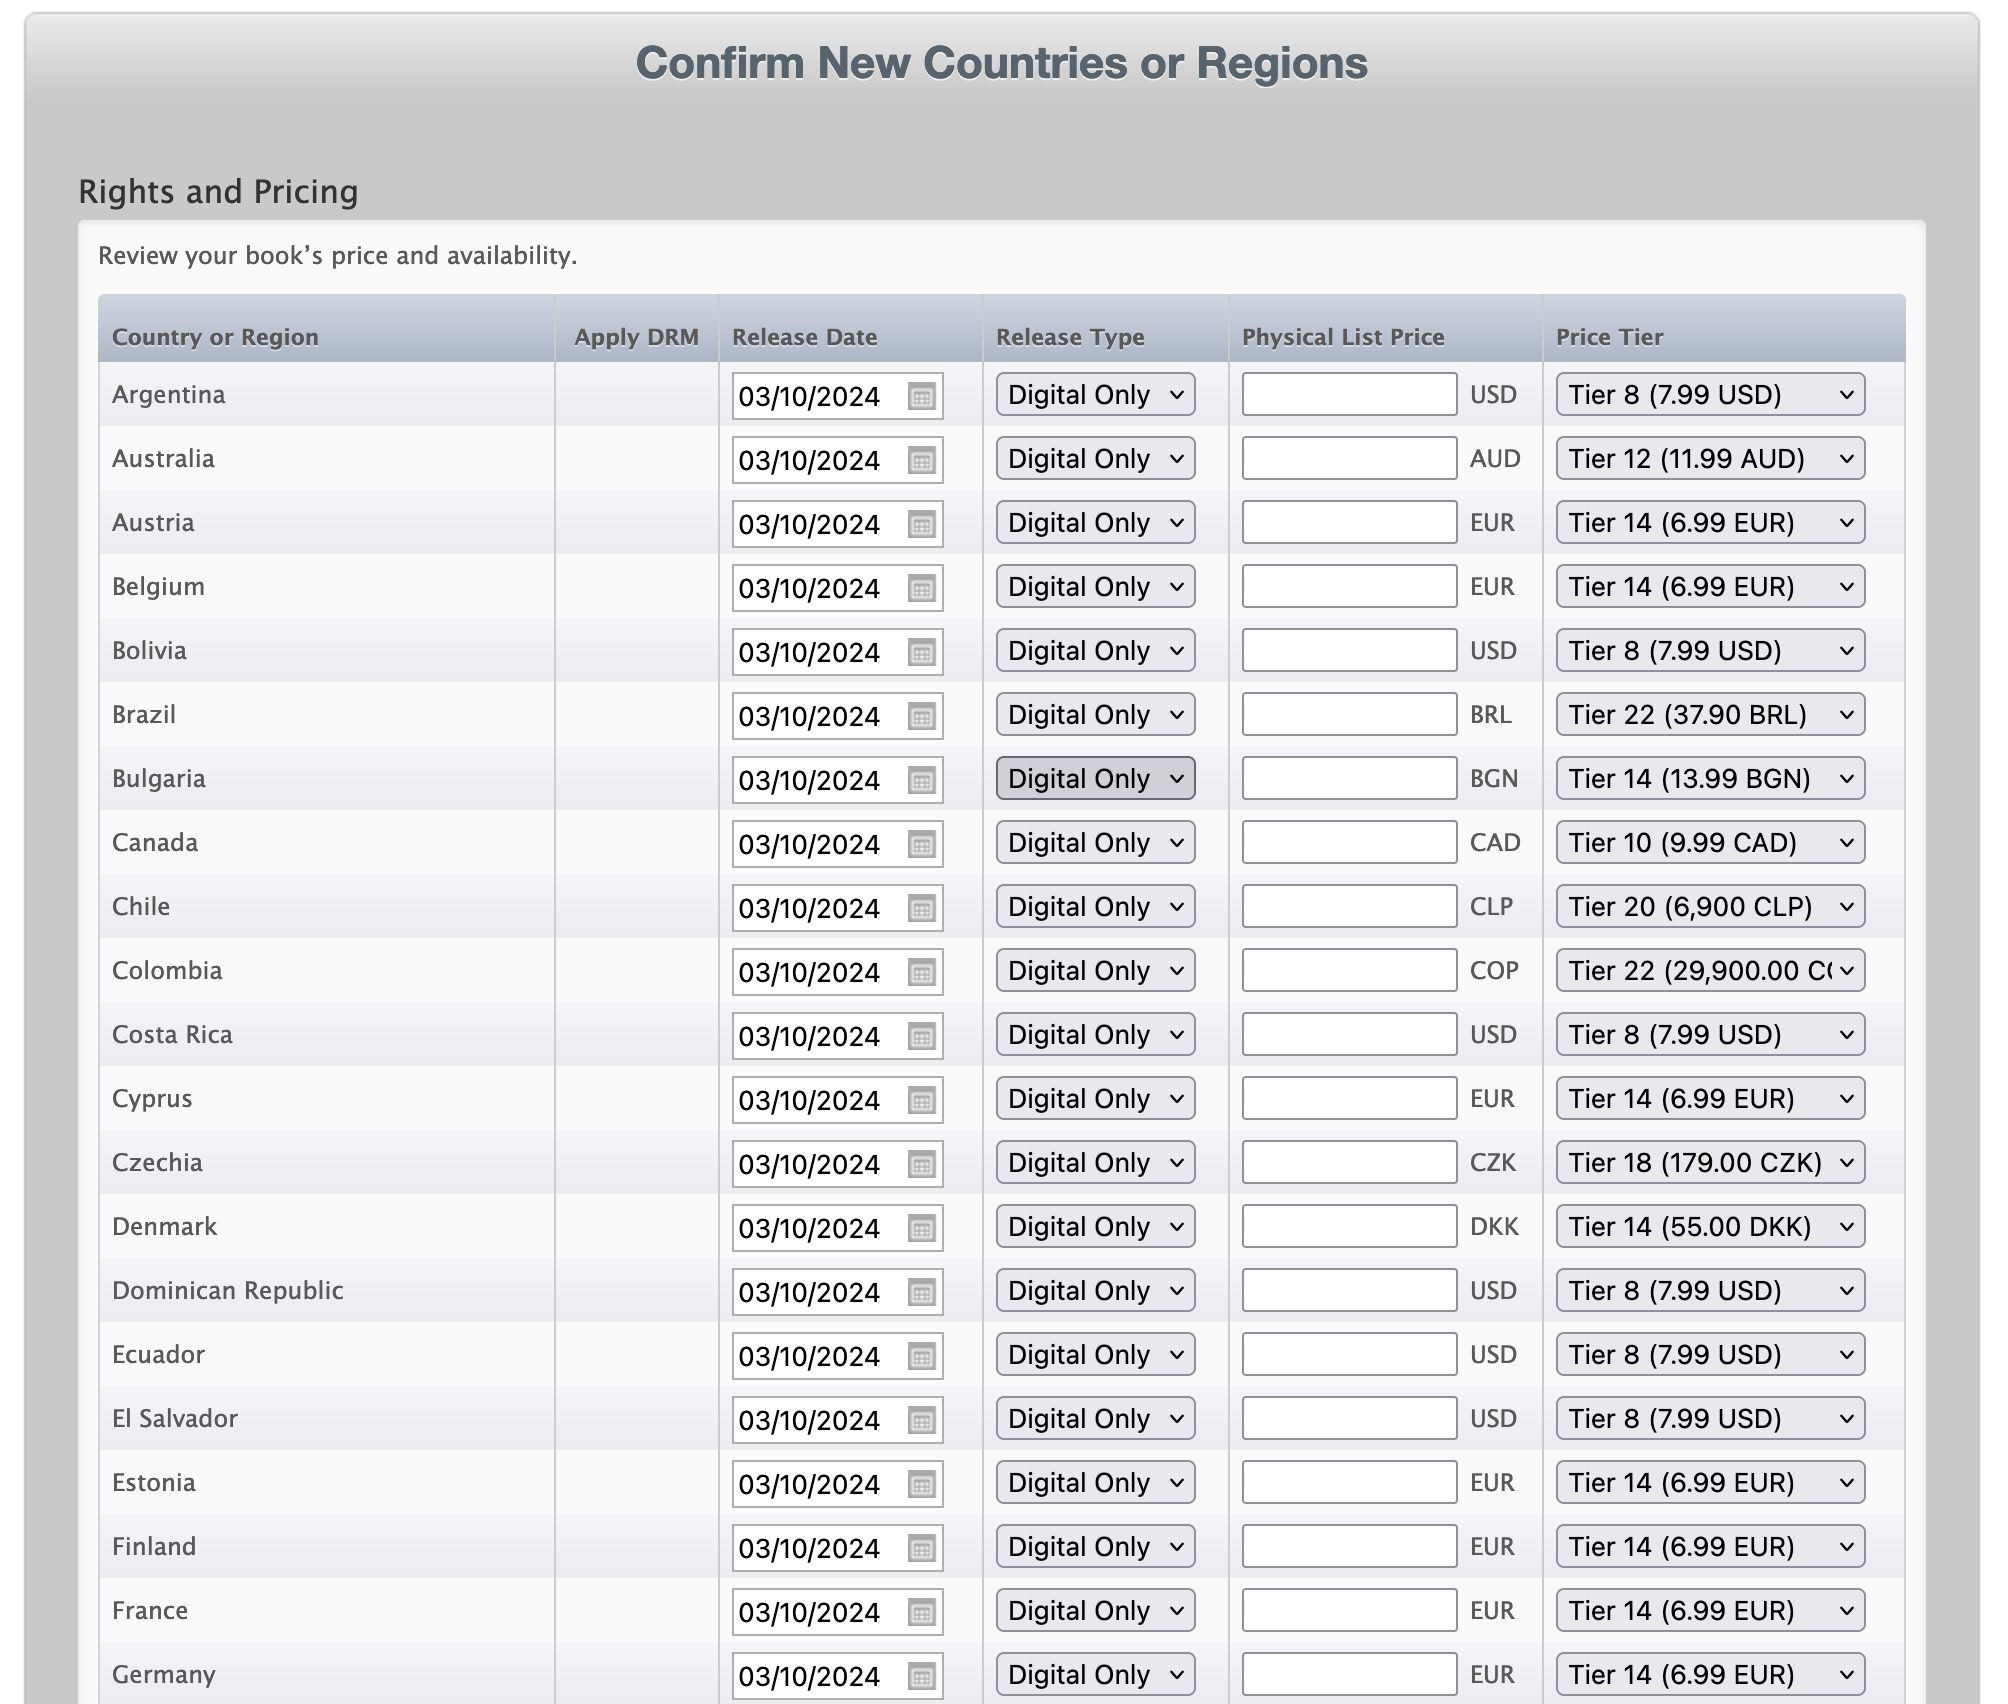
I tend to just set US and Europe anyway, and they look fine, so hit ‘Confirm’ and carry on.
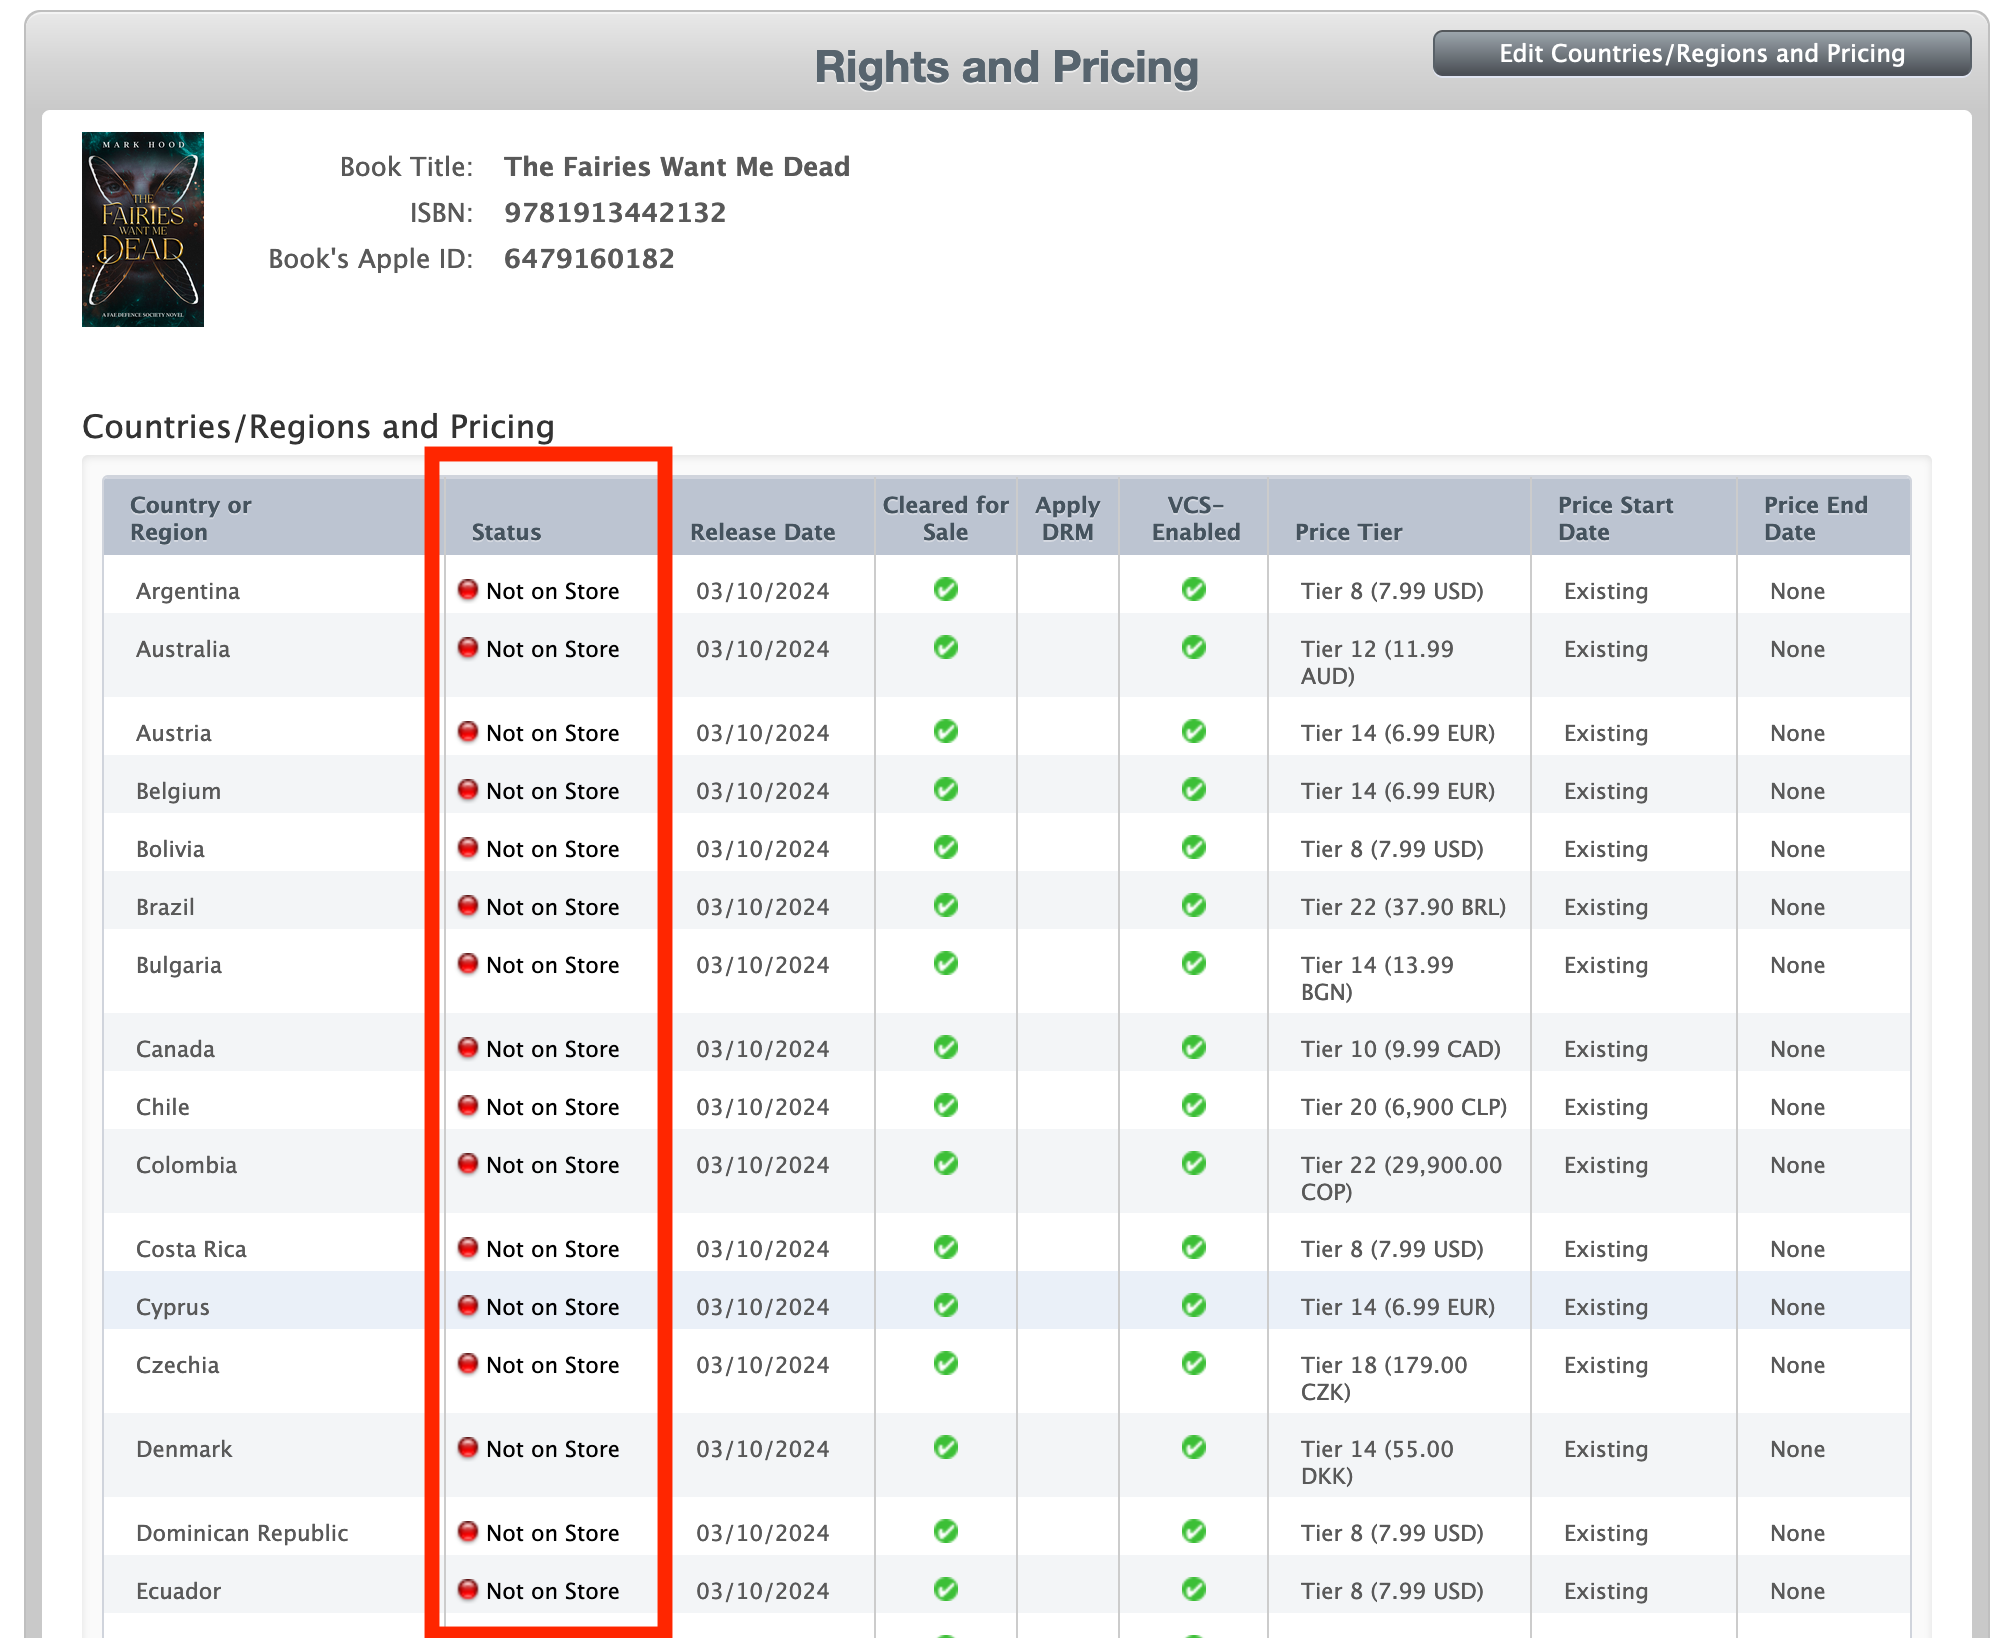
It’ll then push it out to all their stores, which might take a while. Don’t panic when it says ‘Not in store’ immediately.
While we’re here, though, scroll down the bottom and hit ‘Enable’ to automatically put it in any new stores they open.
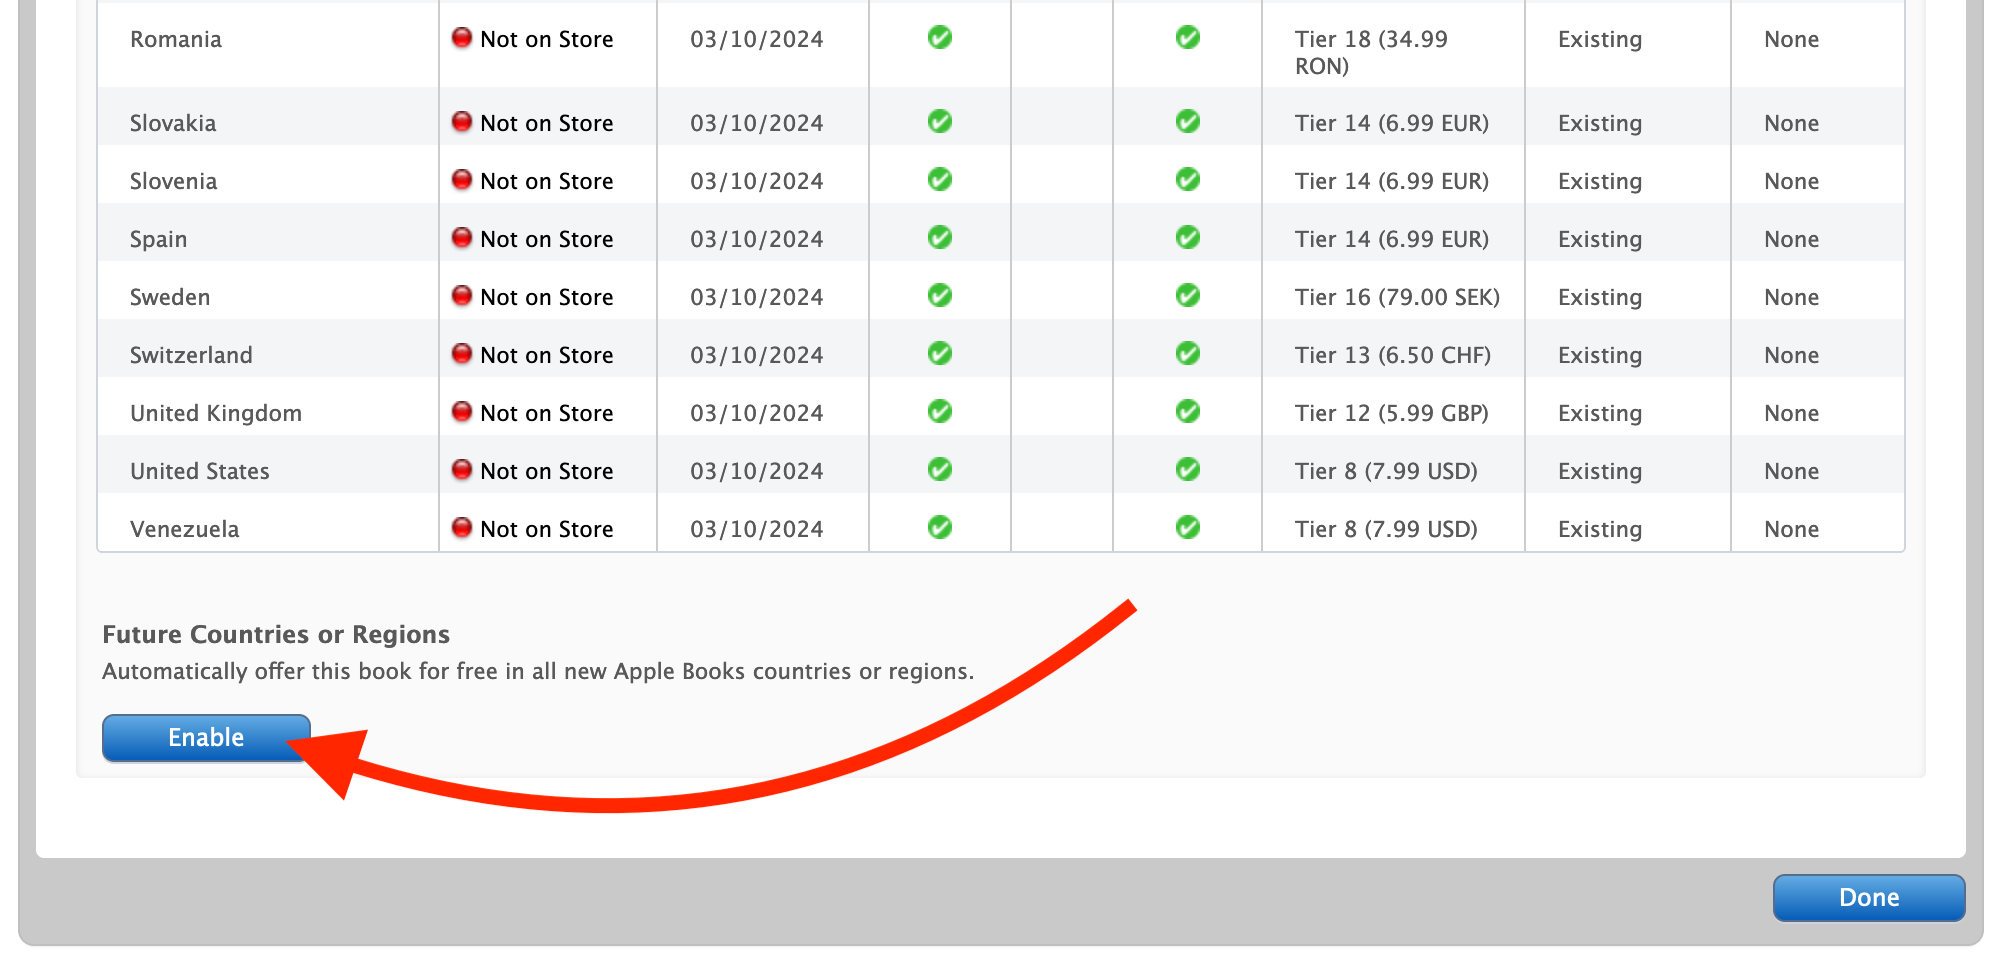
Then hit ‘Done’ and it’ll take you back to your book. It will then explain why it’s not in any stores yet, it’s still in review:
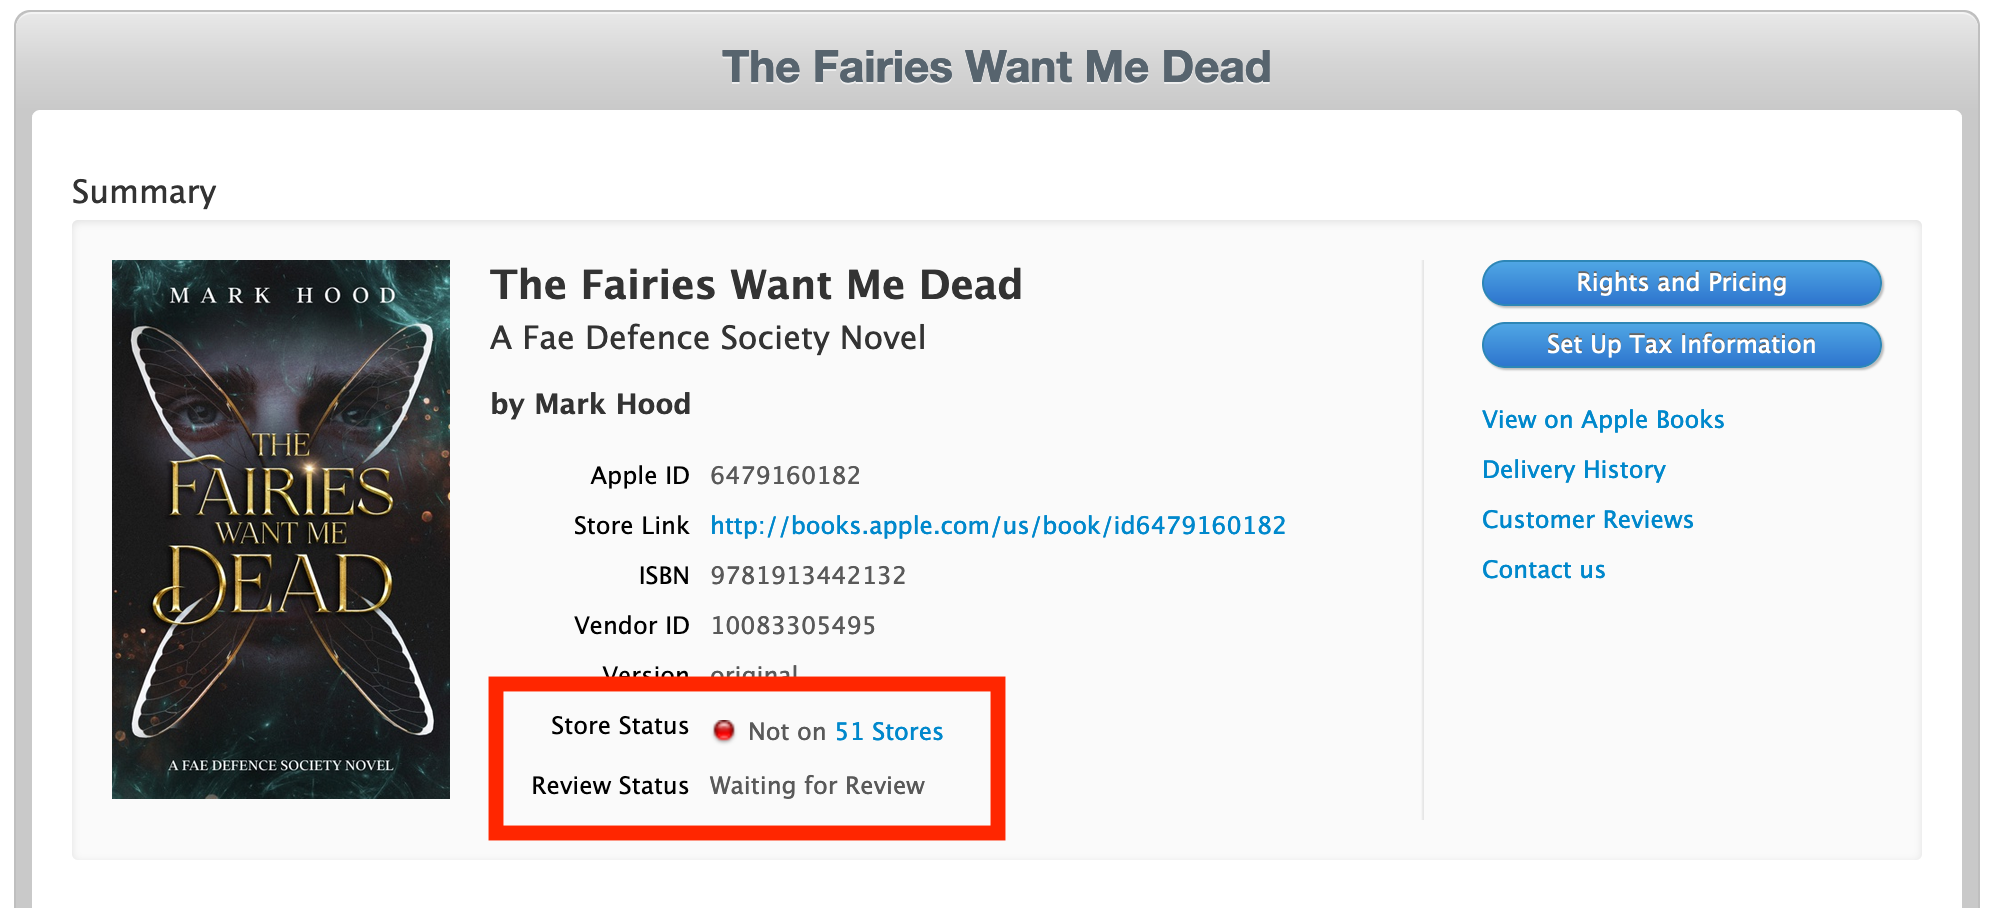
Time for another drink! It might take a day, so once again avoid hitting refresh like a lab rat dispensing food pellets, and come back later.